Setting up Google Ads Conversion Tracking on Outgrow Landing Pages
Google Ads conversion tracking shows you what happens after a customer clicks on your ads – whether they purchased a product, signed up for your newsletter, called your business, or downloaded your app. When a customer completes an action that you've defined as valuable, these customer actions are called conversions.
This document will help you understand how to configure Google Ads conversion tracking on your Outgrow landing pages.
Setting up Google Ad Conversion Tracking in Outgrow
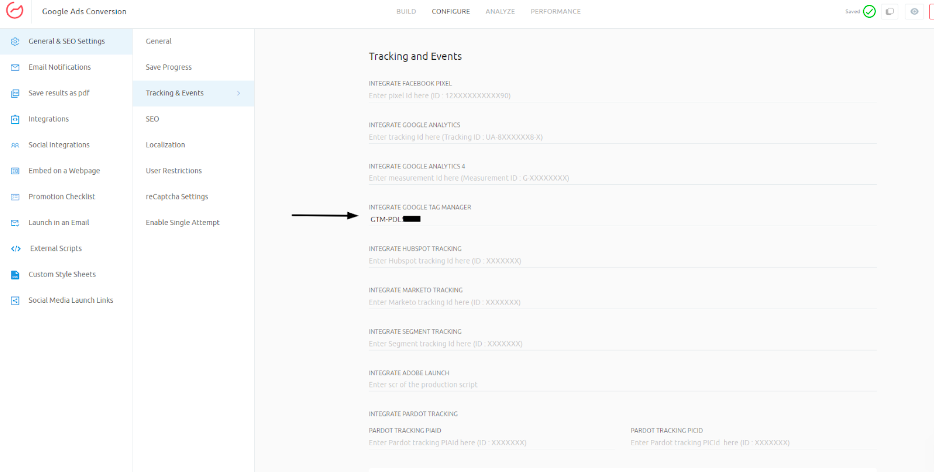
1. Login to your Outgrow dashboard and open the respective content in Build mode. Navigate to the Configure tab and then to Tracking & Events. Under this sub-tab, add your GTM ID in the Integrate Google Tag Manager field.
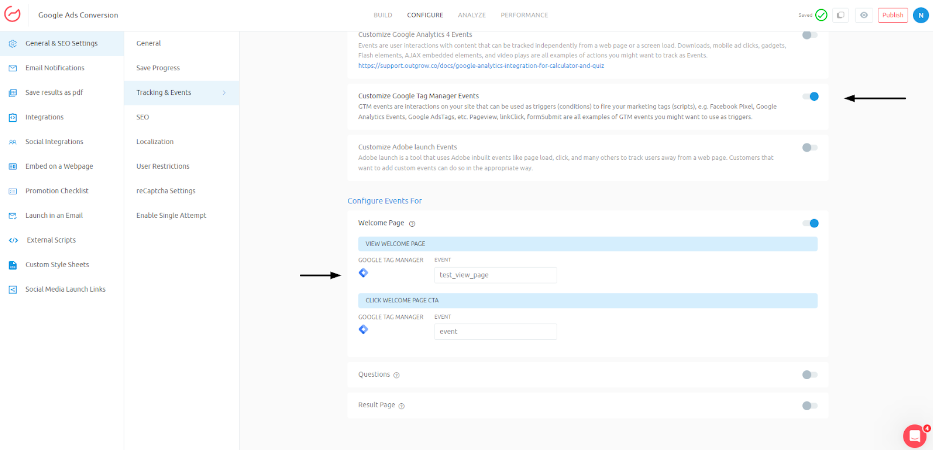
2. Once the ID is added, enable the Customize Google Tag Manager events setting.
3. In the next step, navigate to the Configure Events For section and toggle on the setting configuration for the specific events you want to set up the Conversion tracking.
4. Specify the Custom Event Names and publish the changes in Outgrow.
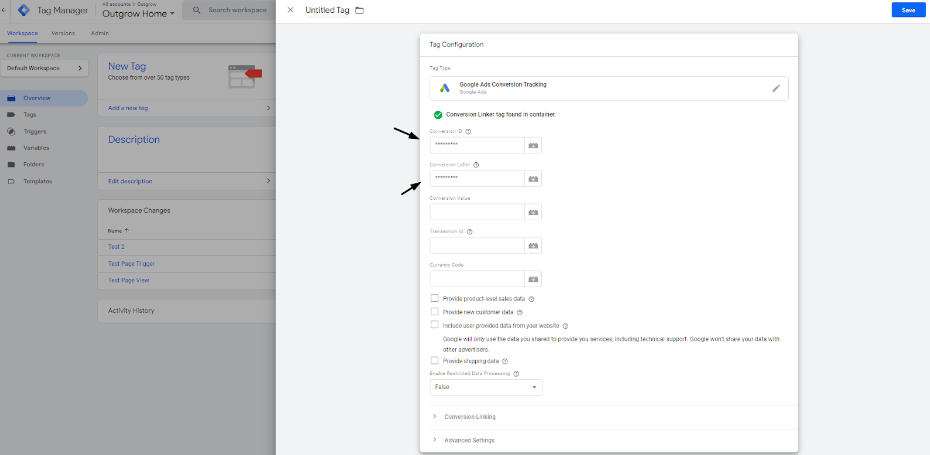
5. Now login to your Google Tag Manager account, and create a new tag by clicking on Create a new tag and then selecting Google Ads Conversion tag. NOTE: In this step, you must add the Conversion ID and Label Name.
IMPORTANT NOTE
For accessing Conversion ID and Label Name, you can follow the below mentioned steps:
A. Open Google Ads and then navigate to Tools & Settings tab. In this tab select Conversions.
B. Click on "New Conversion Action" and then choose "Website".
C. Paste the Live Access URL of the respective Outgrow content here, and then click on Scan.
D. Choose Add A Conversion Action Manually to configure the action, and then click on Done to save the changes.
E. Now click on Use Google Tag Manager to access the Conversion ID. Now go back to the GTM Tag Settings page, and paste the Conversion ID, Conversion Label Name.
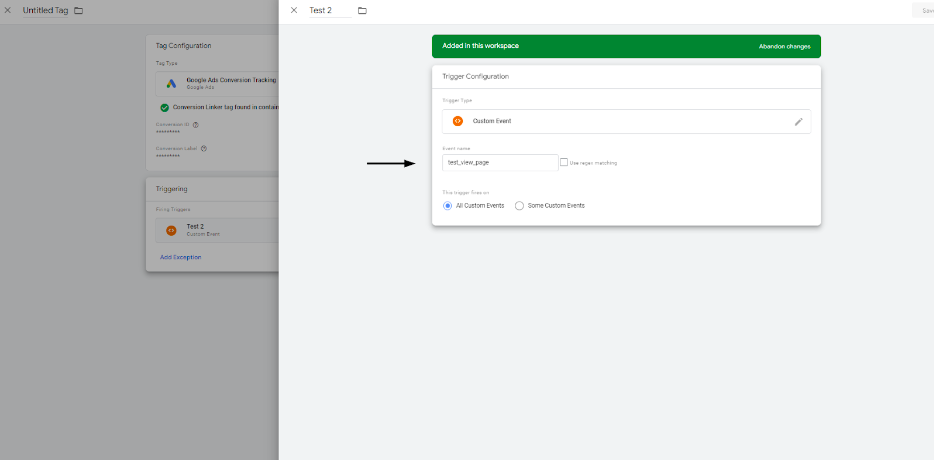
6. In the last step, you must create a trigger for your Conversion Event. Choose Create New Trigger and select Custom Event. Add the Conversion Event Name you specified in Outgrow and save the trigger.
NOTE: You need to ensure the tag configuration is saved. Once you have followed the abovementioned steps, you can access GTM's Preview Mode and check if the tag is firing correctly. Once you have tested and ensured the GTM tag is firing, publish your GTM Workspace to set the changes live.
Feel free to contact us at [email protected] if you have any questions.
Updated 5 months ago