Passing Data in Outgrow
With Outgrow, there are various ways to gather lead data from different sources. By collecting lead information through your Outgrow content piece and passing them to your CRM tool, you can run ad campaigns, email-marketing campaigns or retarget the leads in various other ways.
Some ways to collect lead data
1. UTM Data
You can capture data via URL with the help of UTM parameters. To capture data related to source, medium and campaign which is sending sweet traffic to your content piece, it is recommended to use UTM parameters in the content URL.
When a user lands on a content with UTM parameters appended to the URL, we capture these parameters. You can map utm_source, utm_medium, utm_campaign data to the respective fields in the third party app you are integrating with.
You can use following 5 UTM parameters in the calculator or quiz URL:
| Parameter | Purpose | Examples |
|---|---|---|
| utm_source | Identifies which site sent the traffic, and is a required parameter. | utm_source=Google |
| utm_medium | Identifies what type of link was used, such as cost per click or email | utm_medium=cpc |
| utm_campaign | Identifies a specific product promotion or strategic campaign. | utm_campaign=spring_sale |
| utm_term | Identifies search terms. | utm_term=running+shoes |
| utm_content | Identifies what specifically was clicked to bring the user to the site, such as a banner ad or a text link. It is often used for A/B testing and content-targeted ads. | utm_content=textlink |
| {gclid} | Gclid, short for Google Click Identifier, is a unique tracking parameter that Google uses to transfer information between your Google Ads account and your Google Analytics account. | redirecturl.com?gclid={gclid} |
We recommend building a URL using a standard campaign URL builder like Google's Campaign URL Builder.
Please note only higher tier plans like Business and Enterprise plans can map the UTM parameters to respective fields in the third party apps using Native integration.
2. Lead Generation form
The easiest and most convenient way to collect data is through the lead generation form. In every content piece, you can enable the lead generation form from the lead generation settings and place it wherever you want-
a. Welcome screen
b. With Questions
c. Before the Results
d. With the Results
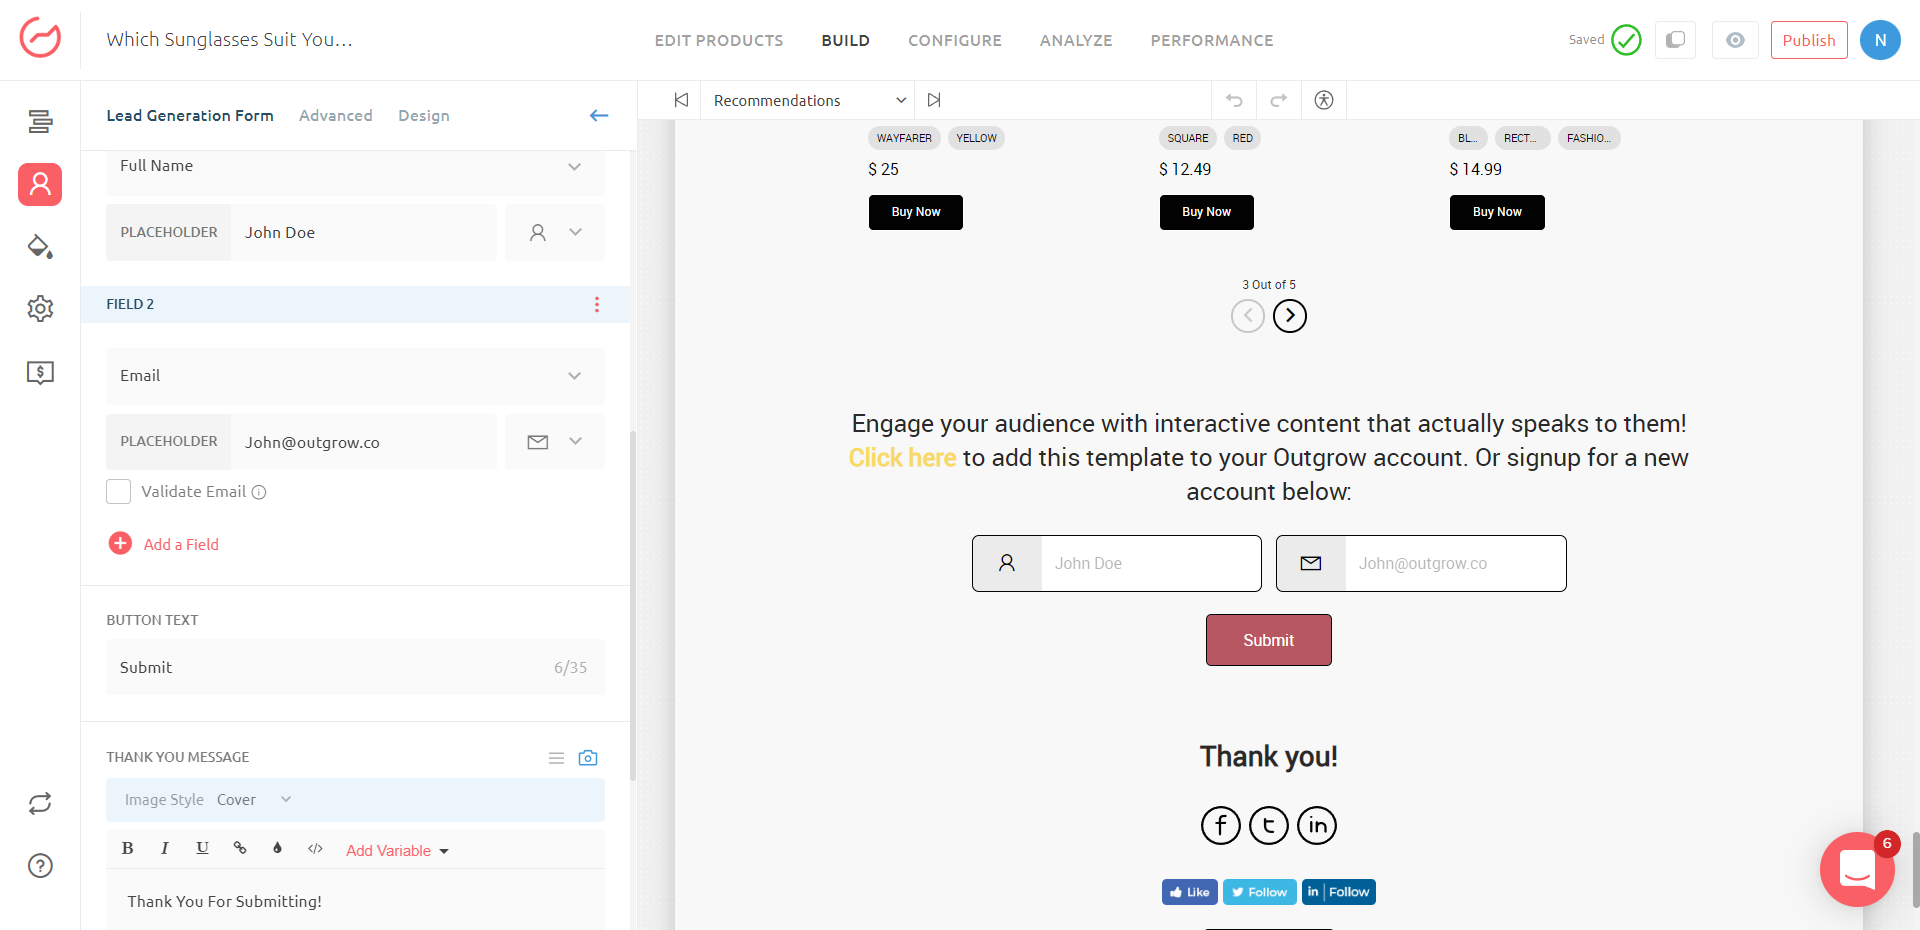
When a user will view your content, he/she will have to fill in their lead details in order to proceed to the next page. Thus, it will help you collect their lead information. This data can be viewed in the User Details section of the Analyze tab.
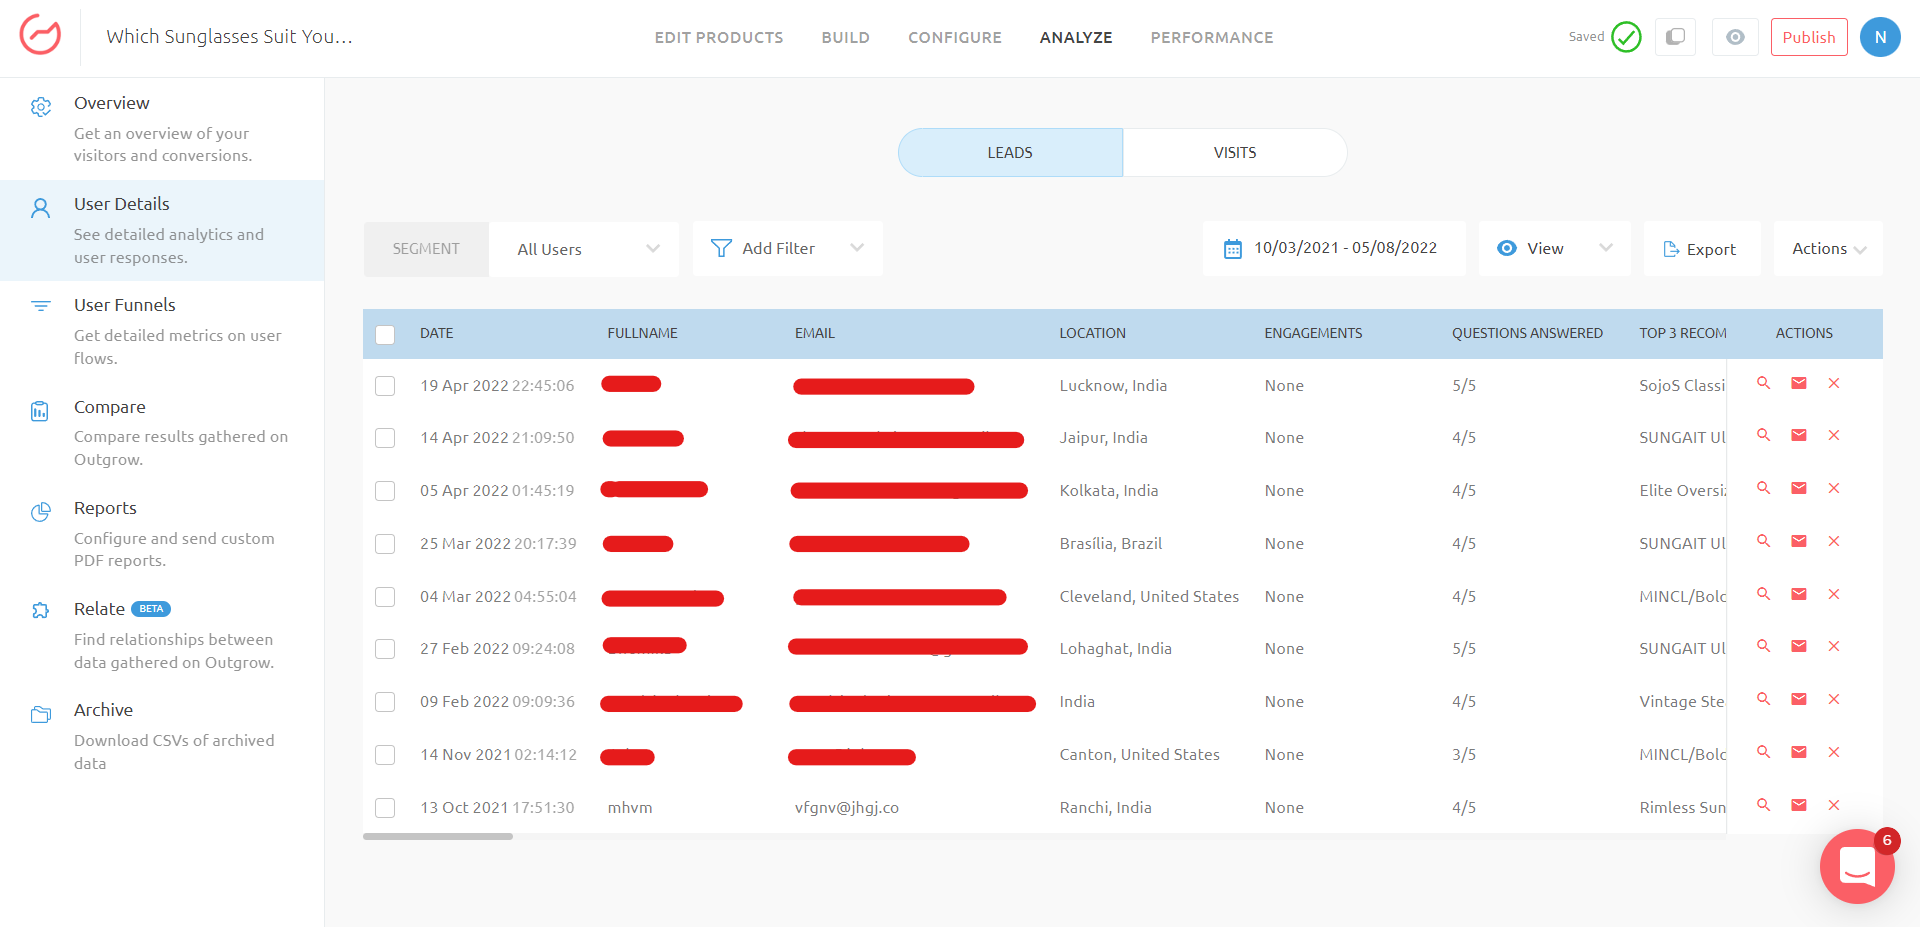
3. Launch in email
To improve the click-through rate of your email campaign, you can add an Outgrow Content Piece in an email.
How to access Launch In an Email feature
- To launch an Outgrow experience in an email, you first need to navigate to the Launch In an Email sub-tab under the Configure tab.
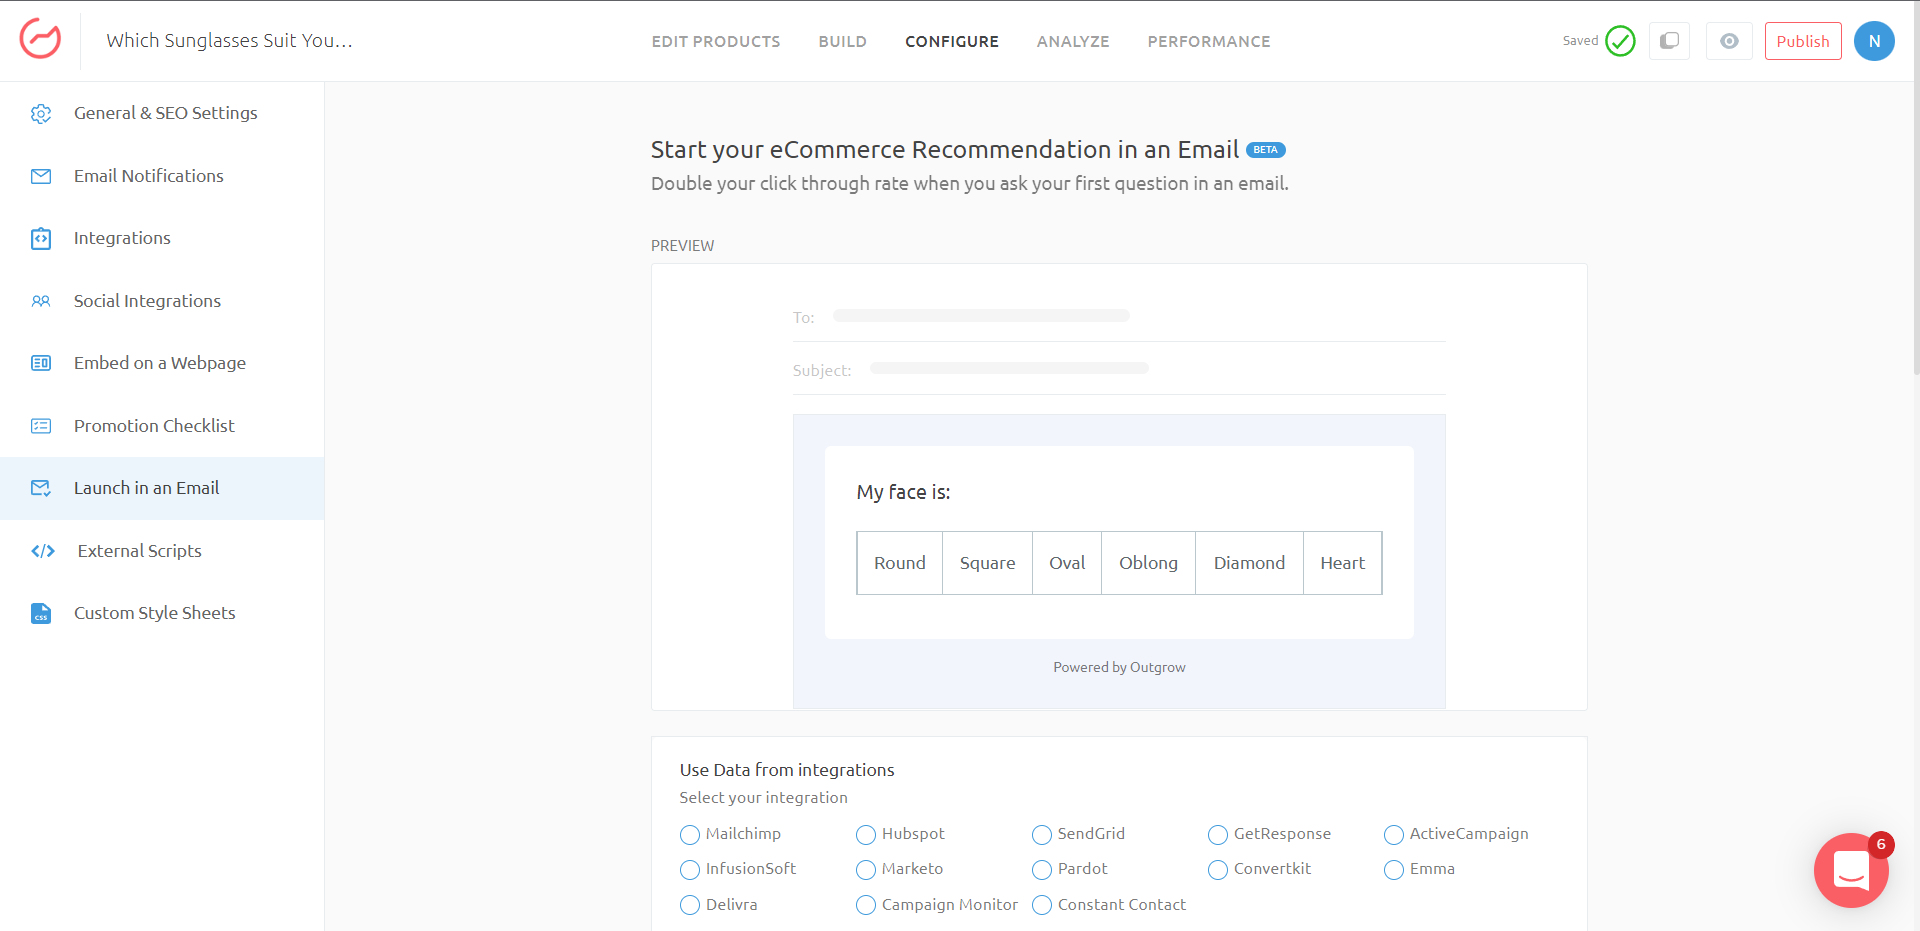
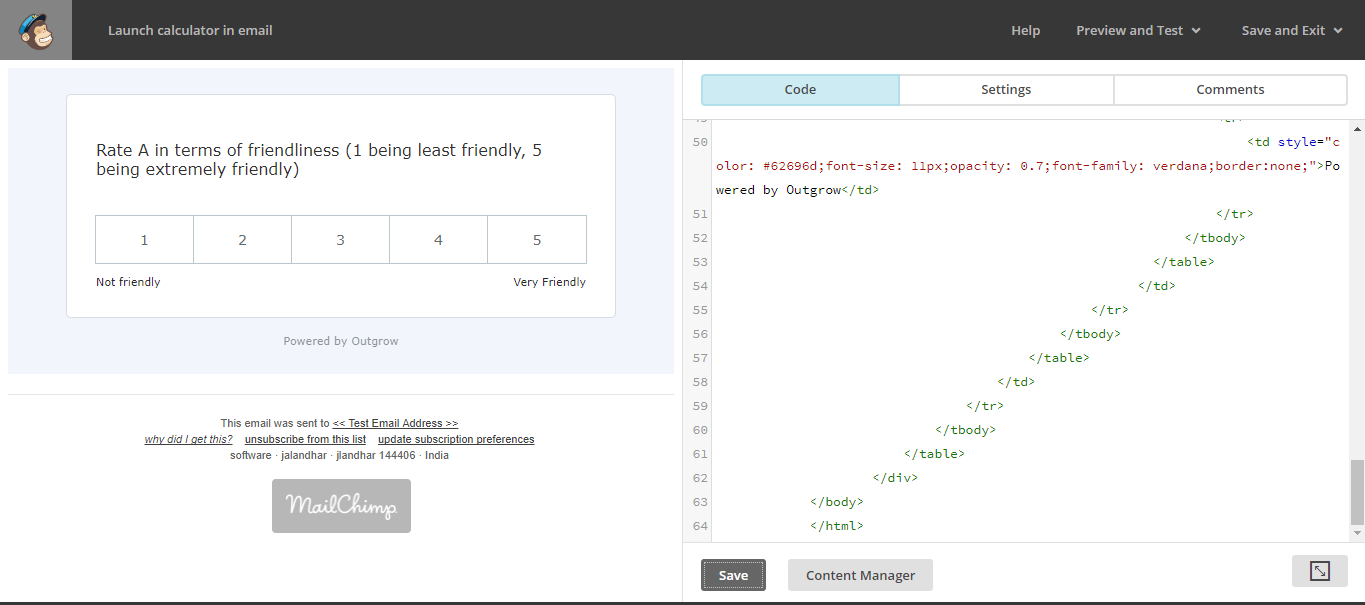
- Once you are in this section you can navigate to the Code View section at the bottom of the page, and from there you can copy the code.
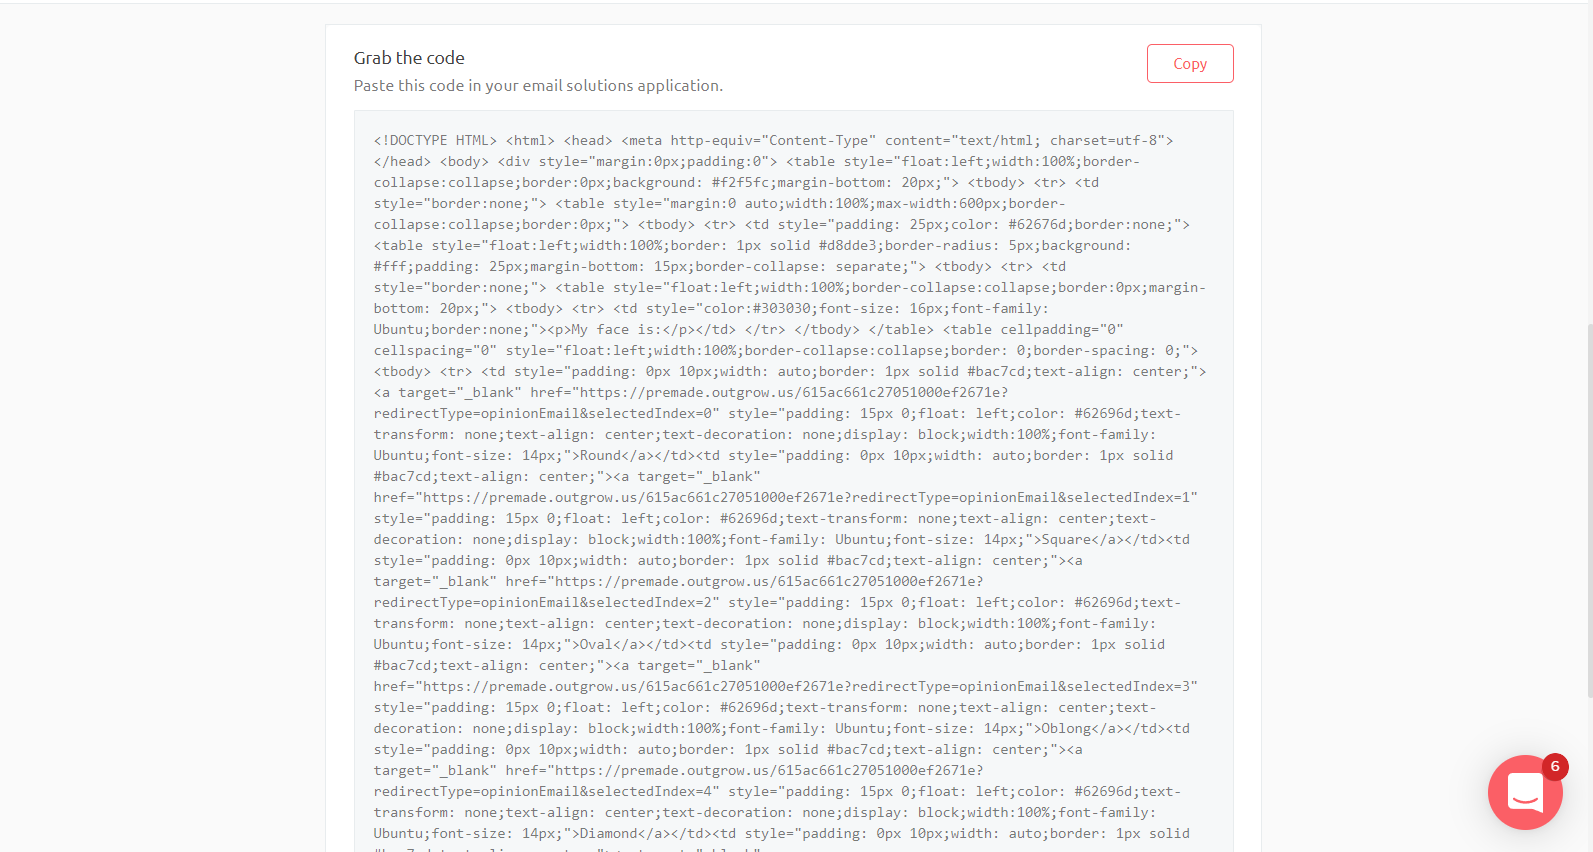
- Once the code is copied you can add it in HTML view of the email that you will configure in your Marketing Automation Tool or CRM.
Passing Lead Form variables in the code
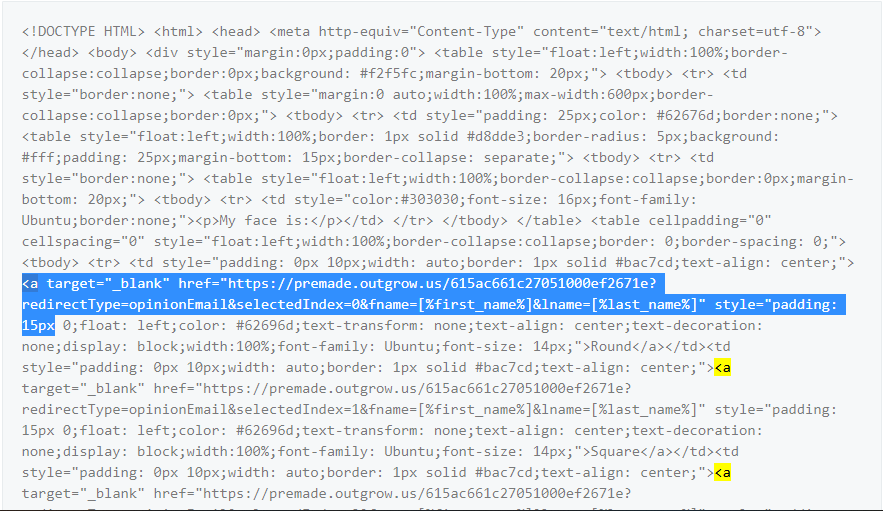
In case you have set up integration with a 3rd party tool such as HubSpot, SendGrid, etc, you now have the ability to pass the Lead Gen field information in the launch code that you will add in the email. This will be very helpful in cases where you are targeting a specific group of people and you already have their details in your system and you don't want to ask the information to the user again.
We currently support this ability when integration is configured between Outgrow and the following 13 tools:
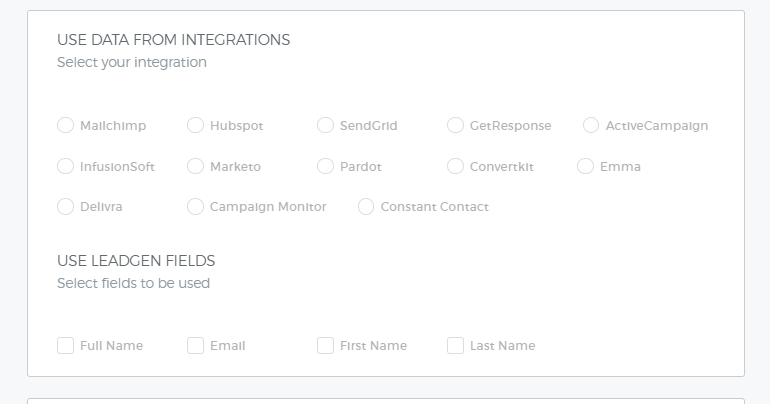
You just need to choose the respective fields and the code will automatically get updated as per your selection.
NOTE:
For tools not listed in Outgrow, you can still modify the code at your end by replacing the existing variables present in the code with the variables for your respective tool.
4. Data IN via URL
Using Outgrow you now have the option to prefill fields in lead generation form using the information transferred as a part of the URL. The data can be easily parsed using a URL from your Marketing Automation Tool, CRM or from one Outgrow content piece to another content piece.
Steps to follow to set up the flow of information from 1 Outgrow Content piece to another
-
To pass the lead form details from one Outgrow content piece to another, enable the lead form in the first content piece.
-
Now on the results page, we will have to place the URL of the second content piece behind the CTA Redirect button.
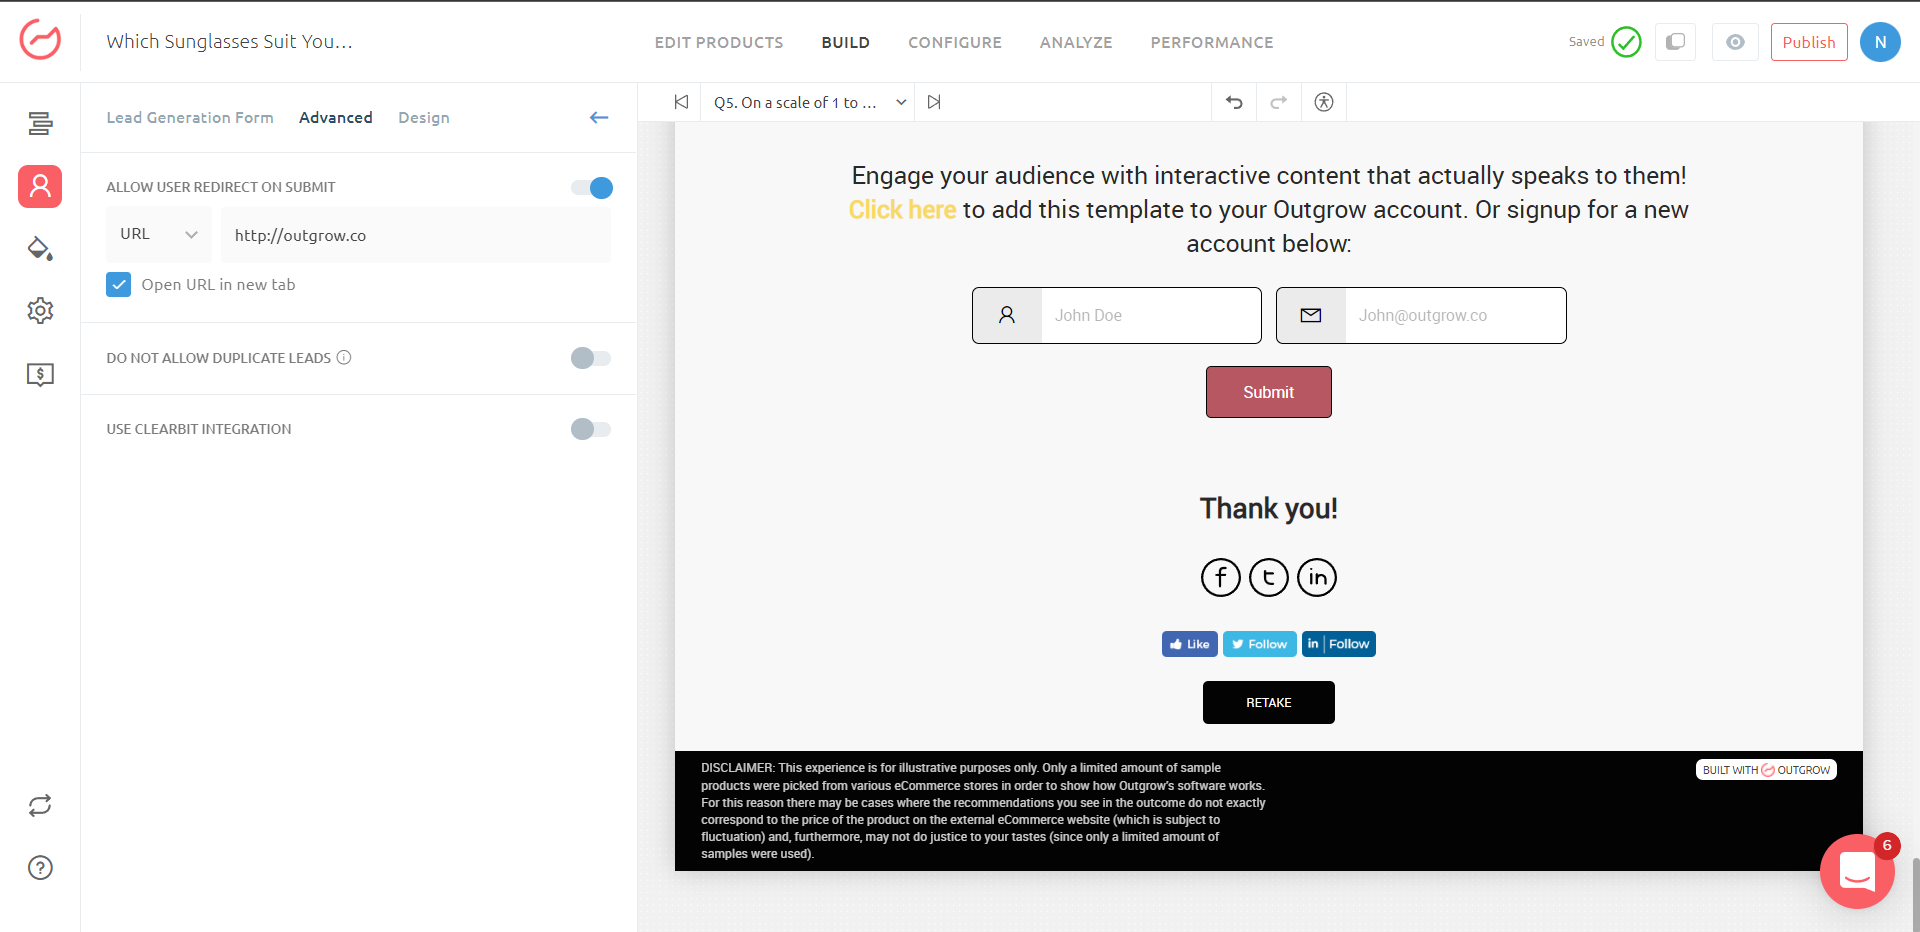
- The lead form parameters that you want to pass from the first calculator to the second one will have to be added in the CTA button URL itself. An example of this URL will be http://livec.outgrow.us/testcalculator?name={fullname}&email={email}.
NOTE:
The (fullname} and {email} parameters mentioned here will only work when information is being sent from one Outgrow content piece to another Outgrow content piece. When data will be transferred from 3rd party tools, these variables will not work.
5. Custom Variable
You can capture data using custom variables and pass these on to your CRM tool in order to trigger marketing campaigns for your company.
Steps involved in gathering data through custom variables
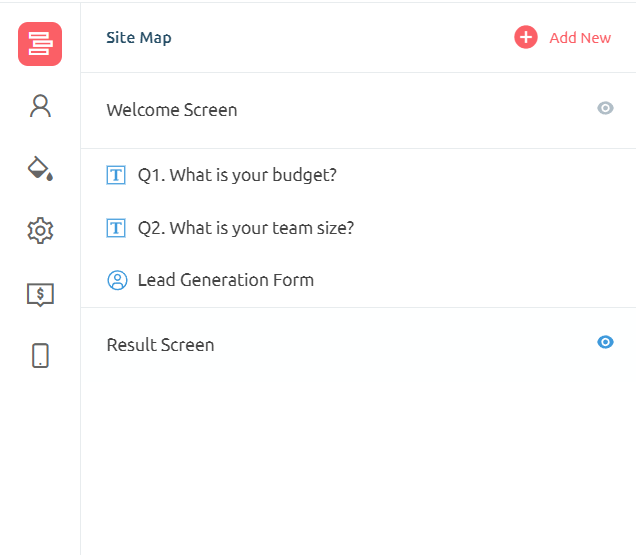
- Log in to your Outgrow account, and from the main dashboard choose the content piece that you
want to build. For example, In this case, we will build a calculator. - Setup the questions as per your requirements. In this case, we have set up a question that asks for
the team size, and we will be setting up the segment using this information.
Step 2: Create Segments in Analytics
- Navigate to the Analyze tab in Outgrow and then go to the User Details sub-tab. In this section, you will have to create a filter first. This can be done by clicking on the Add Filter option.

- Once you click on Add Filter, choose the unique parameter that you want to use to filter the leads. In this case, we want that the leads should be transferred to Person A, Person B, Person C. So we will be setting up a filter matching the criteria as:
A. If Q2 > 1000 then the lead should go to the enterprise account manager, ie; Person A.
B. If Q2 > 100 and Q2<=1000, then the lead should go to the mid-market account manager, ie; Person B.
C. If Q2 > 0 and Q2 <=100, then the lead should go to the account manager handling small businesses, ie; Person C.
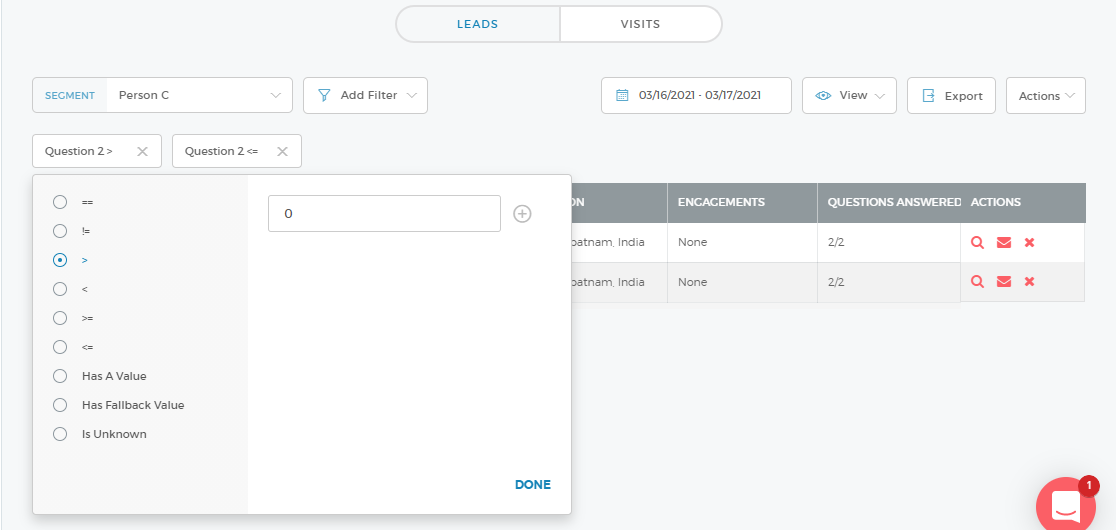
- Once the leads are filtered, go ahead and save the filter by clicking on Save Segment. Assign a unique name to the filter so that it is easily identifiable.

NOTE: Once your segment is created, you can select it from the segment drop-down to see the specific leads at any point in time.

You can create multiple segments like this and save it in the User Details section.
Step 3: Creating A Custom Variable
- Now to map the name of the segment you first need to create a Custom Variable. To do this you can navigate to the Configure tab and then go to the Integrations sub-tab. Here navigate to Custom Variables.
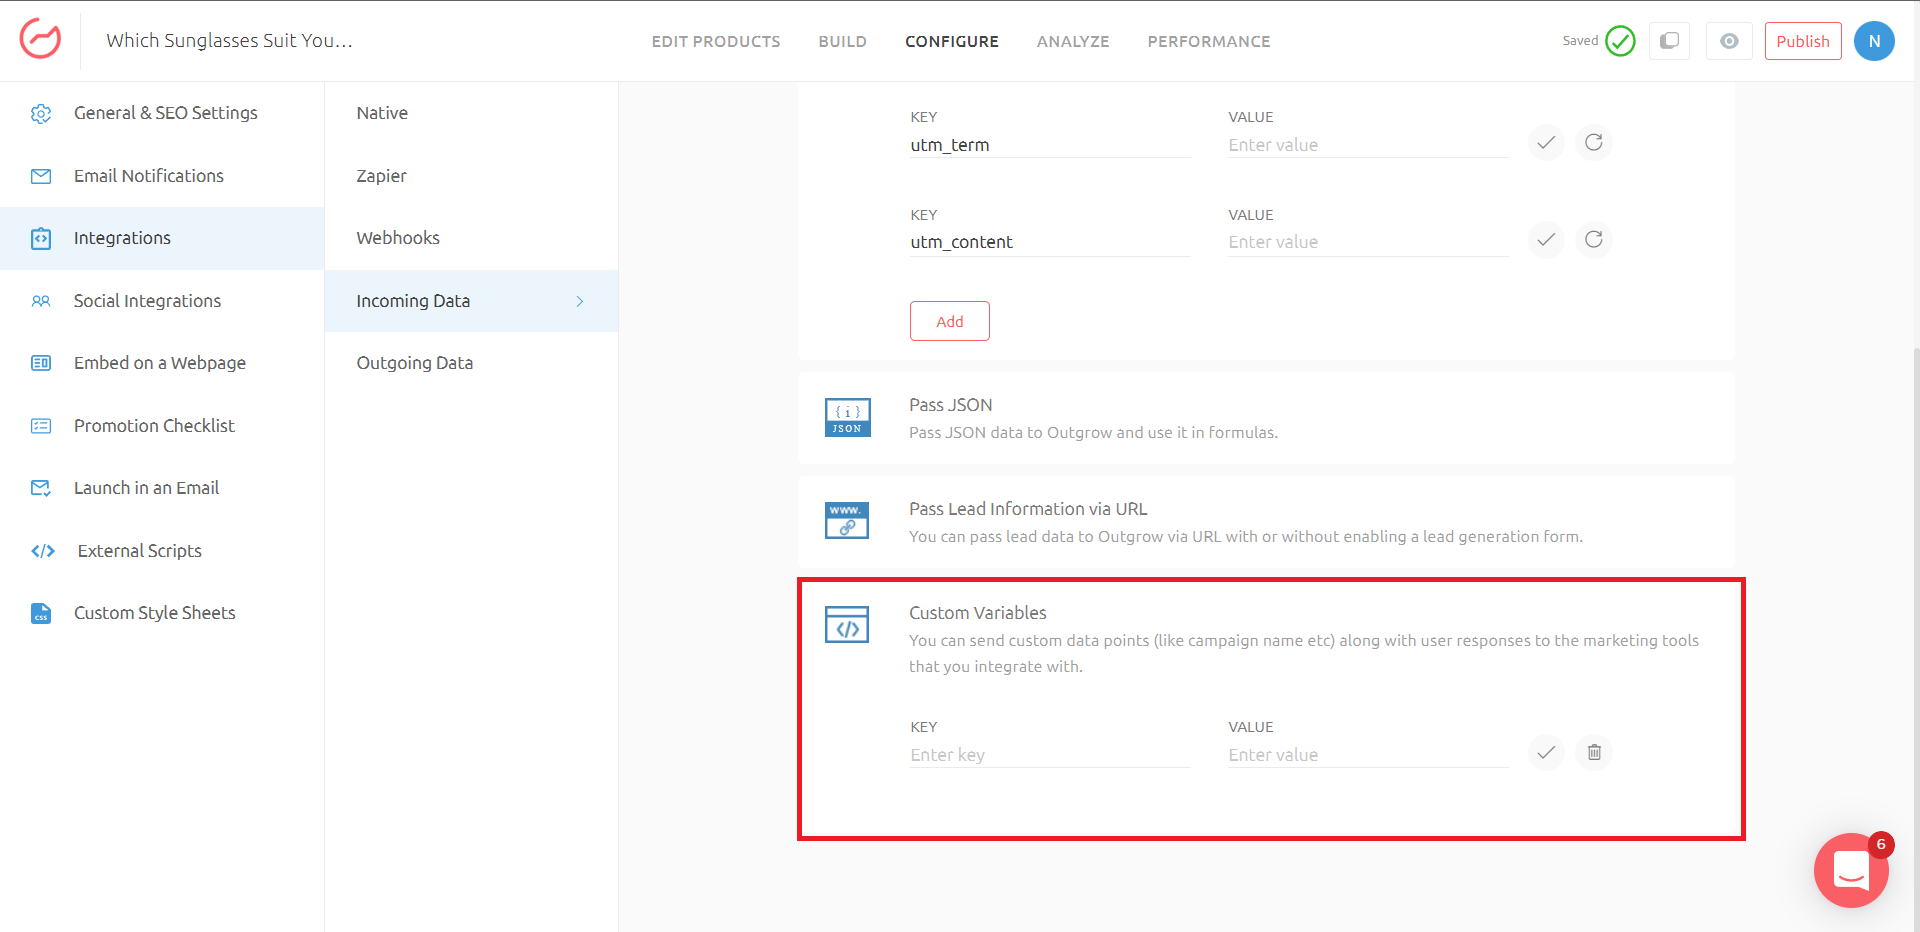
- Scroll down to the Custom Variables option. Now, specify the Key and the Unique value for the key. In this case, we have specified Key as the respective lead type name and Value as the sales rep name.
NOTE:
For each Segment Name, you will have to create a Custom Variable Key with a unique Value.
Step 4: Mapping Segment and Segment Name in your CRM
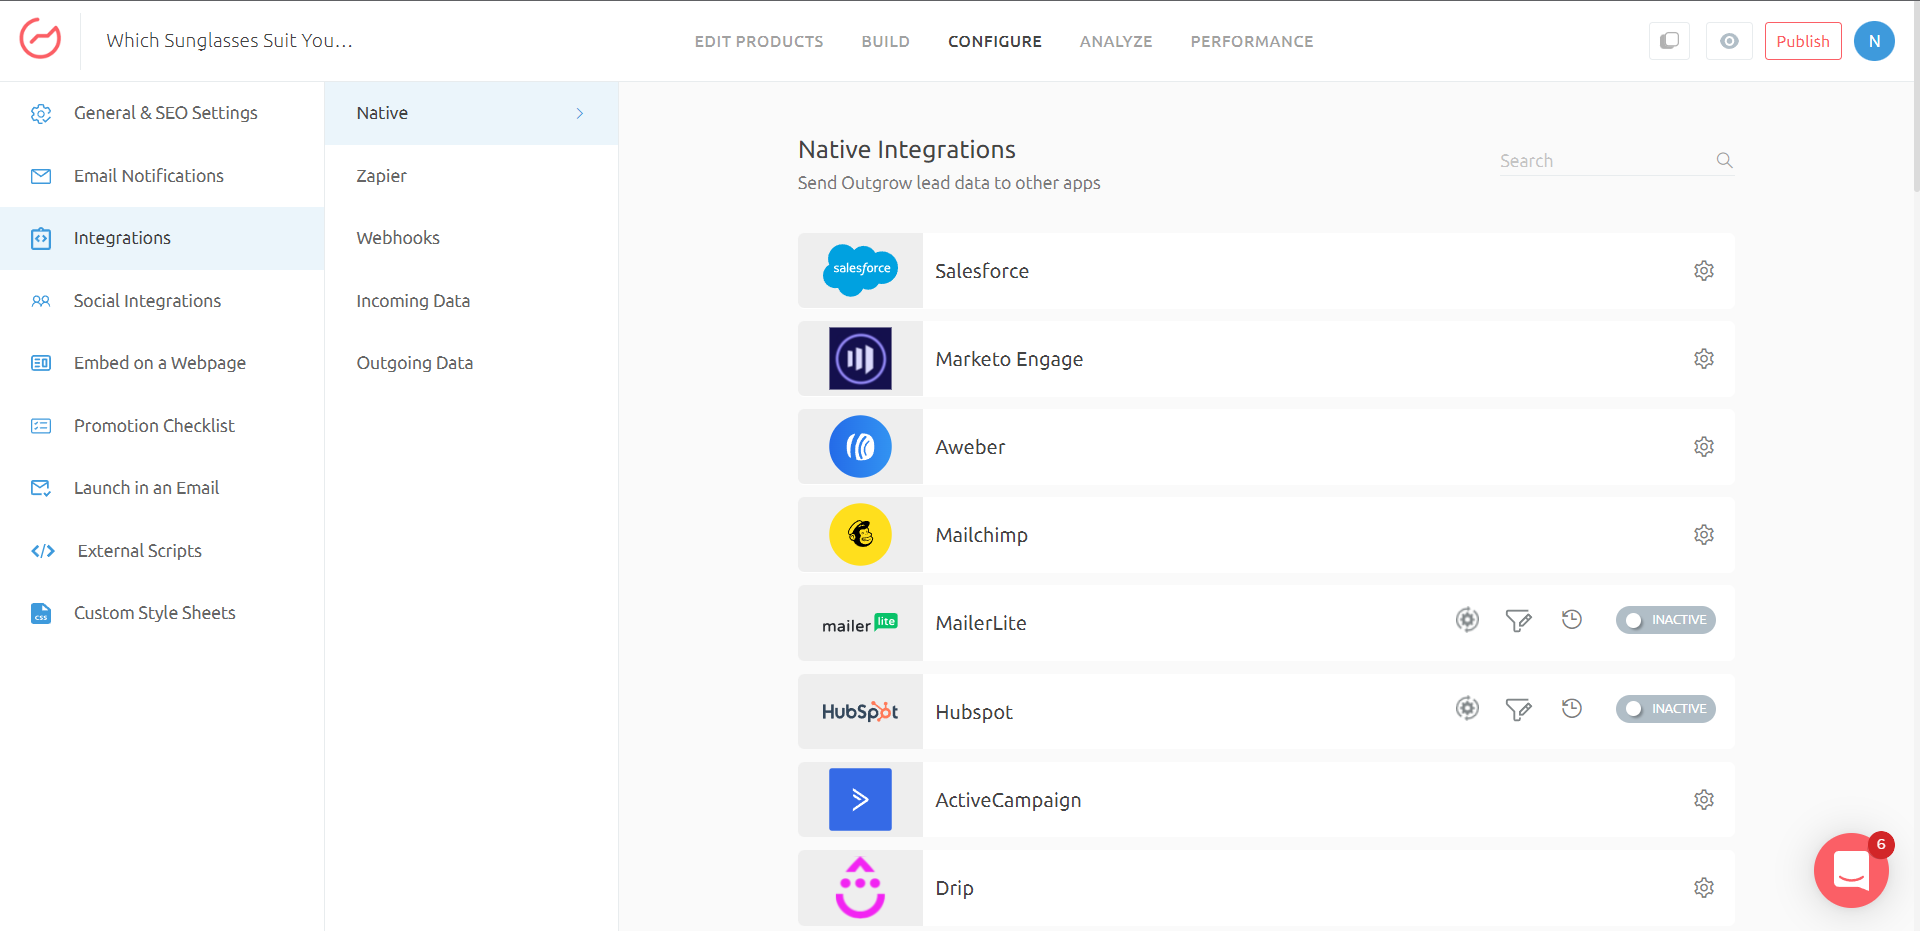
- Now you want to map leads from the segment that you created in Outgrow, with the leads in your CRM list. To do this you need to go to the Configure tab and then navigate to Integrations followed by navigating to the Native Integrations sub-tab. In this case, we are using SalesForce, as the CRM tool.
NOTE:
In case you have already configured the integration you can click on Reconfigure button, otherwise you can click on the Configure button.
- Setup your SalesForce account, this will be where you send your Outgrow leads. Once the account is configured, choose one of the two options Proceed With Object or Proceed With Segments.
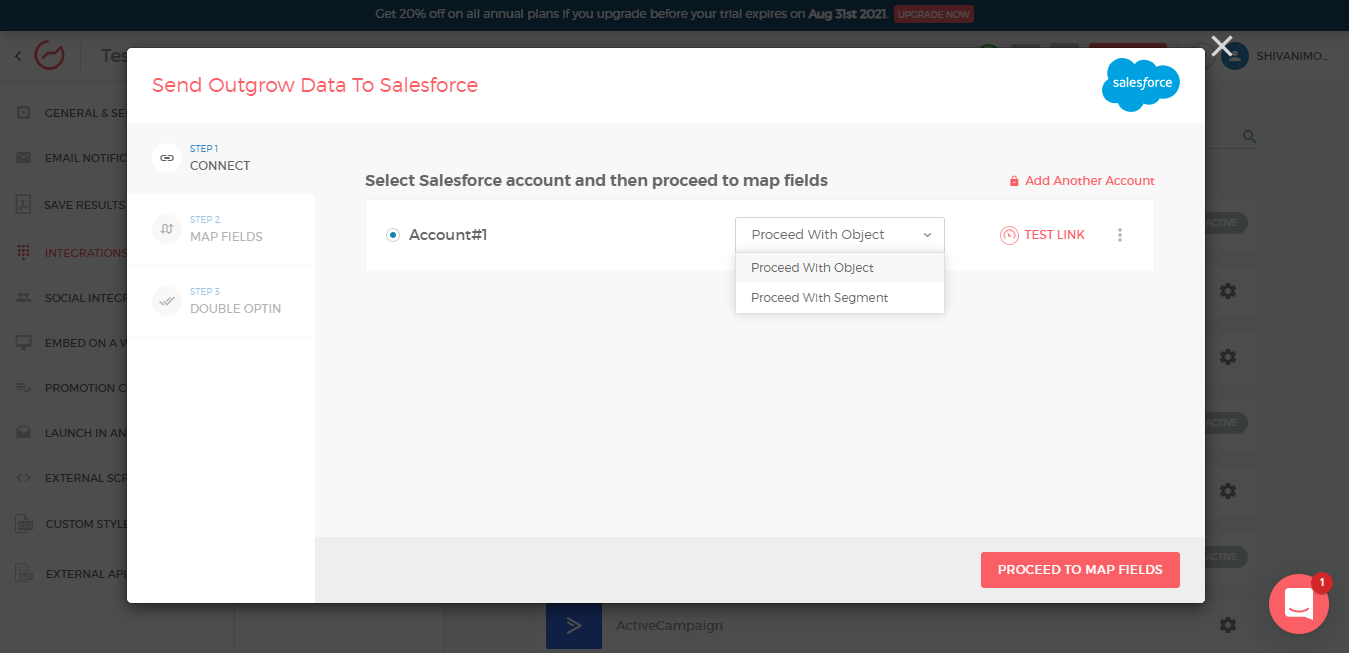
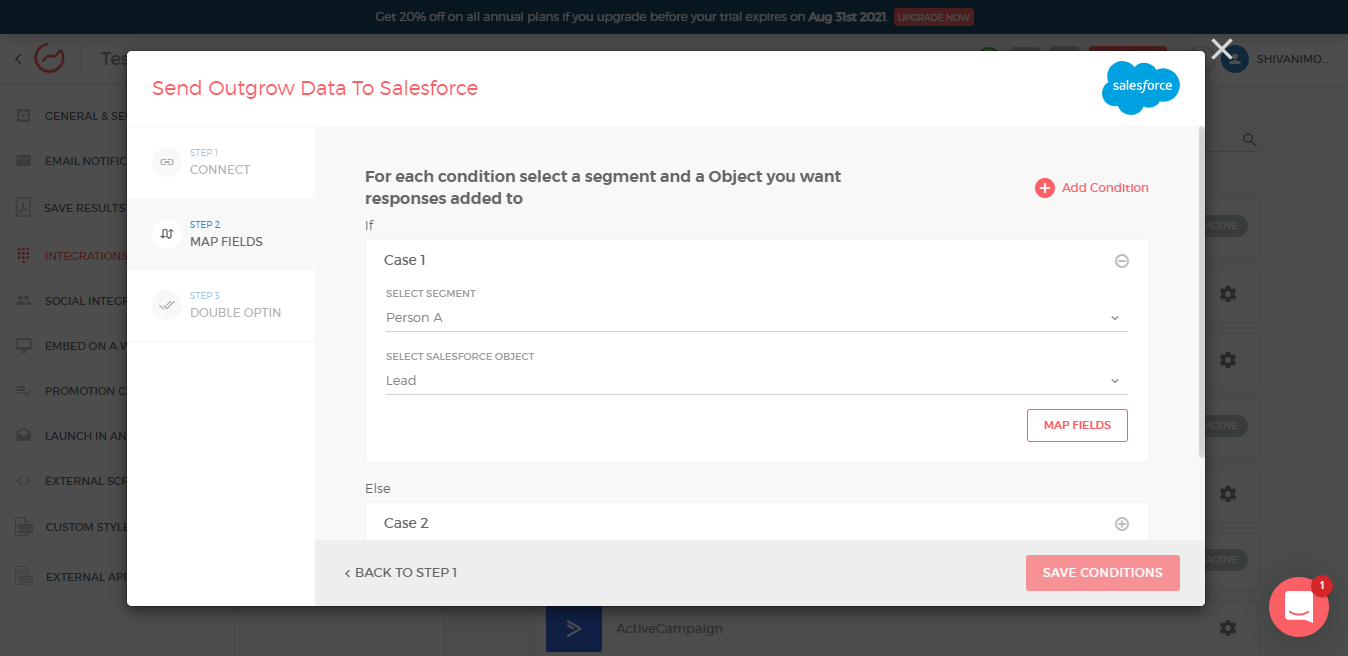
- In this case, we will Proceed With Segment. You can select the name of the segment in Outgrow from which the leads will be passed on, and also choose the list in SalesForce where you want the leads to be added.
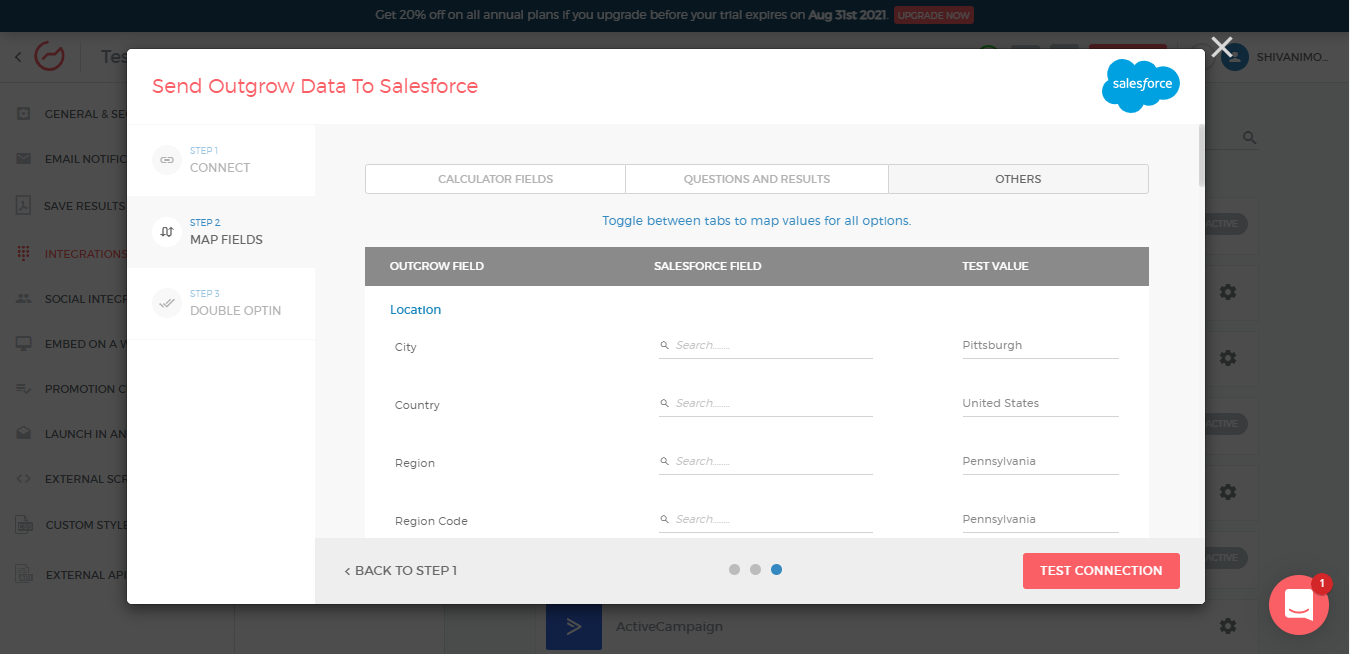
4.[email protected] Your Custom Variable name will be listed in the Field Mapping section, and you can map the respective Custom Variable for the particular segment with the respective field in SalesForce.
Once the setup in Outgrow is complete, you can go to the respective CRM tool and setup routing rules using the segment name that we just mapped.
If you have any questions, please reach out to us at [email protected], and we will be happy to assist you further.
Updated over 1 year ago