Conditional Messaging in Outgrow
Conditional messaging helps you customize the messages for users based on the results they get and showcase a different text response depending on the result range.
Are you looking to customize the messages displayed to users in a calculator based on their score? Our Conditional Messaging feature can help you achieve this easily.
For example, let's say you're building a marketing strategy calculator that scores a user's efficacy. After answering a few questions, the user receives a score out of 100. Depending on their score, you may want to display a specific message. For instance, if the user scores above 90, you may want to say You are a marketing ninja!, if they score between 40 and 90, you may want to say You've got work to do!, and if they score less than 40, the message should read You sure you're a marketer?.
Doing this becomes simple using our Conditional Messaging feature, and this document will help you understand how this can be done.
Steps to add Conditional Messages:
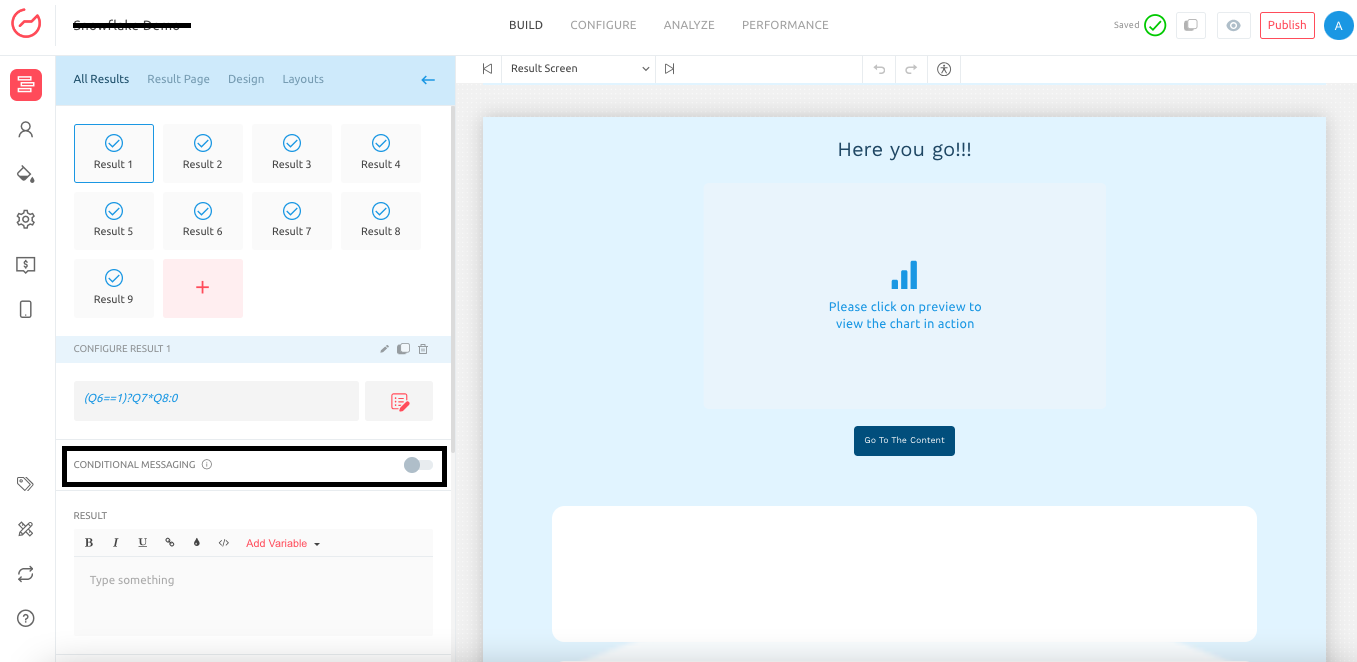
A. Login to your Outgrow dashboard and open the respective content in Build mode. In the Build tab, navigate to the Results page and scroll down to the Conditional Messaging section. Turn on the Conditional Messaging toggle on the Results page.

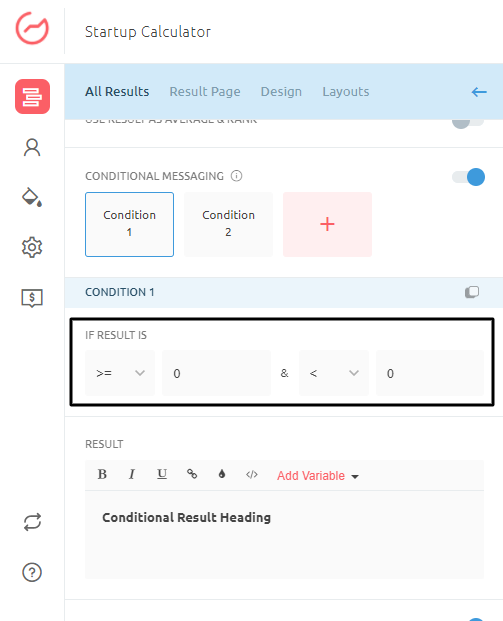
B. Once the Conditional Messaging toggle is turned on, navigate to the respective Condition and set up the condition for Condition 1. You can set the Result Criteria, which, when achieved, will show the information configured in the respective condition.

Range Definition
Please make sure that the minimum value in condition 1 on conditional messaging is the lower end of the result range. In this case, since the lowest possible score is a 0, we would make the minimum of the first condition 0. Similarly, the maximum of the final condition will be the highest possible score.
Also, please make sure that each possible result is covered in one of the formulas. For example, if the last condition ends at 95 and not at 100, and someone scores a 99, they will not be able to see their conditional message.
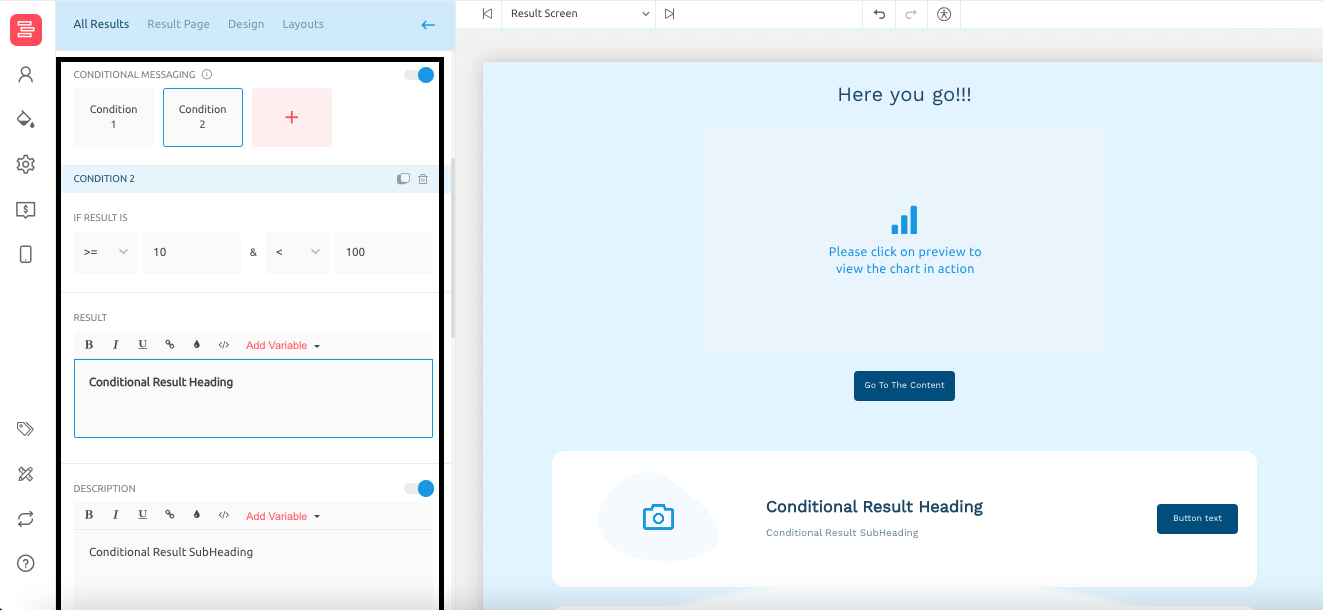
C. You can add new conditions by clicking the Add Condition (Plus) icon. You can now set up conditions for each new condition and can set up headings and descriptions for each condition.

IMPORTANT NOTE
Q. How does Conditional messaging work with Integrations?
Answer: Only the result Heading/Description that satisfies the specific Result Condition will go through the integration and other conditions won't be sent to the CRM tool.
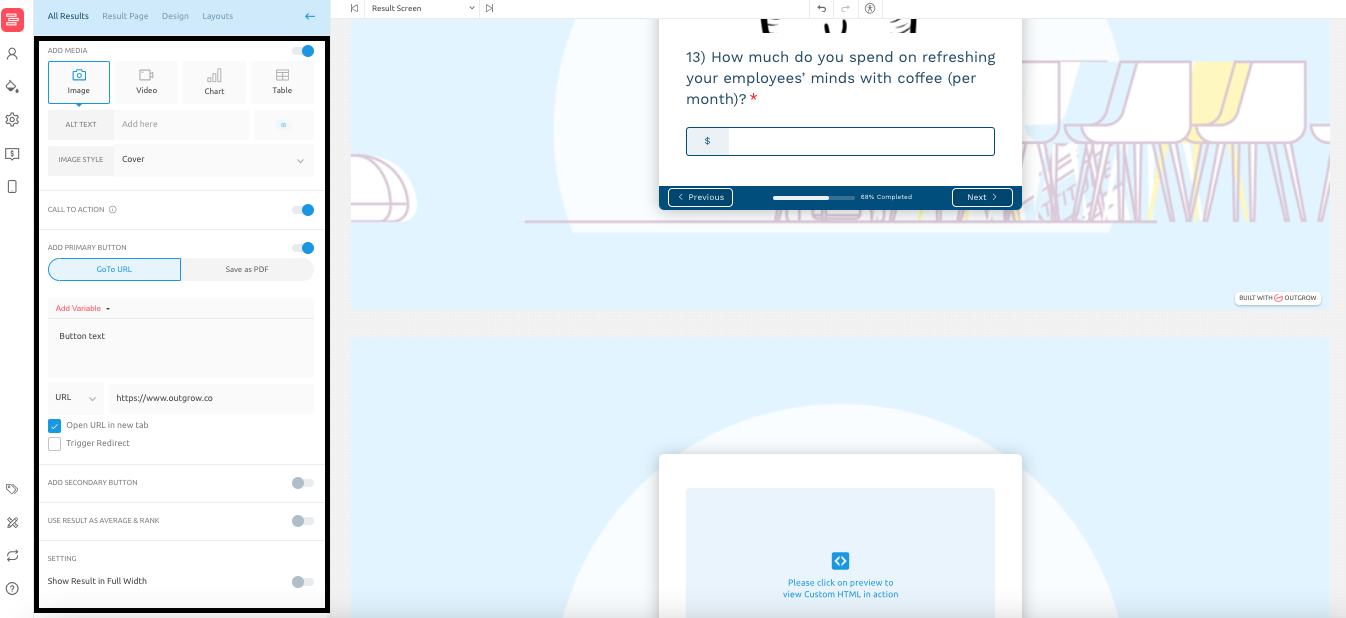
D. You can set up the media that will be displayed for each condition and can also configure the CTA button that will be shown for each condition by enabling the Call To Action toggle. Configure the action that will happen when the user clicks on the CTA button. You can also choose to configure the Secondary CTA button.

E. If you want to show the description configured for the condition in full width, you can enable the Show Results In Full-Width setting.
F. Make sure you click on Publish to save the changes.
If you still have any questions, feel free to use our chat tool on the bottom right or contact us at [email protected], and our team can help you with a quick solution.
Updated over 1 year ago