Pardot and Outgrow Native Integration
Use Outgrow's engaging content pieces to capture valuable leads and automatically push them into Pardot using our seamless integration.
Prerequisites For Configuring Integration
To configure an integration between Outgrow & Pardot, you need to have access to:
A. An Outgrow account with an active subscription.
B. A valid Pardot account with API access enabled.
C. A live Outgrow content piece.
Integration Setup
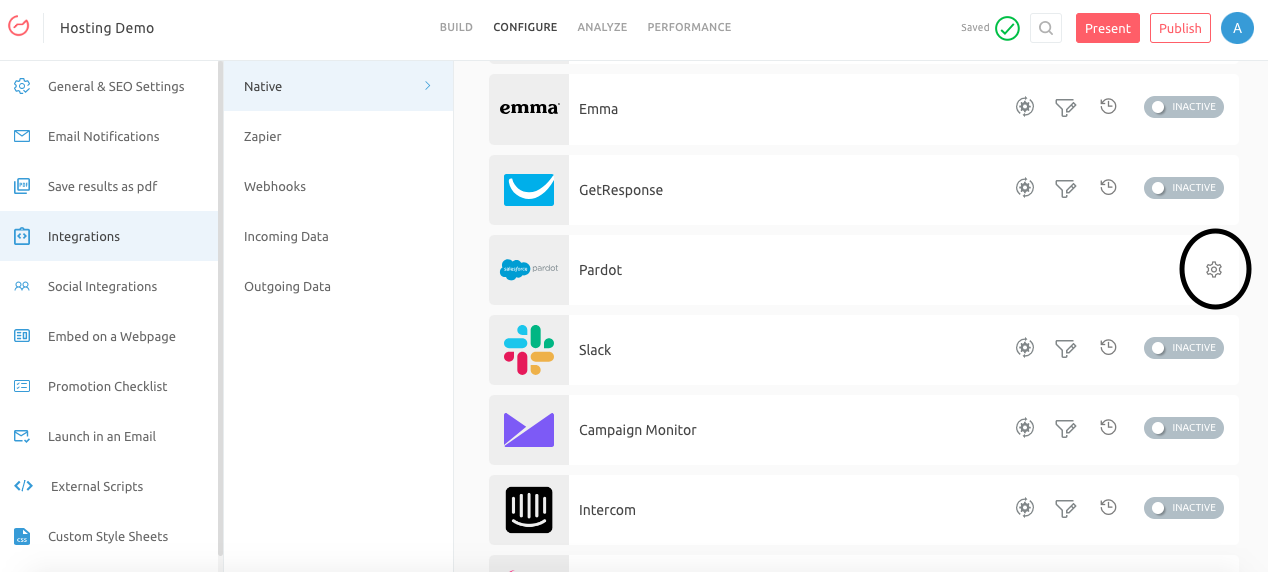
A. In your Outgrow builder dashboard, go to the Configure tab and then under Integrations click on the Configure Integration button under Pardot Integration.

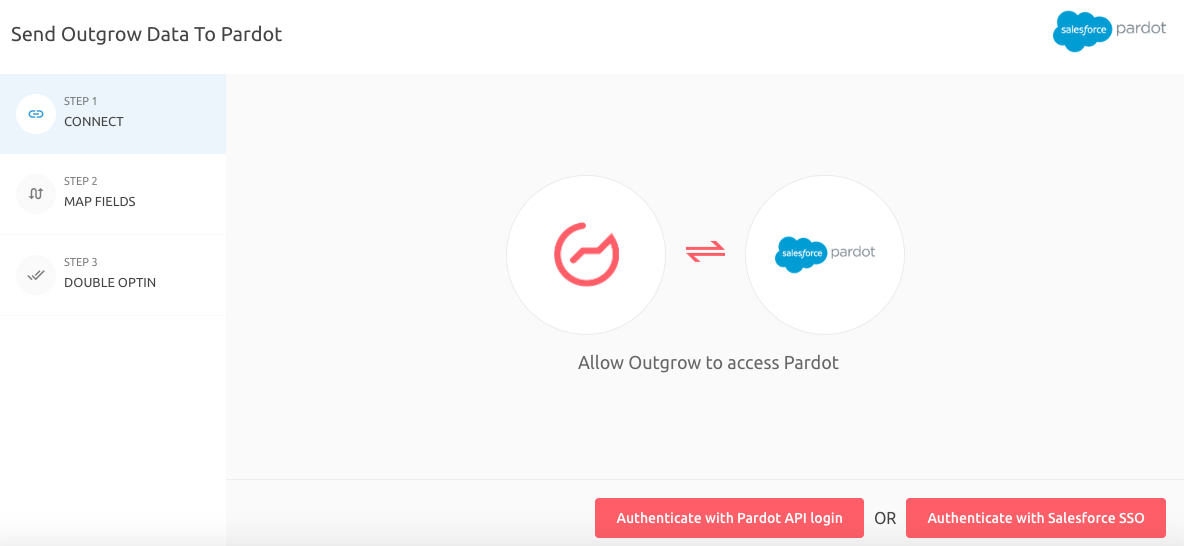
B. To authenticate the integration between Outgrow and Pardot, you can choose between using Pardot API Integration or Salesforce SSO Login.

B.1. Authenticate using Pardot API Login:
- In Pardot, navigate to Admin > My User Settings > Authentication.
- Click + Add User Key.
- Give the key a name (e.g., "Outgrow Integration"), and click Create API Key.
- Copy the generated API Key and your Pardot username and password and paste them into the Outgrow integration screen.
B.2. Authenticate using Salesforce SSO:
- Click Authenticate with Salesforce SSO.
- You'll be redirected to the Salesforce login page. Use your Salesforce credentials to log in.
- Grant Outgrow permission to access your Pardot data.
C. Select Pardot API Version & Enter Business Unit ID:
- Choose the version of the Pardot API you are using (V4 or V5). If unsure, check with your Pardot administrator.
- Enter your Pardot Business Unit ID. To locate this, In Salesforce, navigate to Setup > Quick Find > Pardot Account Setup. Locate the Pardot Business Unit associated with your Pardot account. The ID is a 7-8 digit (e.g., 0Uv123456).
Field Mapping and Testing Connection
A. Essential/Freelancer Plans: In case you are on a Freelancer, Starter or Essentials plan, you have the ability to map standard lead generation fields (e.g., Name, Email, Company) with the corresponding fields in Pardot. You can click on Test Connection to verify the integration. Outgrow will send a test lead to Pardot. You can check your Pardot Prospects list to confirm it was received.
B. Business/Enterprise Plans: In case you are on a Business or Enterprise plan, you have the flexibility to map additional fields from your Outgrow content piece, like Content Results, Custom Field Information, UTM Fields etc, and send that information to the respective fields in Pardot. Carefully map each Outgrow field to the corresponding Pardot field. Click Test Connection to verify the mapping and connection.
More Actions Under Pardot Integration
Once the integration is configured and is active, you can navigate to the Pardot block to see more actions that can be performed on Pardot integration after it has been set up.
A. Re-configure: If your Pardot credentials change or you want to connect a different account.
B. View Mapping: Review how your fields are mapped.
C. Task History: See the status of leads sent to Pardot (e.g., "Waiting," "Failed").
D. Sync: Manually re-send leads that failed to sync due to errors after re-configuring the integration.
E. Deactivate: If you no longer want to send leads from a specific content piece to Pardot.
IMPORTANT NOTE: If you don't see the Pardot Account Setup option in Salesforce Setup, contact your Salesforce administrator for assistance. They can provide you with the correct Business Unit ID.
Pardot users who haven't signed up for Outgrow, can sign up here and follow the instructions below. If you have any questions, please contact us via chat at the bottom right of the page, or you can send us an email at [email protected] and we will be happy to assist you further.
Updated over 1 year ago