Passing Data Out of Outgrow

With Outgrow, there are various ways to export data to the CRM tool of your choice. By passing the lead information gathered through your Outgrow content piece to your CRM tool, you can run ad campaigns, email marketing campaigns or retarget the leads in various other ways.

  1. Data out via URL
    You can capture data via URL with the help of UTM parameters. To capture data related to the source, medium, and campaign which is sending sweet traffic to your content piece, it is recommended to use UTM parameters in the content URL.

When a user lands on content with UTM parameters appended to the URL, we capture these parameters. You can map utm_source, utm_medium, utm_campaign data to the respective fields in the third-party app you are integrating with.

You can use the following 5 UTM parameters in the calculator or quiz URL:

ParameterPurposeExamples
utm_sourceIdentifies which site sent the traffic, and is a required parameter.utm_source=Google
utm_mediumIdentifies what type of link was used, such as cost per click or email.utm_medium=cpc
utm_campaignIdentifies a specific product promotion or strategic campaign.utm_campaign=spring_sale
utm_termIdentifies search terms.utm_term=running+shoes
utm_contentIdentifies what specifically was clicked to bring the user to the site, such as a banner ad or a text link. It is often used for A/B testing and content-targeted ads.utm_term=running+shoes
{gclid}Gclid, short for Google Click Identifier, is a unique tracking parameter that Google uses to transfer information between your Google Ads account and your Google Analytics account.redirecturl.com?gclid={gclid}

We recommend building a URL using a standard campaign URL builder like Google's Campaign URL Builder.

Please note only higher tier plans like Business and Enterprise plans can map the UTM parameters to respective fields in the third-party apps using Native integration.

UTM in integration and analytics

After you have added the UTM parameters, you can also pass these variables during integration with your marketing tool. Simply map the UTM Source or Medium or whichever variable you need to pass with the name that you have provided.
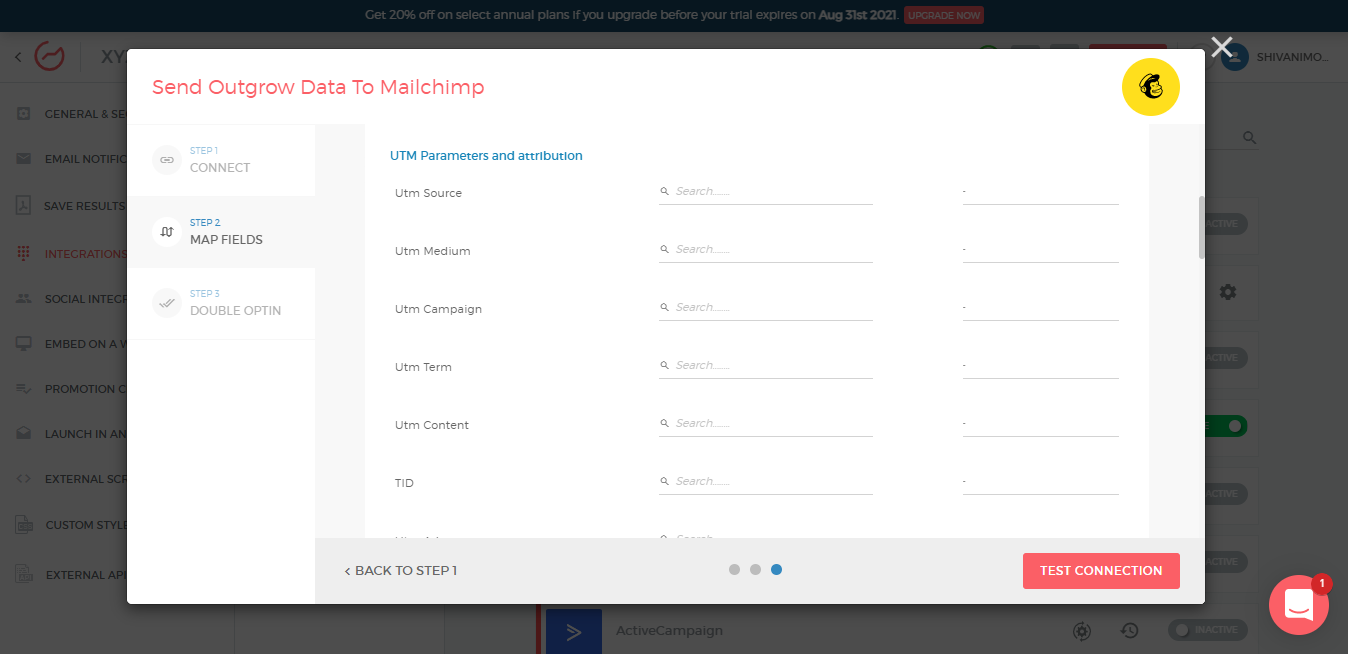
Once you have mapped these UTM variables, you can also find the data associated with these in the exported spreadsheet. To view, go to the Analyze tab and then export the datasheet. Now open the sheet and you will find these variables-

Passing data via Integration
Using the native integration feature you can transfer the leads collected using Outgrow to your CRM tool in order to trigger marketing automation activities.

To set up the integration you need to have access to:

**1. An active Outgrow account.

  1. An account with any CRM tool.
  2. A live Outgrow content piece.**

Steps to set up the integration

  1. Log in to your Outgrow account and open a live content piece for which you want to set up an integration. Once you are in the builder, navigate to the Integrations section in the Configure tab. Under Native Integrations, you will see the list of tools and you can choose to configure any.

  1. Post clicking on the Configure Integration icon, an integration configuration window will open up. In this window, you will have to click on Authenticate With Hubspot. (Let’s take Hubspot as an example)

NOTE -
Please ensure that pop-ups are enabled in your web browser to see the HubSpot account login page.

  1. Once your account is authenticated and you have selected an account for passing on leads, you can choose to Proceed with Contacts or Forms in order to move to the field mapping section.

  1. Now you can proceed to map the fields.

  1. Once you are done mapping the fields, we will push a test lead to HubSpot with sample values. If connection and mapping are successful you will see this test lead in your HubSpot contacts.

If your connection is successful you will see Active Status on HubSpot represented by the green checkmark, which indicates that new leads on your calculator or quiz will be sent to HubSpot.

Passing data via Webhook

In general terms, a webhook is simply a notification sent over the web, which is triggered automatically whenever a specific event occurs.
In this case, the event is a new lead on Outgrow's content piece. Whenever a new lead is submitted, a notification containing the response data is immediately sent to your chosen destination — the Webhook URL which you set in the configuration panel.

Here's what you will need to get started

A. An Outgrow account
(Freelancer and Essential plans do not include Webhook. Business and Enterprise plans include access to Webhooks through which users can send the lead data from Outgrow to any compatible URL)
B. An Endpoint (URL, where you want to send the data).
Note: If you need to generate a test URL you can do this using RequestBin or Mockbin.

Steps involved in configuring Webhooks

Follow two simple steps to start sending the leads you collect on Outgrow to an Endpoint using Webhooks
A. Configure your Webhook
B. Test connection

Configure

  1. To access Webhooks, navigate to the Builder >Configure>Integration on your Outgrow calculator or quiz. Select Webhooks from the secondary navigation as shown in the illustration below.

  1. Enter a Webhook URL. (This is the endpoint which we will make HTTP POST requests to).

  1. You can add a URL endpoint which requires authentication as well using Basic Authentication.

  1. In case you want to test the payload delivery, you can create a test End Point URL here. Once you add the URL you can test the payload delivery.

In Outgrow this is how you will be able to see if the payload delivery was successful or not.

This is how successful payload delivery will look like at the specified endpoint in your CRM.

  1. Hit Send test JSON and enable. If the test is successful Status code 200 will be returned.

Test requests and responses will be shown on the screen as well. Once the Webhook is tested and saved, the leads from your Outgrow content will start flowing to the endpoint as soon as they get created.

Passing data to Google Sheets

  1. Log in to your Outgrow account and open a live content piece for which you want to export the lead data.
  2. Once you are in the builder, navigate to the User Details section under the Analyze tab.

  1. To export the lead data, you can click on the ‘Export’ button on the right side.

  1. After doing this you will receive an Excel sheet on your email with all the required lead data. Similarly, to export the visits data, you can go to the Visits section and then click on the ‘Export’ button.

  1. You can check your email to view the lead data in an Excel spreadsheet.

NOTE-
You can also pass data to GoogleSheets via integration. For more information on this, you can refer to this document.

Feel free to reach out to us at [email protected] in case you have any questions or concerns.