Setting Up An Integration Between Marketo Engage & Outgrow
Using the native integration feature you can transfer the leads collected using Outgrow to your Marketo Engage account, to trigger marketing automation activities.
To set up the integration you need to have access to:
1. An active Outgrow account.
2. A Marketo Engage account.
3. A live Outgrow content piece.
Steps to configure Marketo Engage and Outgrow Integration
1. Log in to your Outgrow account and open the respective content piece for which you want to set up the integration in edit mode. Navigate to Integrations sub-tab present under Configure tab. Click on the Set Up Integration (Gear Icon) button.

2. To set up the integration you need to add Account Name, Client ID, Client Secret, and Endpoint. Once you have specified the details click on Authenticate With Marketo Engage.
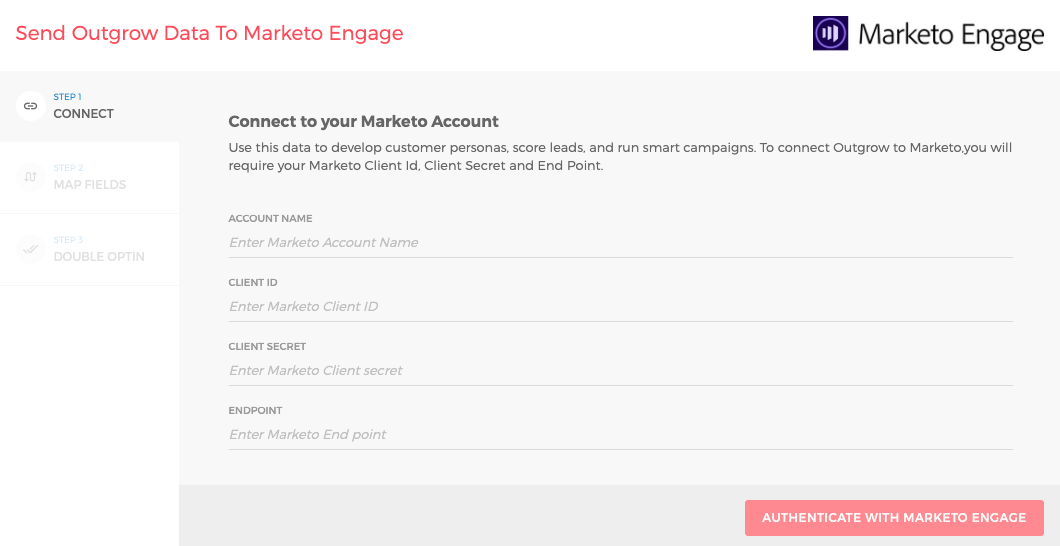
Important Note: For Account Name, you can add the Marketo Engage Account Name that is there in your Marketo Engage account.
3. You will have to set up a Custom Service in Marketo Engage to get the Client ID, Client Secret, and Endpoint. For this, you can log in to your Marketo Engage account, and under Admin Settings click on Users & Roles.
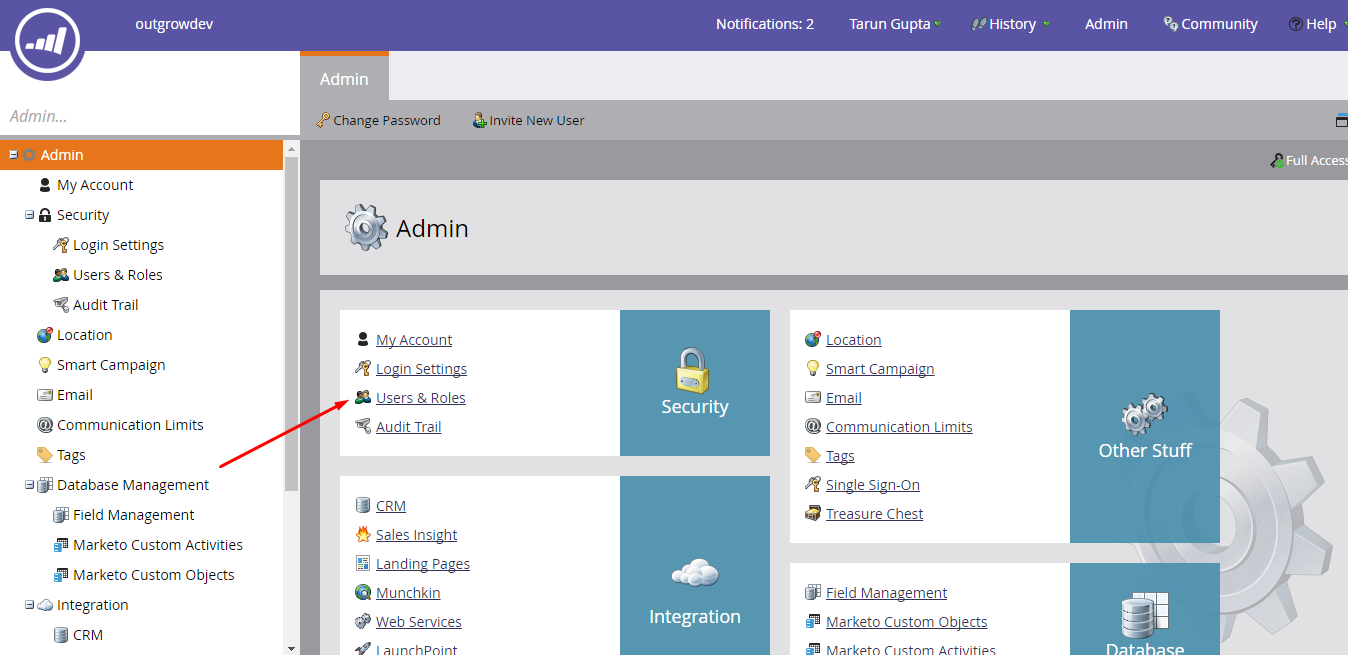
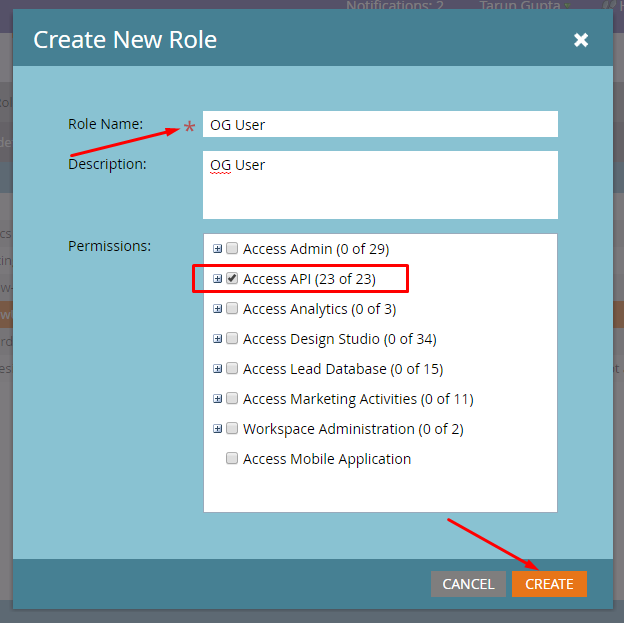
4. The first step of creating a Custom Service is to create a role that you can apply to the relevant API-Only user. This is done from the Admin > Users & Roles > Roles menu> + New role. When adding a new role, fill in a Role Name, Description and for Permission select Access API. Then create the new role.
5. After creating a role, you will need to create an API-Only user. Once the new role is created, head into the Users tab and click on Invite a New User. Provide First Name, Last Name, Email Address and for Roles, check off the new role just added in the previous step. Lastly, check the checkbox for API Only.
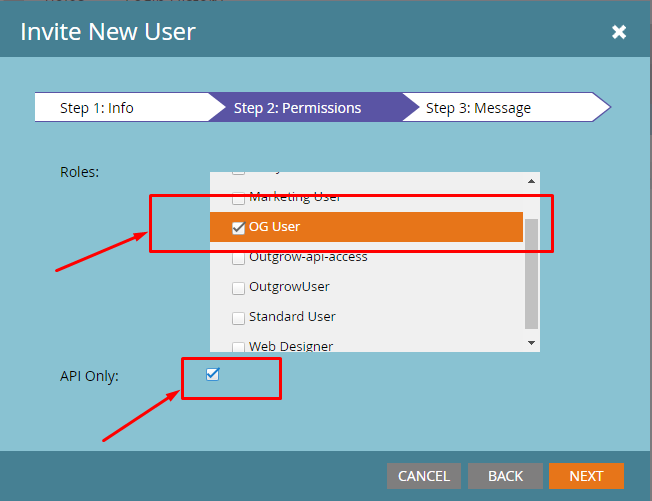
API-Only Users
API-Only users are a special type of user in Marketo, as they are administrated by other users and cannot be used to log in to Marketo.
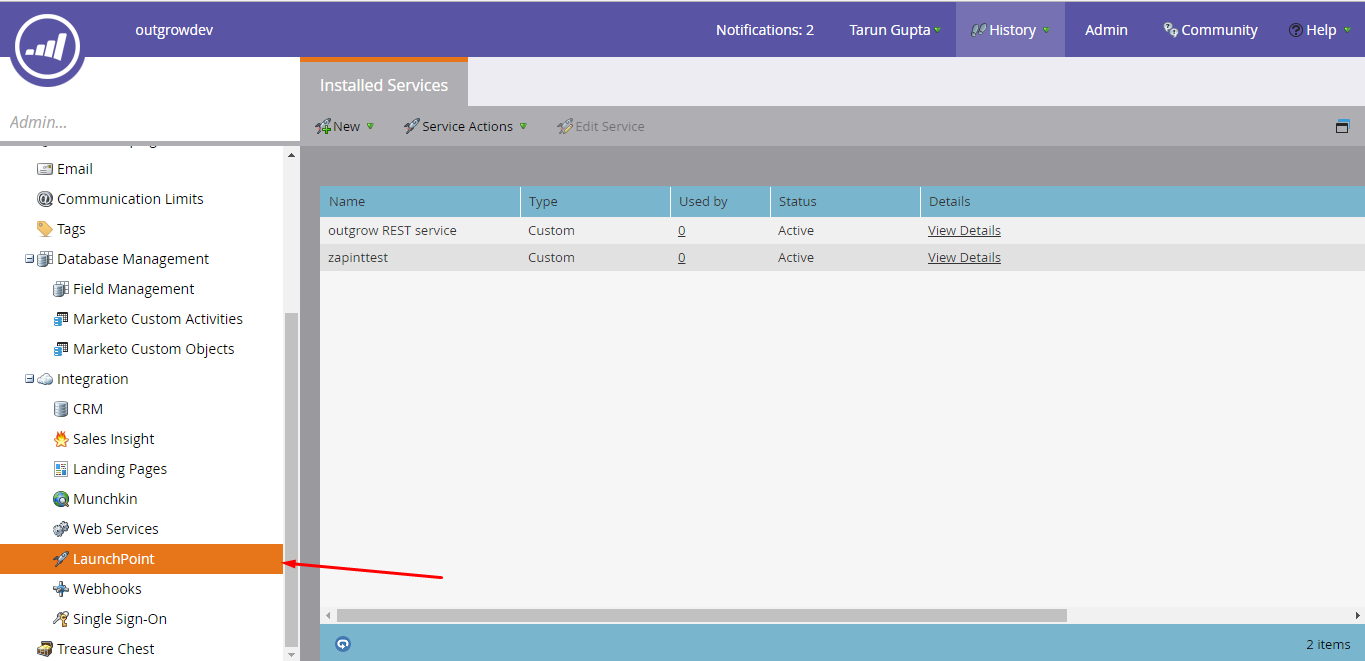
6. After adding a new Role and inviting a User head to the Admin panel and select Launchpoint from the menu items in the left sidebar.
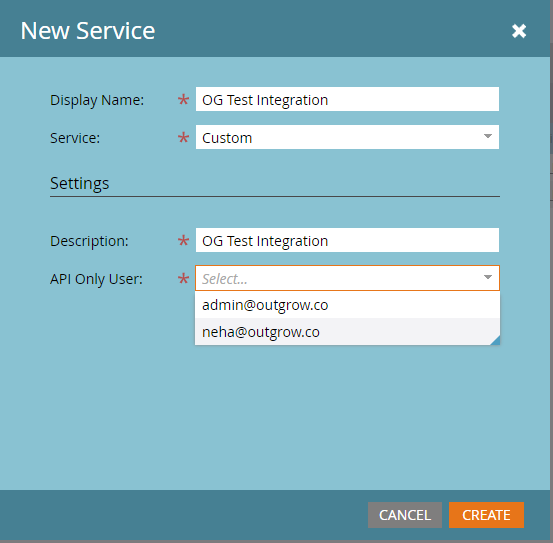
7. In Launchpoint, click on the New button to add a New Service. Fill in a Display Name, select a Custom service, fill in a Description and for API Only User, select the User just added in the previous step.
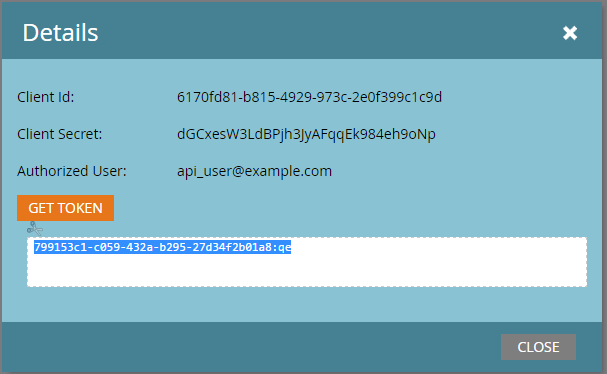
8. Once the New Service is successfully added, hit the View Details button and a pop-up with the Client ID and Client Secret will appear. Copy the Client ID and Client Secret and paste it into Outgrow Marketo Engage integration configure pop up.
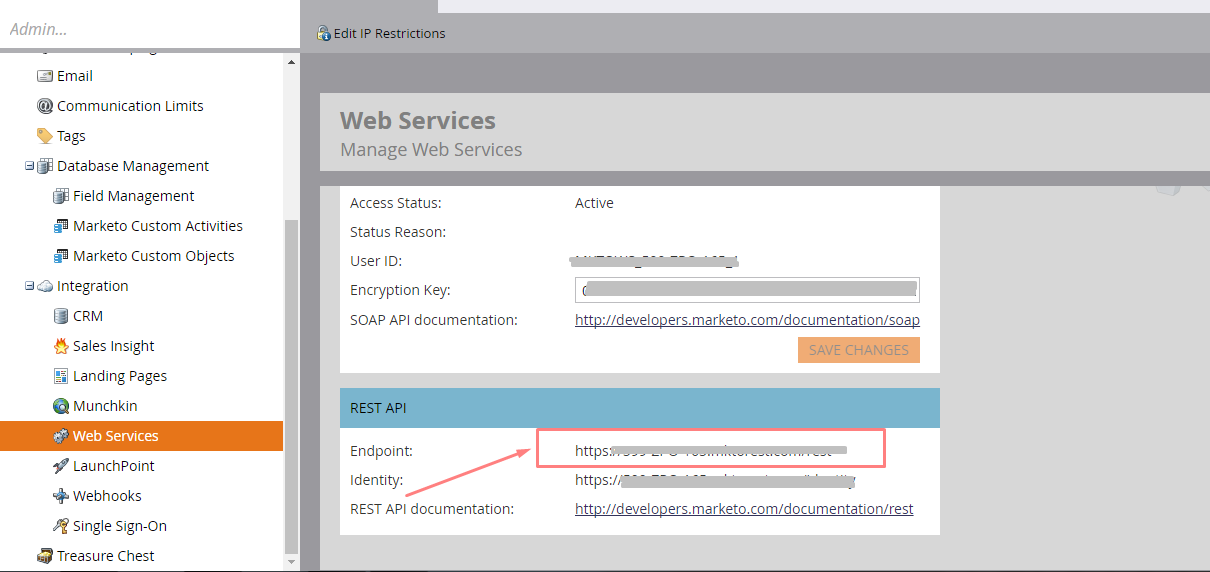
9. You will also require the Endpoint data from your Marketo Engage account. To get the Endpoint of your Marketo Engage account, navigate back to Admin and then to Web services.
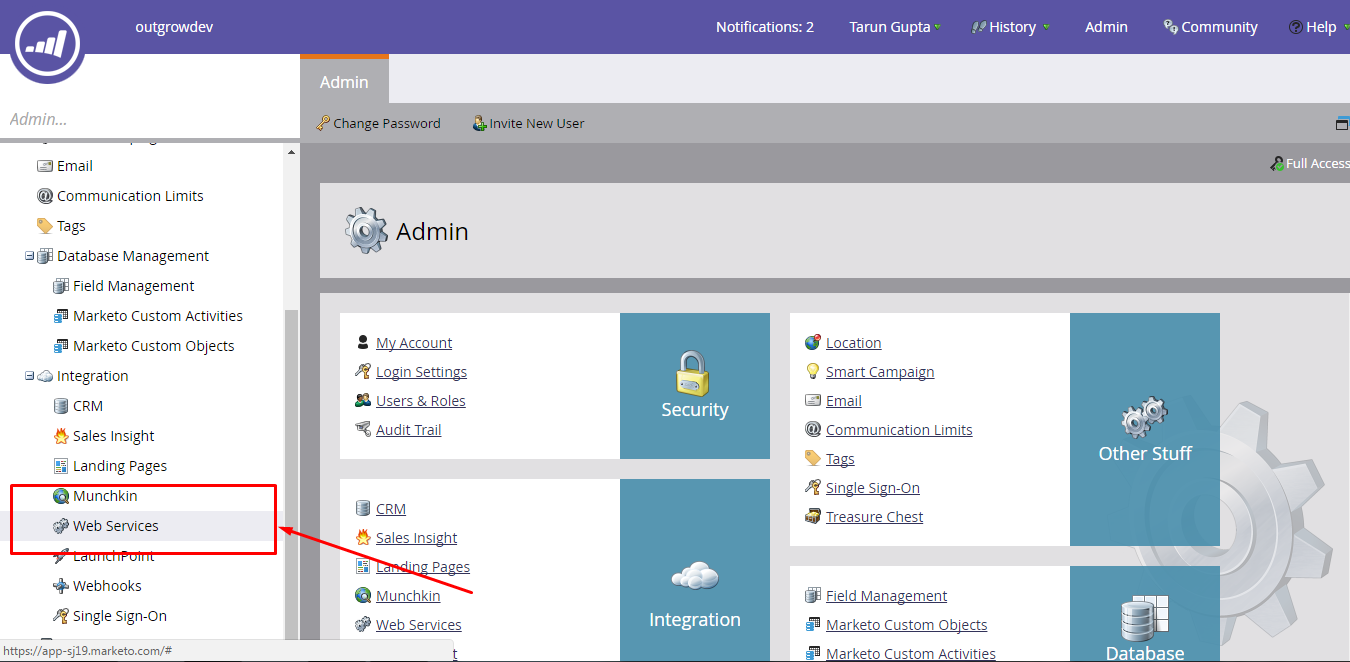
10. Find the Endpoint in the REST API box. Copy and paste it in the Marketo Engage Configure pop-up.
11. Add the Client Id, Client Secret, and Endpoint obtained from Marketo Engage in the Configure popup and click Configure.
NOTE: When you copy End Point from Marketo Engage, it has the word "rest" attached at the end. Please remove the word while adding the End Point URL.
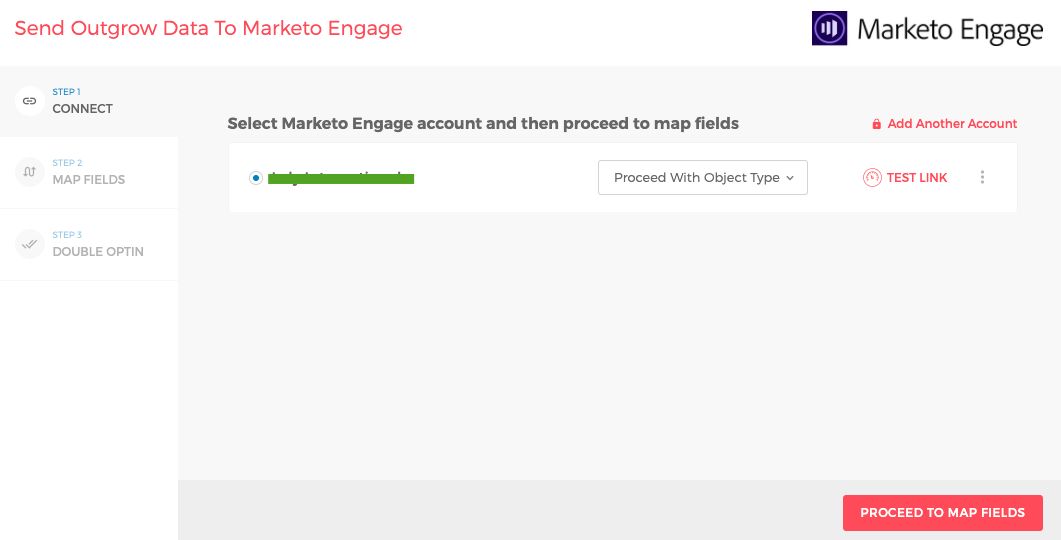
12. After integrating your account with Outgrow, you have the option to Process with Object Type or Proceed with Segment.
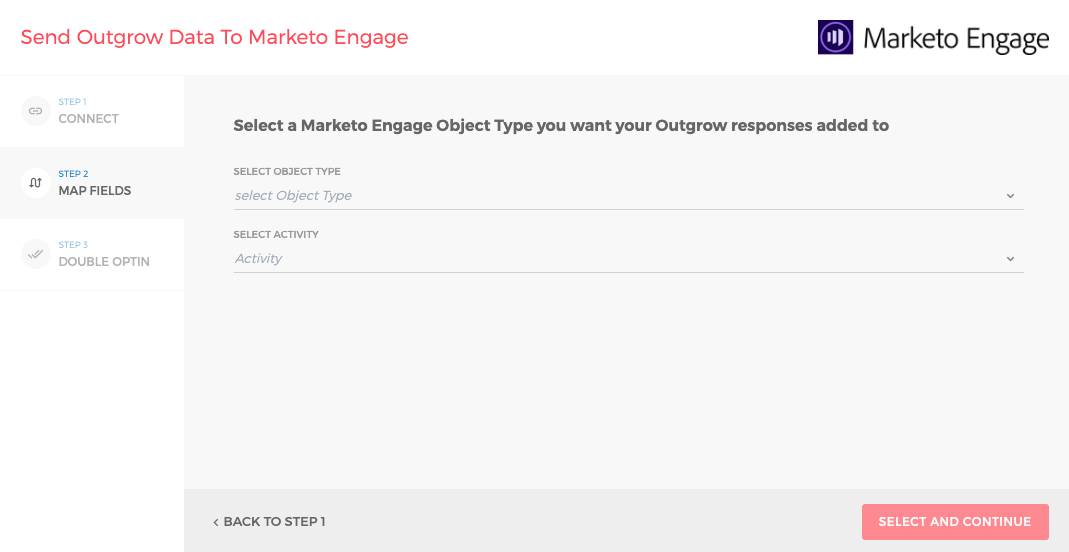
13. To set up integration map Marketo Engage fields with the fields of your Outgrow calculator or quiz, you first need to specify the Object Type and Activity.
14. In the next step map fields from Calculator, Questions, Results etc in Outgrow with the fields in Marketo Engage.
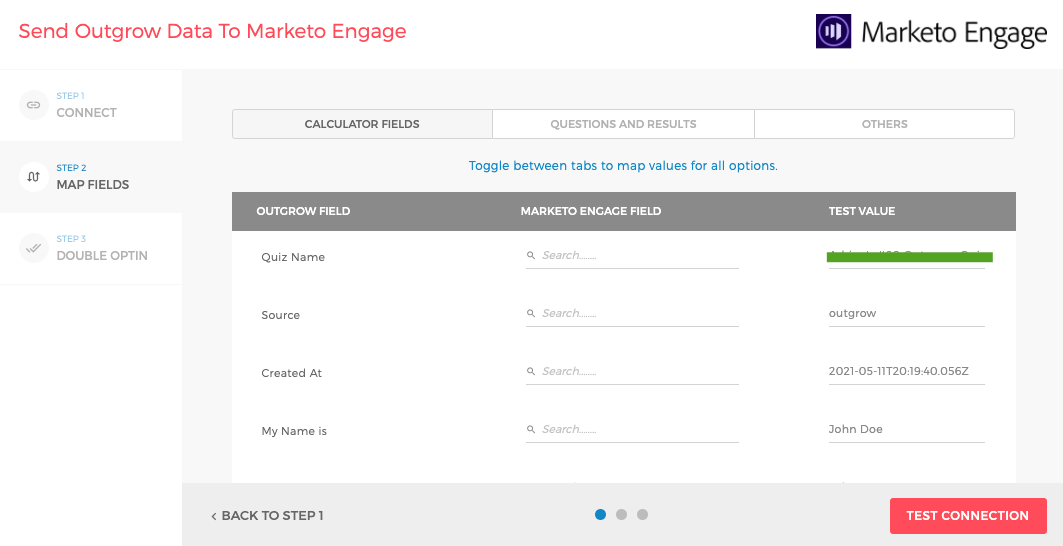
15. Once you are done mapping the fields, we will push a test lead to Marketo Engage with some sample values. If connection and mapping is successful you will see the test lead in your Marketo Engage Leads list.
Creating Custom Fields in Marketo
Let’s say you have additional data about your leads that do not fit into the standard Marketo Engage fields. For example, this custom field could be about Nick's Name captured on the lead form. You can create a custom field in Marketo Engage for your Nick Name, and then update the value of this field using Outgrow's native integration with Marketo Engage. Follow the below-mentioned steps to learn more about how to create a custom field in Marketo Engage:
1. Under Admin, click on Field Management.
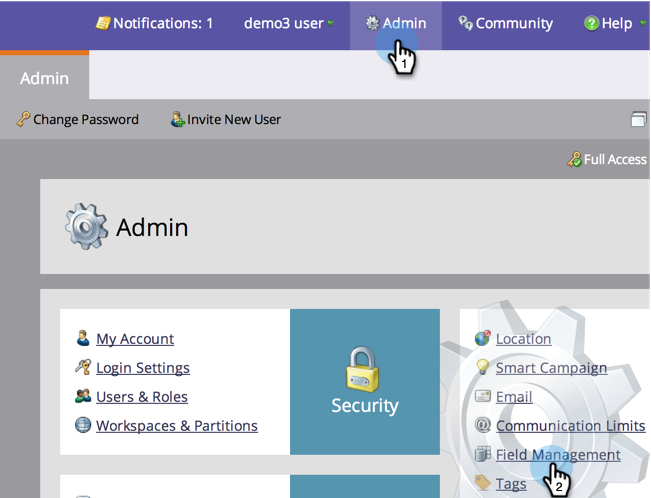
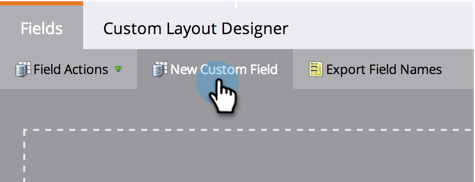
2. Click the New Custom Field button.
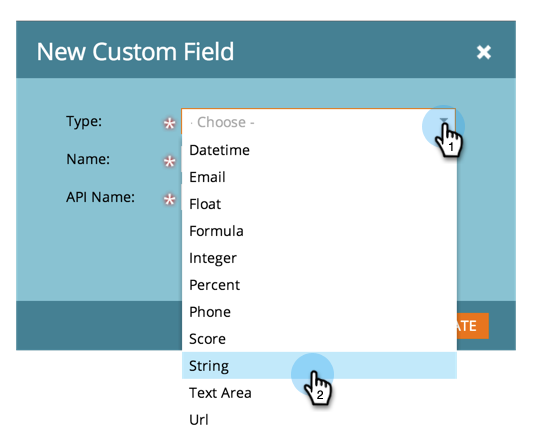
3. Choose the field Type. This will change how it is rendered in Smart Lists and Forms in Marketo Engage.
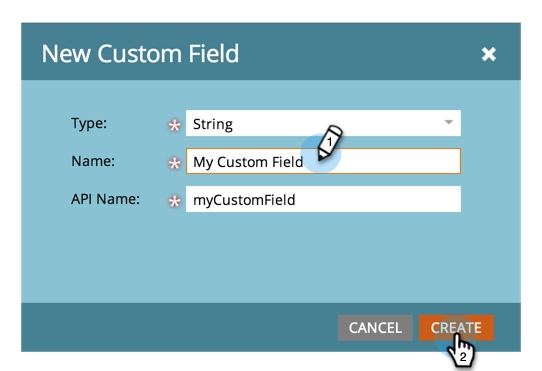
4. Enter the Name as you want it to appear in Marketo Engage. Pick the Name and API Name carefully as renaming fields can be difficult and in some situations not possible.
5. The custom field you created will now be accessible via integration.
Creating Objects and Activities in Marketo Engage
CASE 1: You can create a lead in Marketo Engage and also send custom activities with the lead.
CASE 2: You can send the data into the custom object that you have created in Marketo Engage. You can also send custom activity along with it. Custom objects can be created from Custom Objects in your Marketo Engage account.
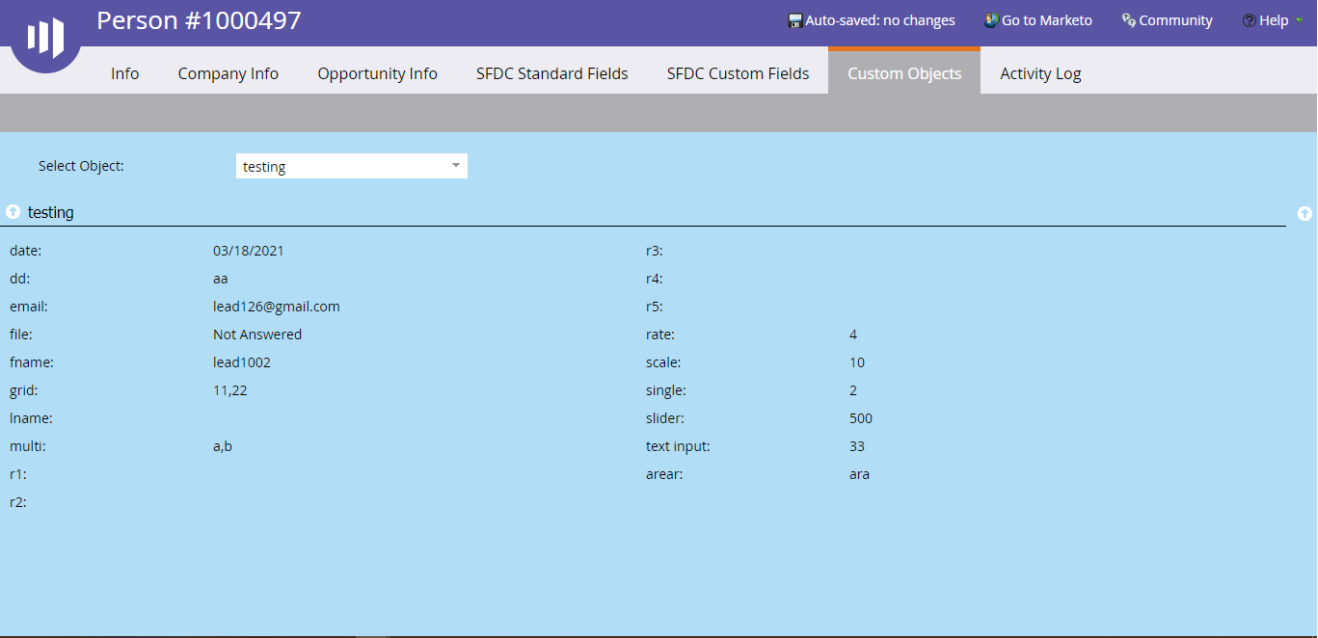
NOTE: In this case, a lead is also to be created with the email given in the custom object so that the custom object and activity can associate with that lead.
More actions
Once the integration is configured and is active, you can navigate to the Marketo Engage block to see more actions that can be performed on Marketo integration after it has been set up.
Re-configure- In case your Marketo Engage credentials have changed or you want to connect Outgrow with a different Marketo Engage account, then you will have to Reconfigure your Marketo Engage integration to continue getting Outgrow leads in your Marketo Engage account. If you have collected some leads on Outgrow but don't see them on Marketo Engage then you should definitely try to Reconfigure once to fix it yourself. If that doesn't help then drop us an email with your query at [email protected].
View Mapping- If you need to go over which fields you have mapped to configure your Outgrow-Marketo Engage integration, you can click on view mapping. You can then toggle between tabs to view the mapping across all fields.
Task History- This contains the list of all the leads sent to Marketo Engage. The leads which are in queue to be synced will have status Waiting and those which have failed to sync due to some reason will be shown as Failed. If due to some error in connection your leads from a calculator or quiz have not been sent to Marketo Engage then you can Sync the leads to your Marketo Engage account after re-configuring. All the leads which were not sent to your account will be sent to Marketo Engage when you sync. If for some reason, even after syncing you do not see your lead on your Marketo Engage account then reconfigure once and then Sync.
Deactivate - In case you don't want to send leads from a content piece to Marketo Engage, you can simply deactivate it.
What happens when you use Email Deduplication feature along with using the same email address for syncing leads
When you have submitted multiple leads using the same email address, but have enabled the Email De-duplication feature in your content as well, what happens is that the feature ensures that if multiple responses are submitted using the same email address, the responses are updated in the same record instead of creating new records in the database. Only the most recent responses will be available for review in the database.
In case you want that each time information is sent to Marketo from Outgrow, a record should be maintained, then here is what you can do. You can either use a different email address while submitting a response each time or in case you want to use the same email address, you can opt to create a Custom Object and maintain the history of the record using that Custom Object. Here are the steps that you can follow to achieve this setup:
1. Create a Custom Object in Marketo.
2. Add Email as the field to link the lead's email address field.
3. In the next step, you need to add "createdat_custom" as the Dedupe field. This Marketo field will be mapped with the Created At field in Outgrow. This will ensure that multiple records can be created in the Custom Object in Marketo.
4. You can add additional custom fields in the custom object as per your requirement and can map those fields with the respective fields in Outgrow.
NOTE: Here are a few things that you need to keep in mind:
1. Please make sure that you do not have any other Dedupe field in the Custom Object. This will ensure that you are able to create multiple custom object records for the same lead. Also, please ensure that for a custom activity, a primary attribute is specified.
2. The newly created date field in Marketo needs to be in String format and not Date format. Creating the field in String format will allow you to set the respective field as a Dedupe field.
Important Note
The important thing to keep in mind related to data sync related timings:
When it comes to flow of data from Outgrow to your CRM or Marketing Automation Tool, there are 3 scenarios that determine how long does it take before the data is sent from Outgrow to your CRM:
A. Scenario 1 - In your Outgrow content you have a single lead gen form, and the form is placed on the Welcome screen. In this case, the time that will be taken post which the data will flow from Outgrow to your CRM will be calculated on the basis of Number of Questions X 10 Seconds. So if there are 30 questions, then the data will automatically flow after 300 seconds.
B. Scenario 2 - In your Outgrow content, you have multiple lead gen forms, out of which the primary lead gen form is placed on the Welcome screen, and the second lead gen form is placed somewhere after questions. Then again the time taken post which data will flow from Outgrow to your CRM automatically will be calculated on the basis of Number of Questions X 10 Seconds .
C. Scenario 3 - In case the lead gen form is on the results page or after questions, then the lead data from Outgrow to CRM will flow once the submit button will be clicked on the lead gen form.
Feel free to reach out to our Support Team in case you have any questions, and we will be happy to assist you further.
Updated over 1 year ago