Outgrow & Greenhouse Native Integration
Greenhouse offers an applicant tracking system and recruiting software using which companies are able to hire the best resource for a job.
To set up an integration between Outgrow & Greenhouse, here is what you need to get started:
A. An Outgrow account with an active subscription plan.
B. An active Greenhouse account with API access.
C. A live Outgrow content piece.
Stage One: Generating a Harvest API Key for the Greenhouse/Handshake Integration
1. To set up an integration between Outgrow & Greenhouse, you need to generate a Harvest API key in Greenhouse. To generate a Harvest API key for the integration, click the Configure icon (Gear Icon) in the upper right-hand corner. Then you need to navigate to Dev Center in the left-hand panel. From the Dev Center page, click on API Credential Management.
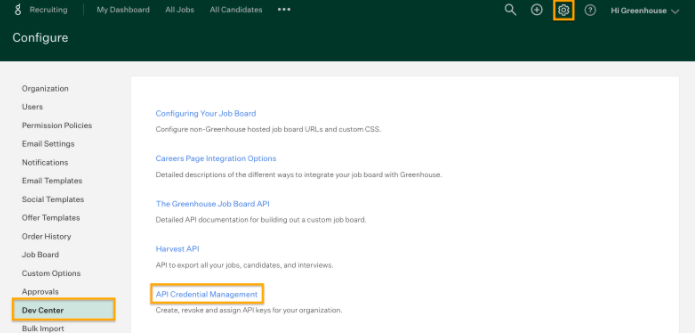
2. From the API Credential Management page, click Create New API Key to generate the API key for Handshake.

3. In the Create New Credential dialog box, make the following selections:
A. API Type: Harvest
B. Partner: Handshake
C. Description: Handshake Harvest API Key
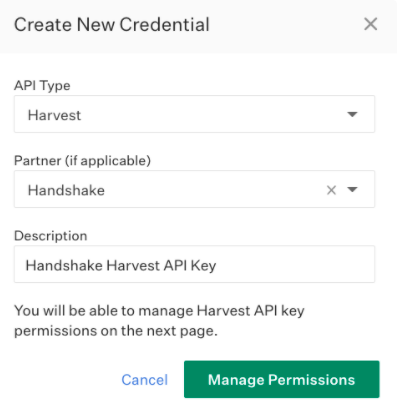
When finished, click Manage Permissions to generate the Harvest API key and automatically assign it the appropriate permissions required by Handshake.
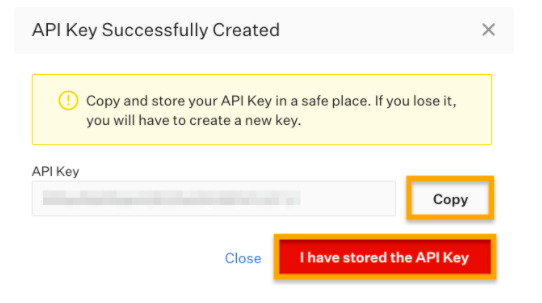
4. In the subsequent dialog box, click Copy to save your API key to your clipboard. Store the API key in a secure location to provide to Handshake in the next step. Click I have stored the API Key once you have copied and saved the key.
IMPORTANT NOTE
You cannot access the full Harvest API key again after clicking I have stored the API Key. If you lose your API key and need to access it later, you must create a new API key, provide it to the integration partner, and then revoke access to the original key.
5. On the subsequent page, you can select all the permissions that you want to assign to your API key. You can also opt for Select All to grant all the permissions to the API key. Click on Save when finished.
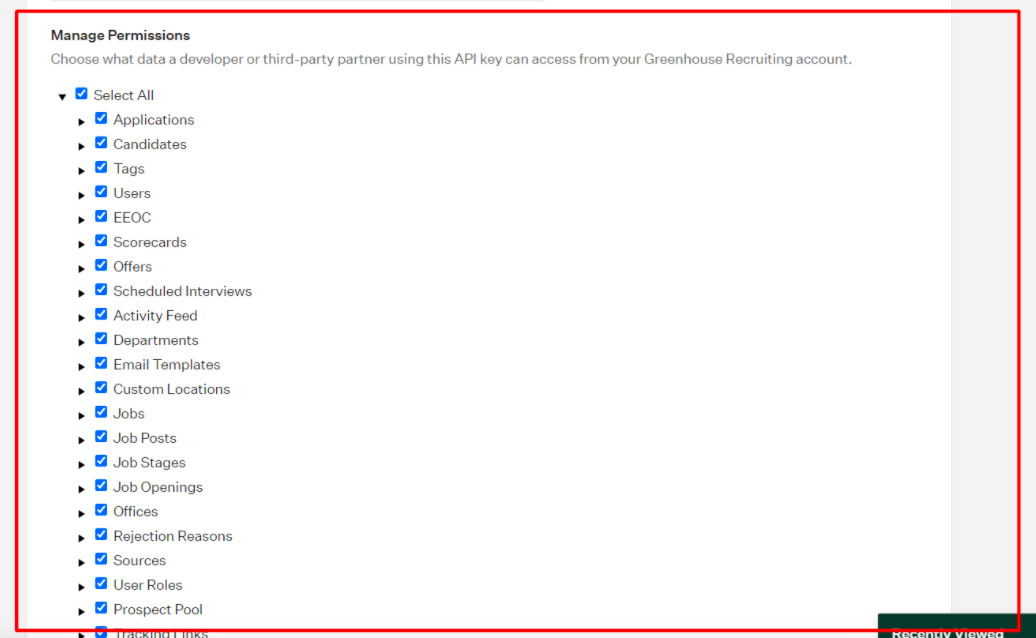
Your Harvest API key for the Greenhouse Recruiting / Handshake integration is created and configured. In the next stage, you will learn how to configure the integration in Outgrow.
Stage Two: Configuring Integration in Outgrow
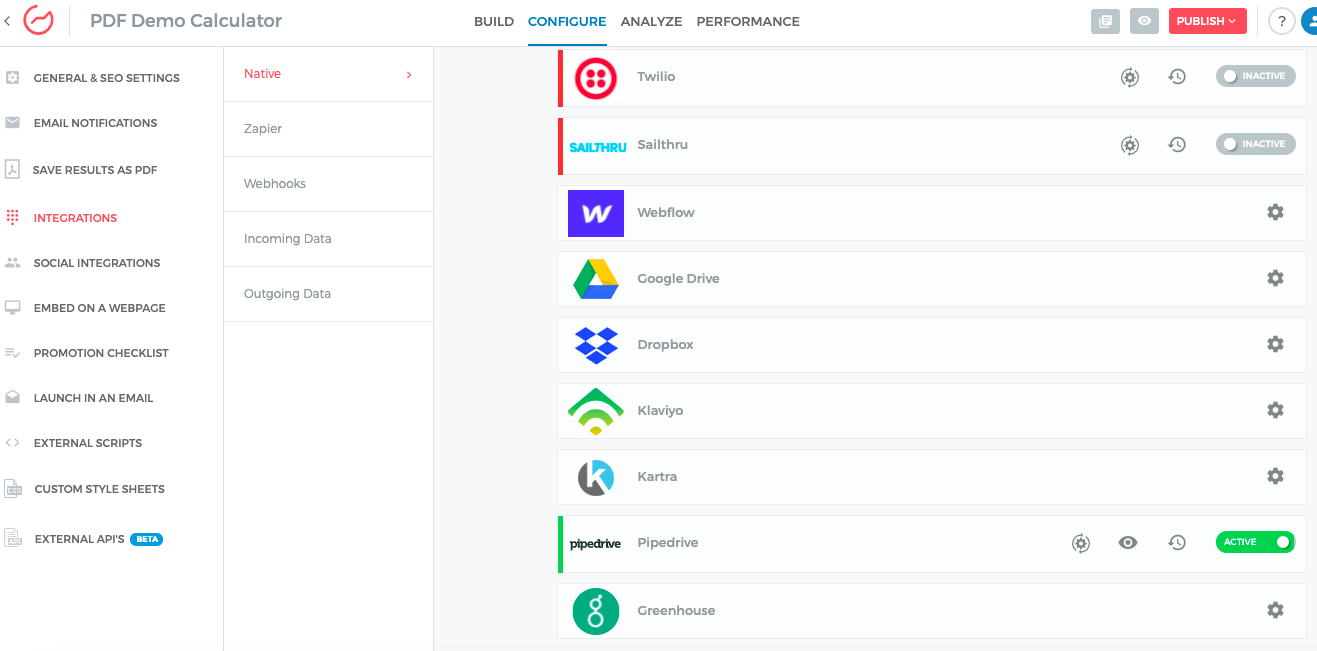
1. To start the integration configuration process you need to navigate to the Configure tab in your Outgrow builder dashboard. Click the Configure icon for Greenhouse integration (Gear Icon).
2. In the next step, you are required to connect your Outgrow account with your Greenhouse account. You need to specify:
A. Account Name: This is for internal usage only. You can specify any name here.
B. Greenhouse Email: In this field, you need to specify the email address that you use to log in to your Greenhouse account.
C. Greenhouse API Key: Specify the API key that you generated in Greenhouse.
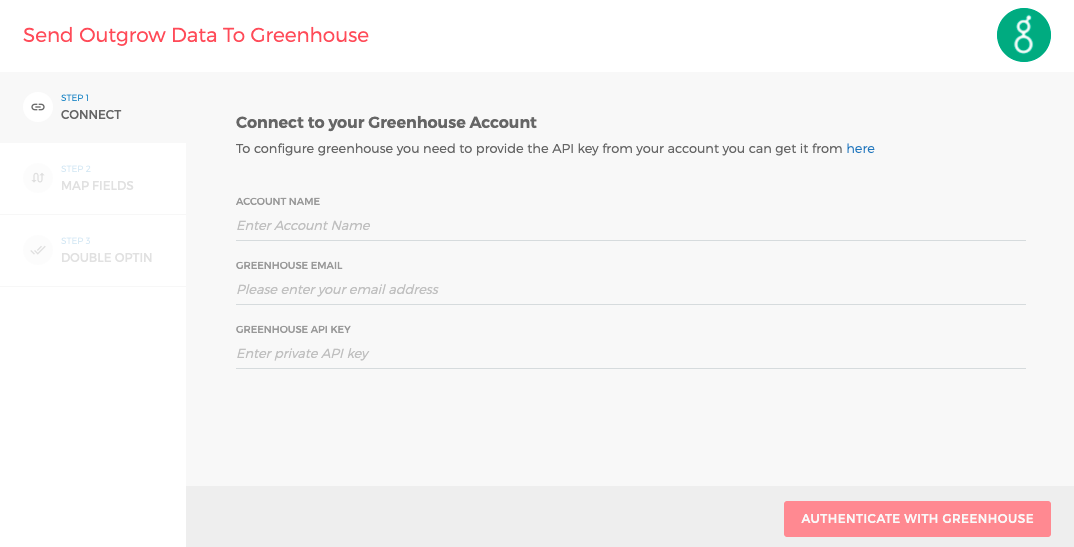
Once the details are added, click on Authenticate With Greenhouse to enable the integration.
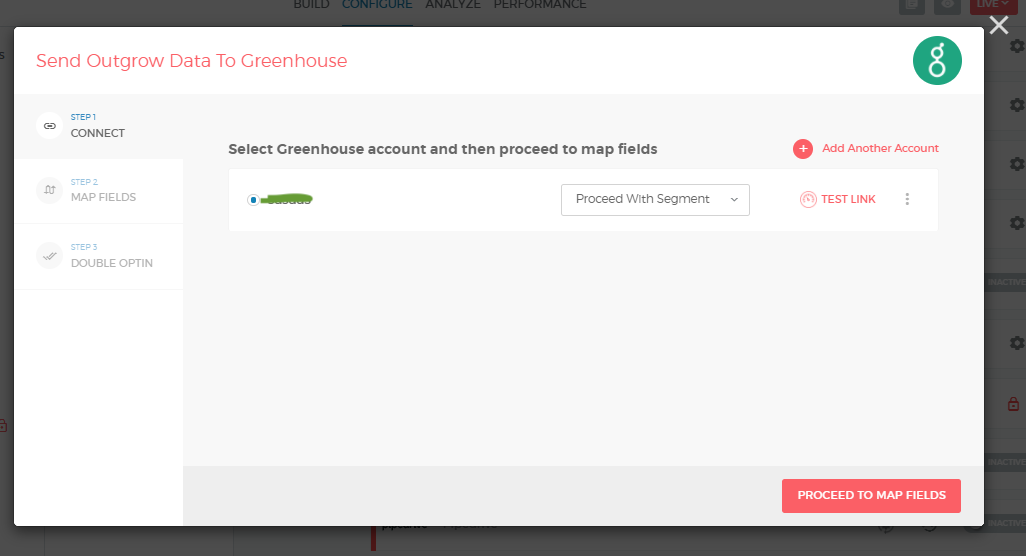
3. Once your account is authenticated and you have selected an account for passing on leads, you can choose to Proceed with Lead or Segments in order to move to the field mapping section.
4. Post selecting whether you want to continue with Lead or Segment, you will be taken to the Field Mapping section to map the respective Outgrow fields with the Greenhouse field.
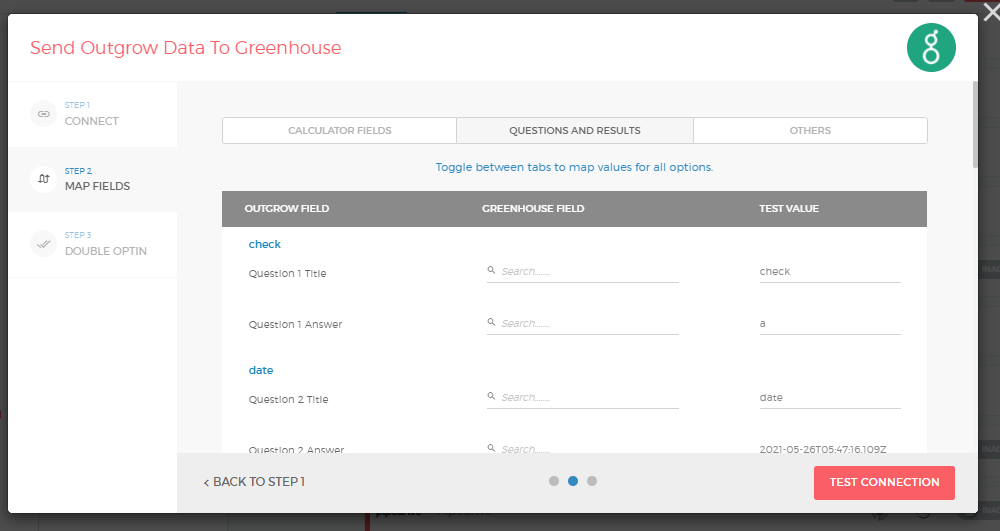
4.1. In case you want to map a segment, you can select the segment that you want to map, and also specify what happens to the leads that are not a part of the respective segment.
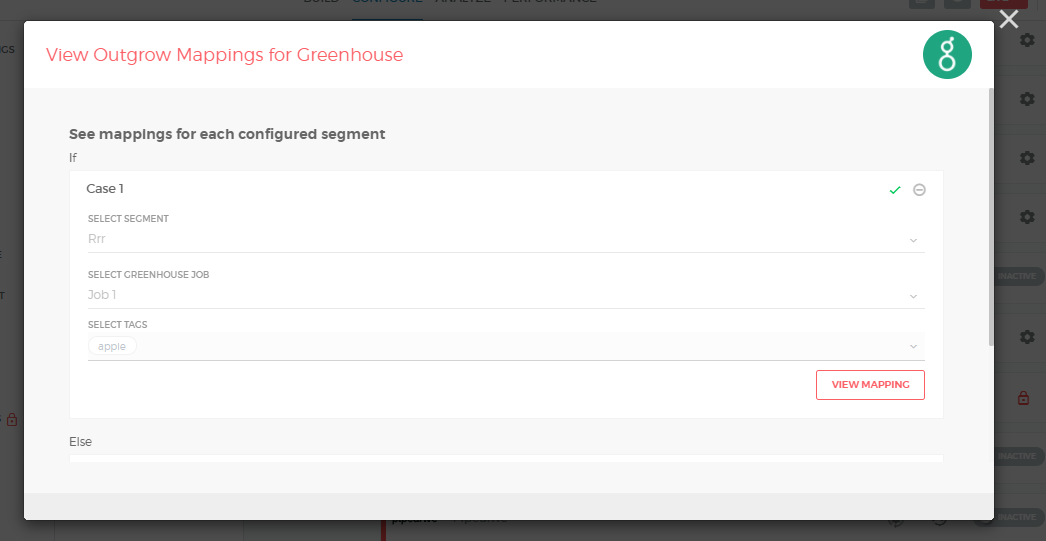
5. Once the integration configuration will be complete, you will notice that the Active Integration Connection toggle will get enabled.
More available Actions for your Integration
Once your integration is activated, there are a few additional actions that are available for usage:
A. Re-configure: In case your Greenhouse credentials have changed or you want to connect your Outgrow account with a different Greenhouse account, or you want to reset the field mappings that are already in place, you can click on the Reconfigure button.
B. View Mapping: If you need to go over which fields you have mapped to configure your Outgrow-Greenhouse integration, you can click on view mapping. you can then toggle between tabs to view the mapping across all fields.
C. Task History: This contains the list of all the leads sent to Greenhouse. The leads which are in queue to be synced will have status Waiting and those which have failed to sync due to some reason will be shown as Failed. For each Failed To Sync or Waiting To Sync lead you can click on View Details, to see the reason because of which the lead is in its current state.
Deactivate: In case you don't want to send leads from a calculator or quiz to Greenhouse, you can simply deactivate the integration.
IMPORTANT NOTE
1. For every new Outgrow content that you create you will have to Configure, Activate or Deactivate the integration from the Configuration section in the builder.
2. In case you have opted for Essentials or Freelancer subscription plans, you can only send Lead Form data from Outgrow to Greenhouse. In case additional information such as Questions, Answers, UTM Parameters, etc, are required to be sent to Greenhouse, you can reach out to our Support Team and we will be happy to create a discounted offer for you.
3. Almost every CRM tool has kept mapping the email field mandatory. Without the email, you can't identify lead data. So in order to set up an integration with Greenhouse, mapping the email field is absolutely necessary.
In case you have any additional questions or concerns, you can reach out to us at [email protected], and we will be happy to assist you further.
Updated over 1 year ago