Configuring Native Integration Between Outgrow & Rybbon
Rybbon is the all-in-one solution for sending, tracking, and managing digital rewards programs. With Rybbon, it’s easy to incorporate automated rewards from popular brands — including Amazon, Visa, and Mastercard — to boost engagement, increase response rates, generate brand recognition and loyalty, and motivate employees. You can collect leads using Outgrow, and can push those leads to Rybbon using our newly introduced native integration functionality.
Using this document, you can get a better understanding of how to configure the native integration between Outgrow & Rybbon.
Here's what you will need to get started
To configure integration between Outgrow & Rybbon, you will need access to:
A. An Outgrow account with an active subscription plan.
B. An active Rybbon account.
C. A live Outgrow content piece.
How to configure the integration
To configure the integration between Outgrow and Rybbon, here are the steps that you need to follow:
1. Log in to your Outgrow account and select the appropriate content piece.
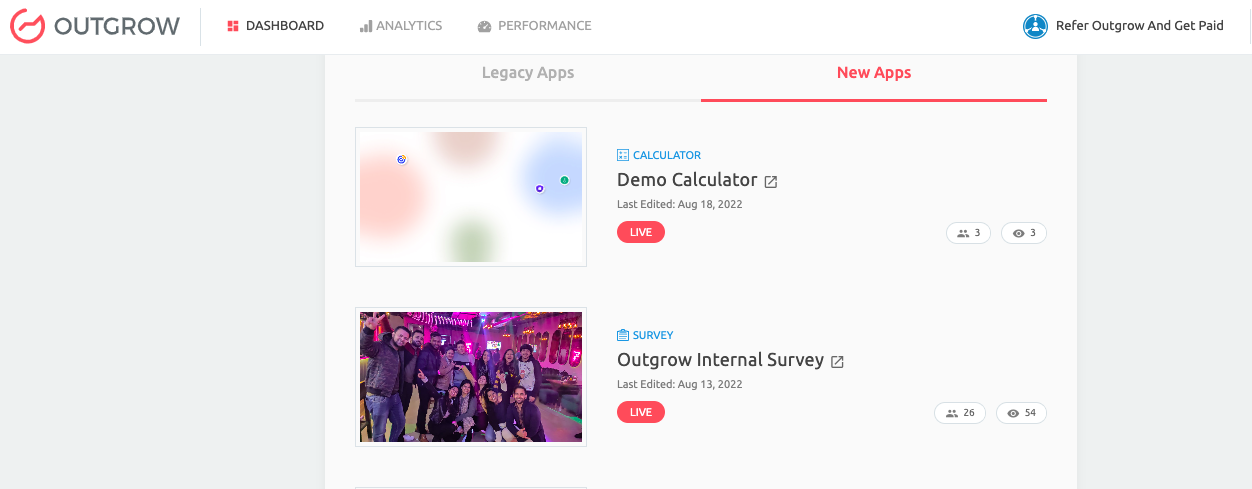
2. Open the respective content in Build mode.
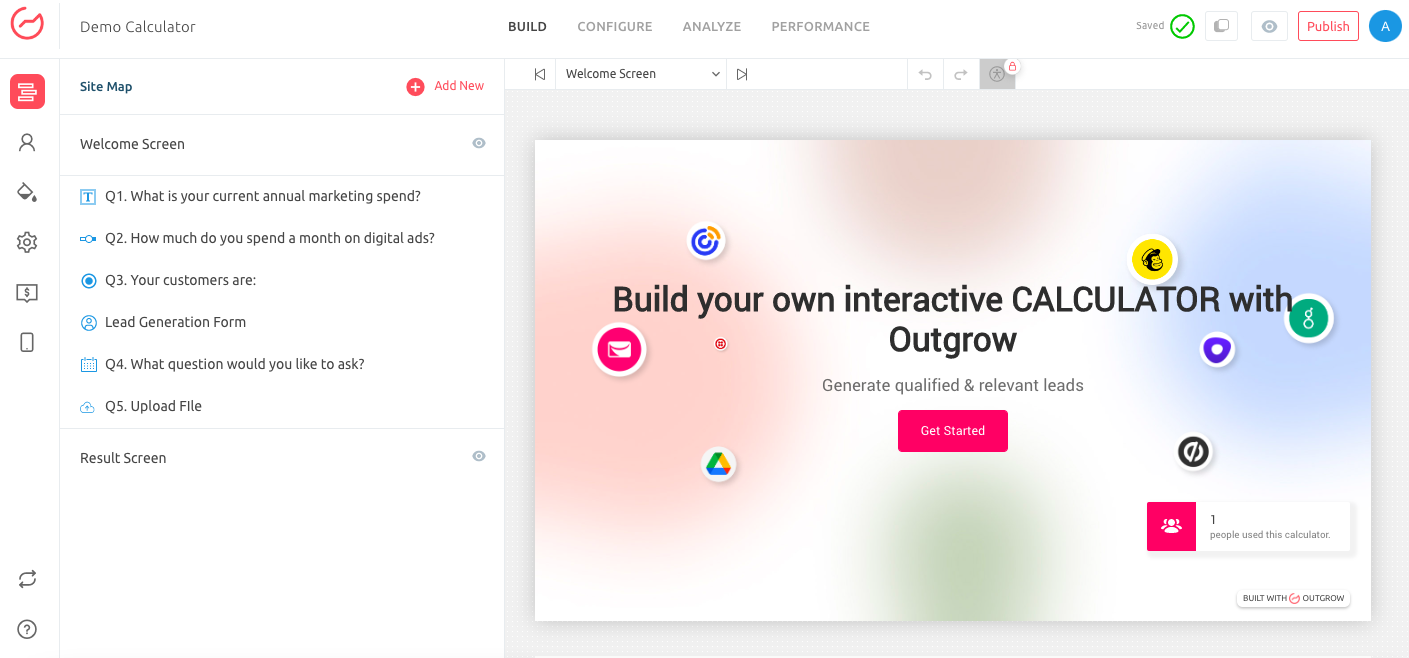
3. Click on the Configure tab, and then navigate to the Integrations sub-tab. Under Integration, go to Native Integrations and scroll down to Rybbon integration.
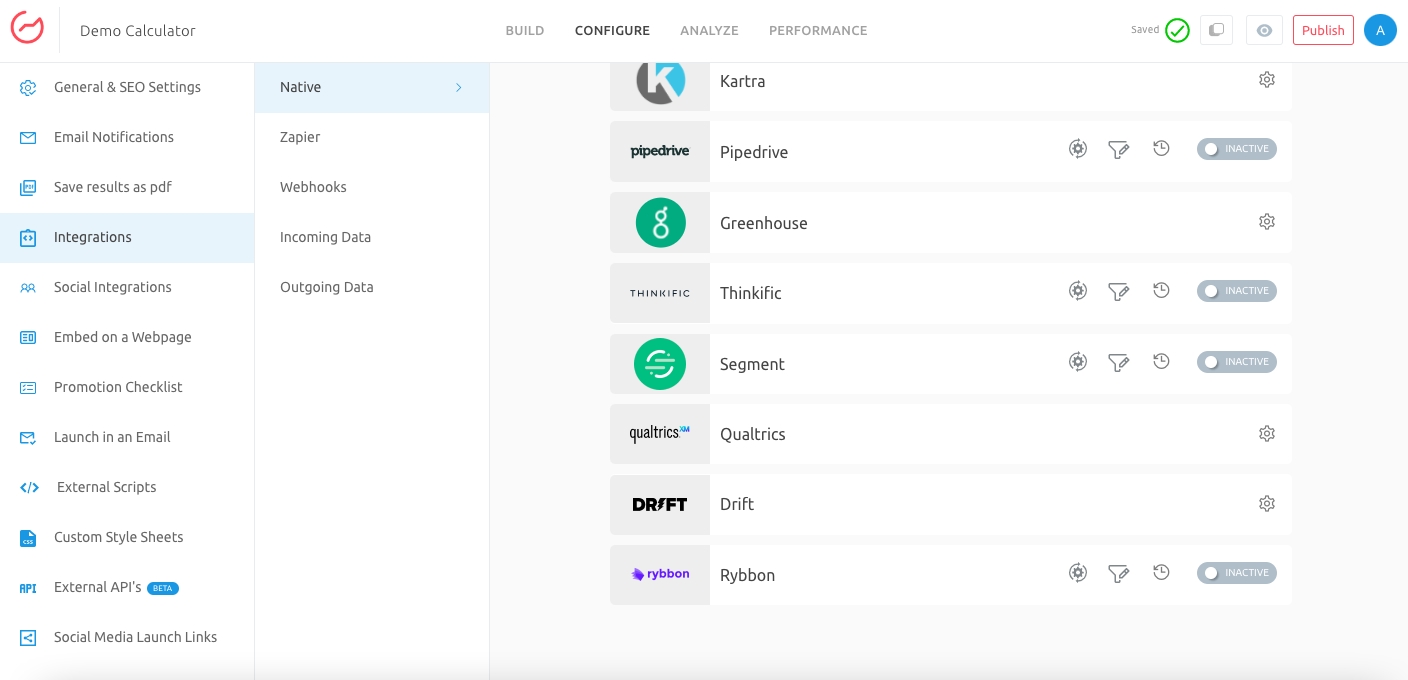
4. Click on the configure icon for configuring native integration with Rybbon.

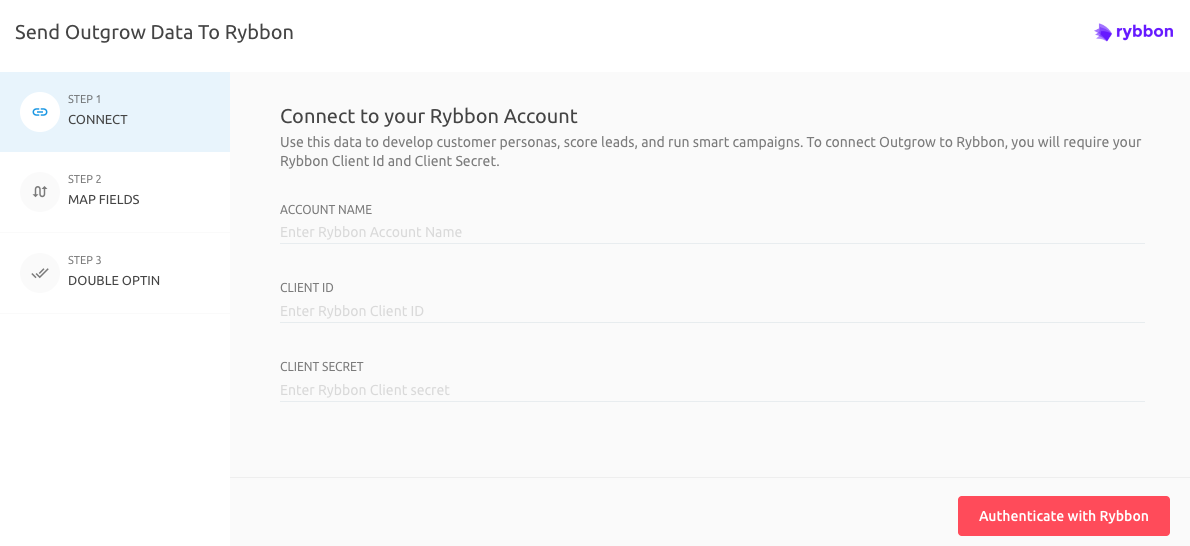
5. Post clicking on the Configure Integration icon, an integration configuration window will open up. Click on Authenticate With Rybbon. To authenticate your Rybbon account, you will be required to use your Client ID and Client Secret Key. You can follow the below-mentioned steps to learn more about how to access this information in your Rybbon account.
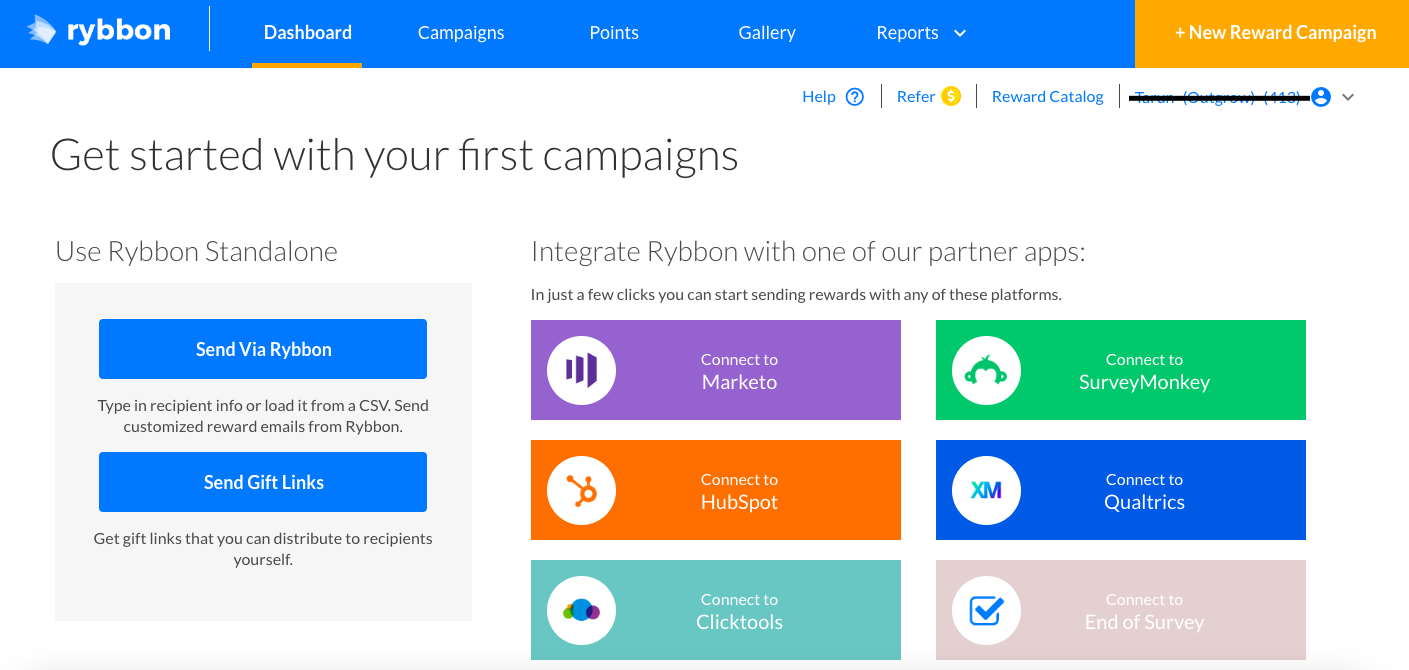
5. A. Login to your Rybbon account and click on the drop-down menu icon present next to your username.
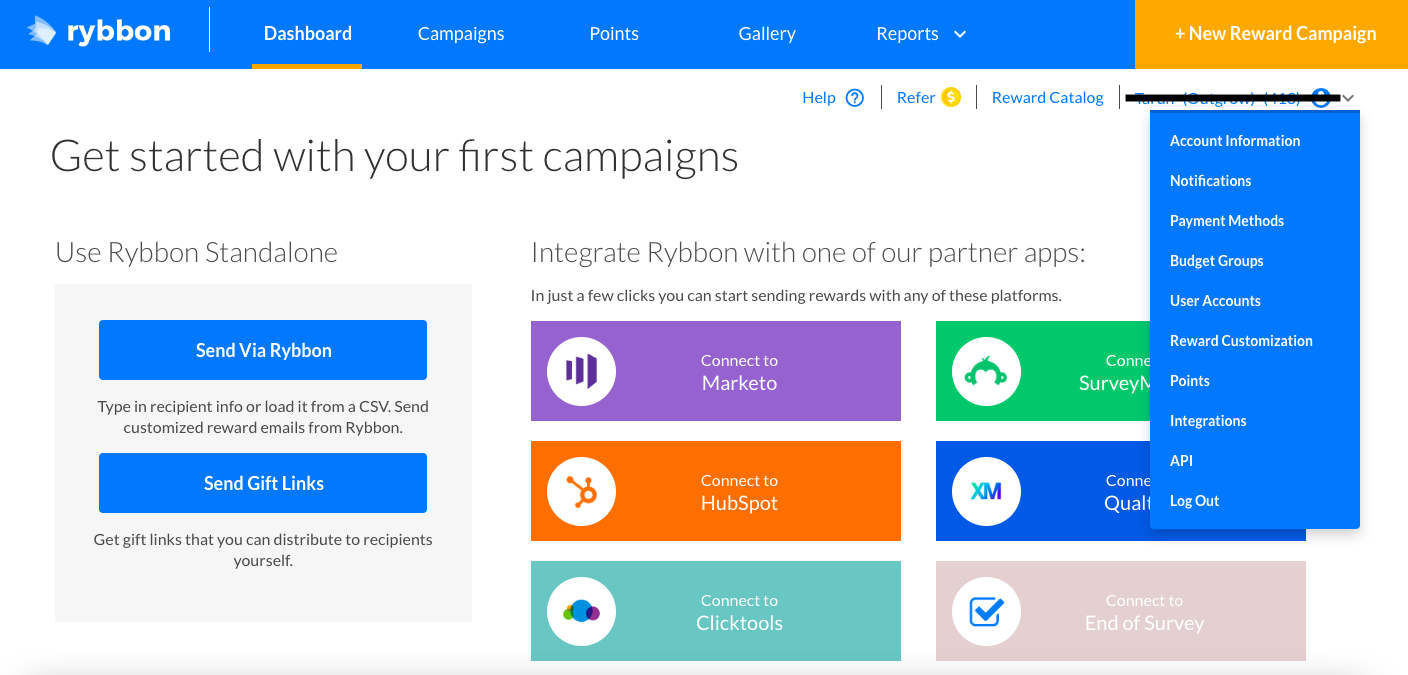
5. B. Click on the API option in the menu.
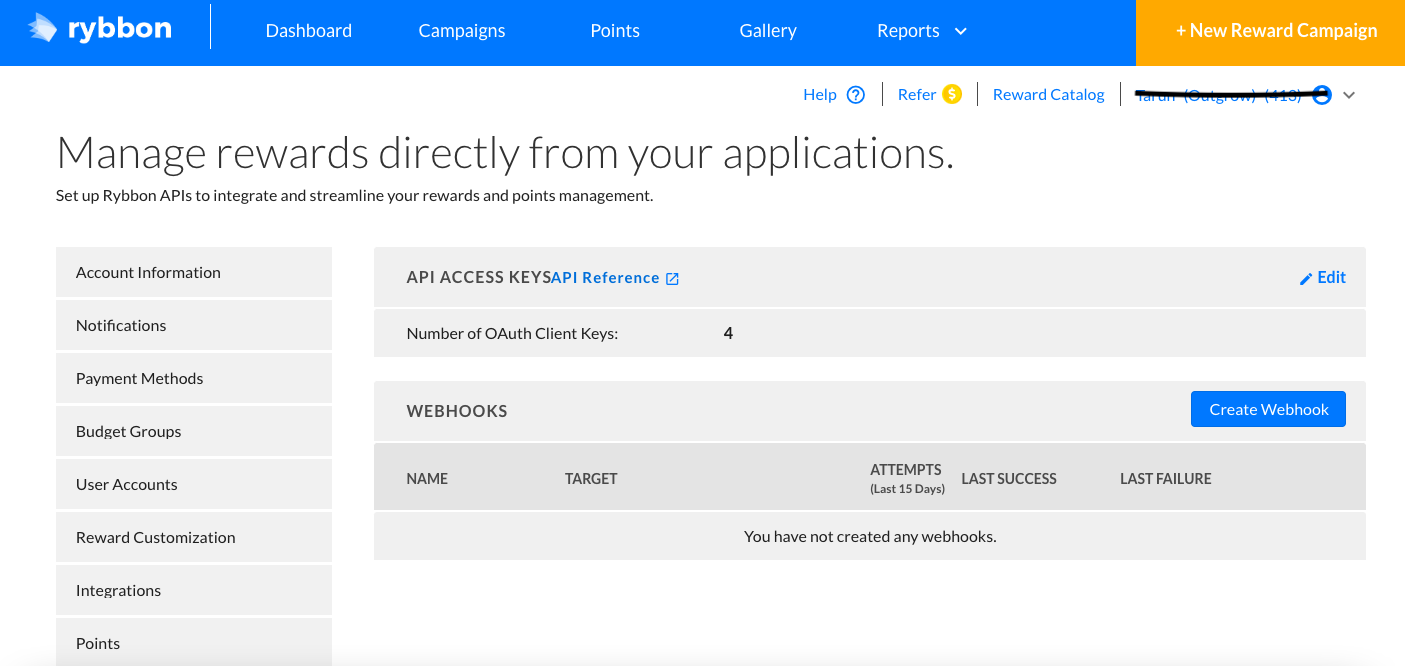
5. C. Click on Edit in the API Keys section.
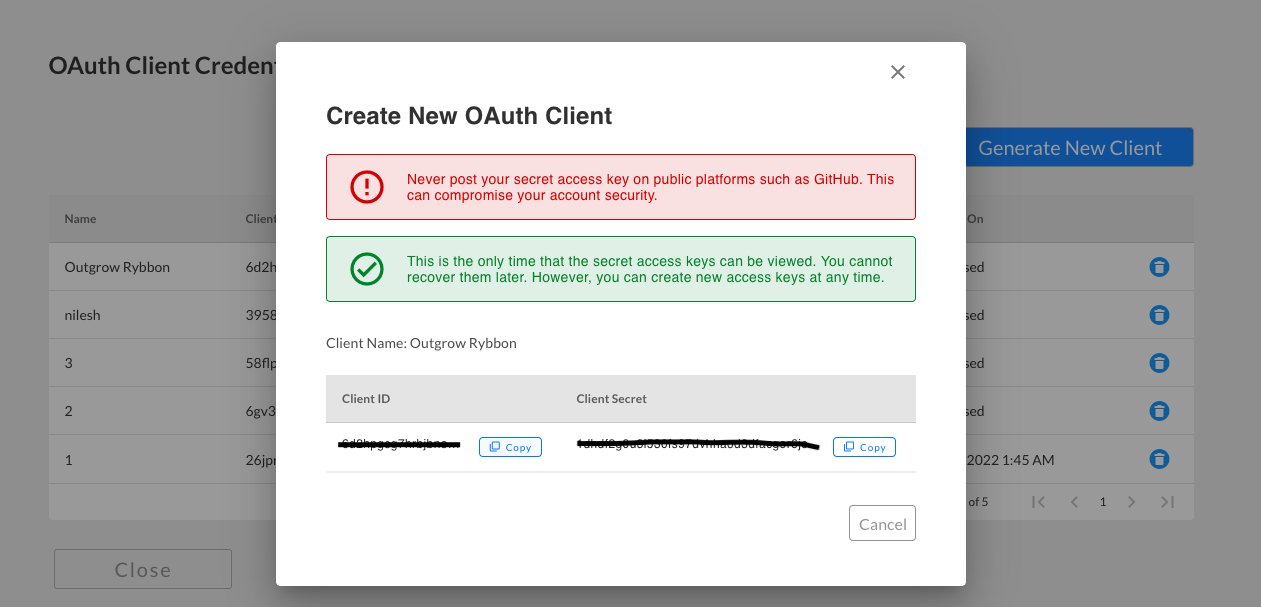
5. D. Now you can choose to use an existing Client ID or you can create a new Client ID by clicking on Generate New Client.
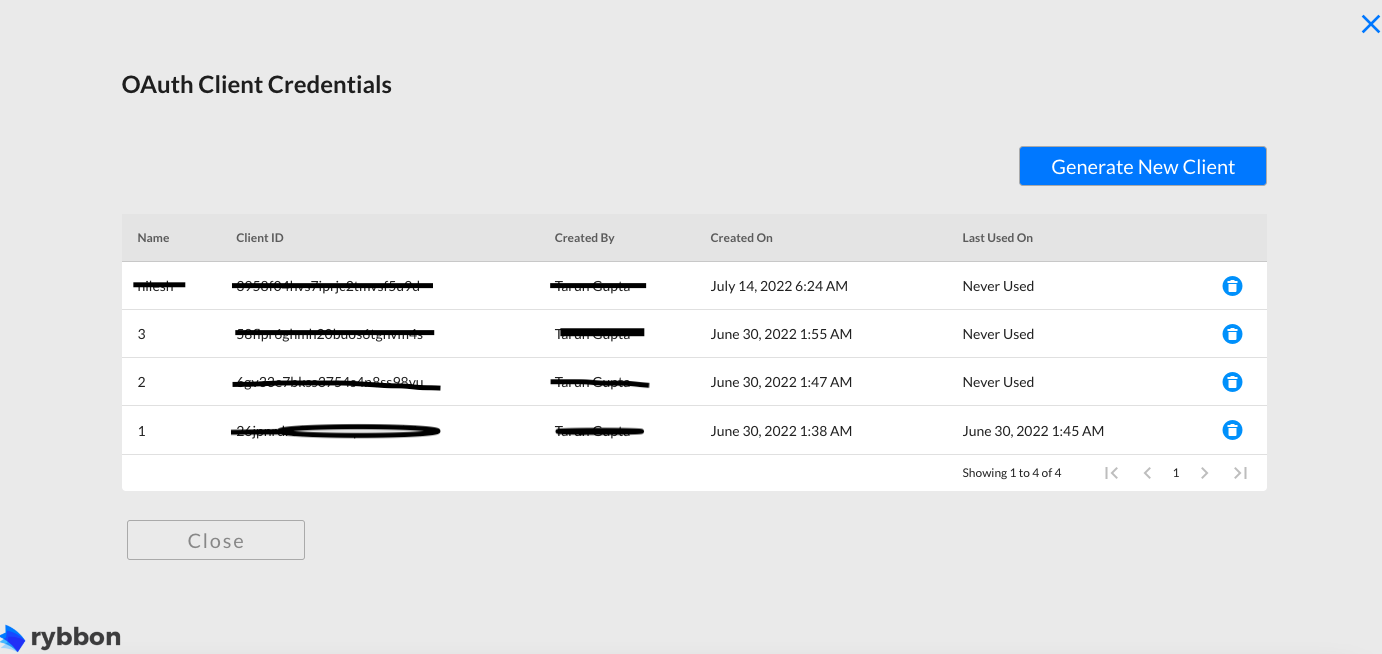
5. E. You can copy the Client ID and Client Secret Key and add them to your Outgrow account. Click on Authenticate With Rybbon to save the details.
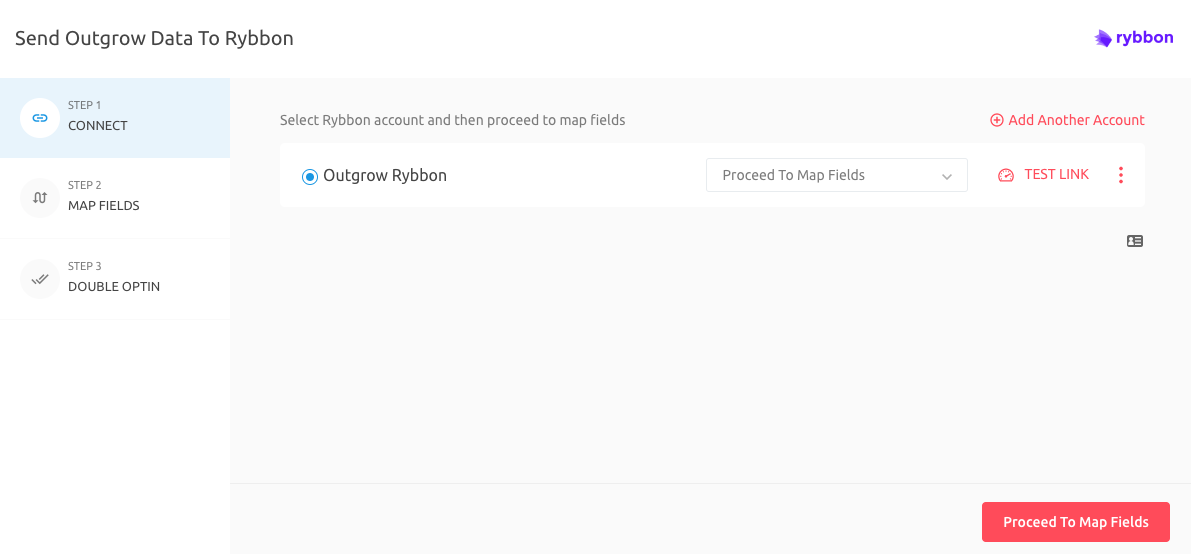
6. Once your account is connected, choose whether you want to Proceed To Map Fields or you want to Proceed To Map Segments.
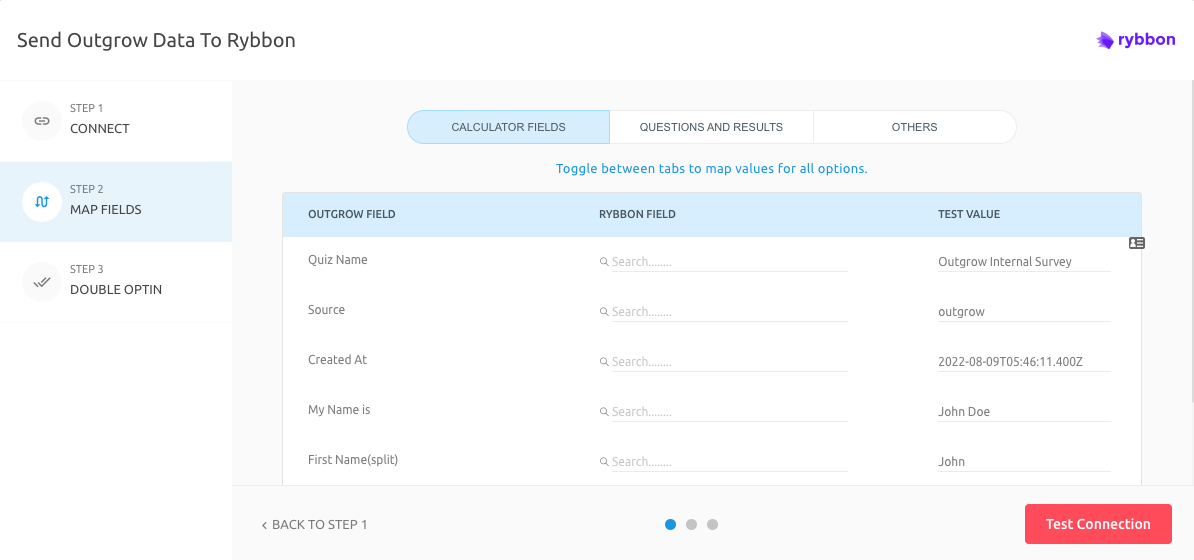
7. Map the respective Outgrow fields with the respective fields in Rybbon. Click on Test Connection to authenticate the field mappings.
IMPORTANT NOTE
We support both the Point API and the Campaign API offered by Rybbon.
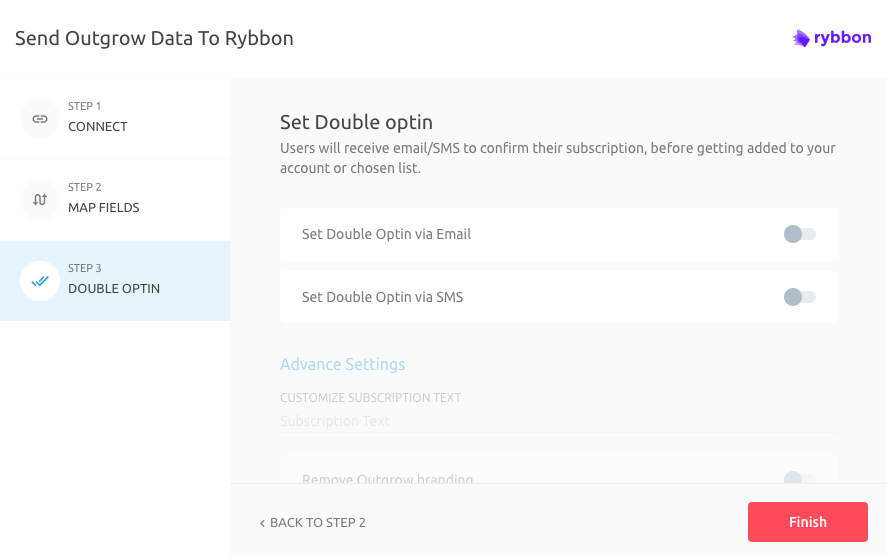
8. You can choose to configure Double Opt-In functionality if required, else you can click on Finish to save the configuration, and set the integration as active.
9. Your Rybbon integration is now active.

How to assign Points to your Outgrow Leads and add them to a Campaign
We support both Points API and Campaign API offered by Rybbon. When you choose to use Points API and add the leads collected in Outgrow as contacts under Points, you can follow the below-mentioned steps to add the contacts to a campaign using Points based rule:
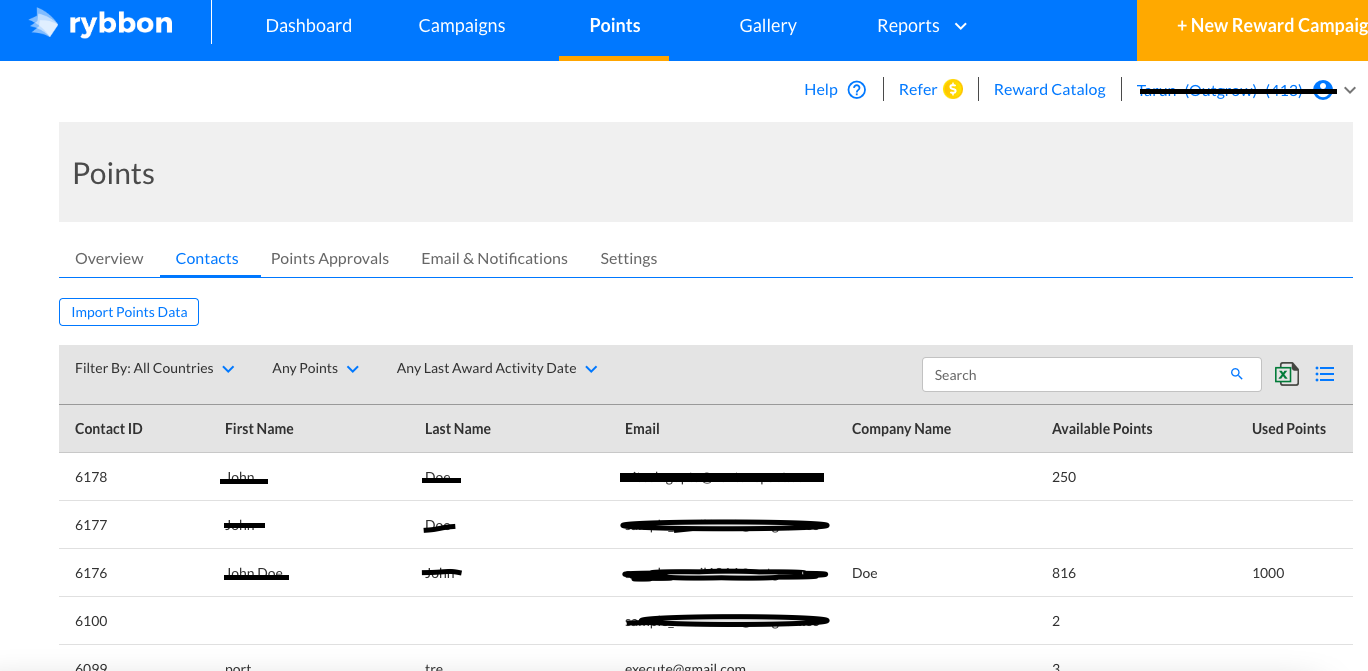
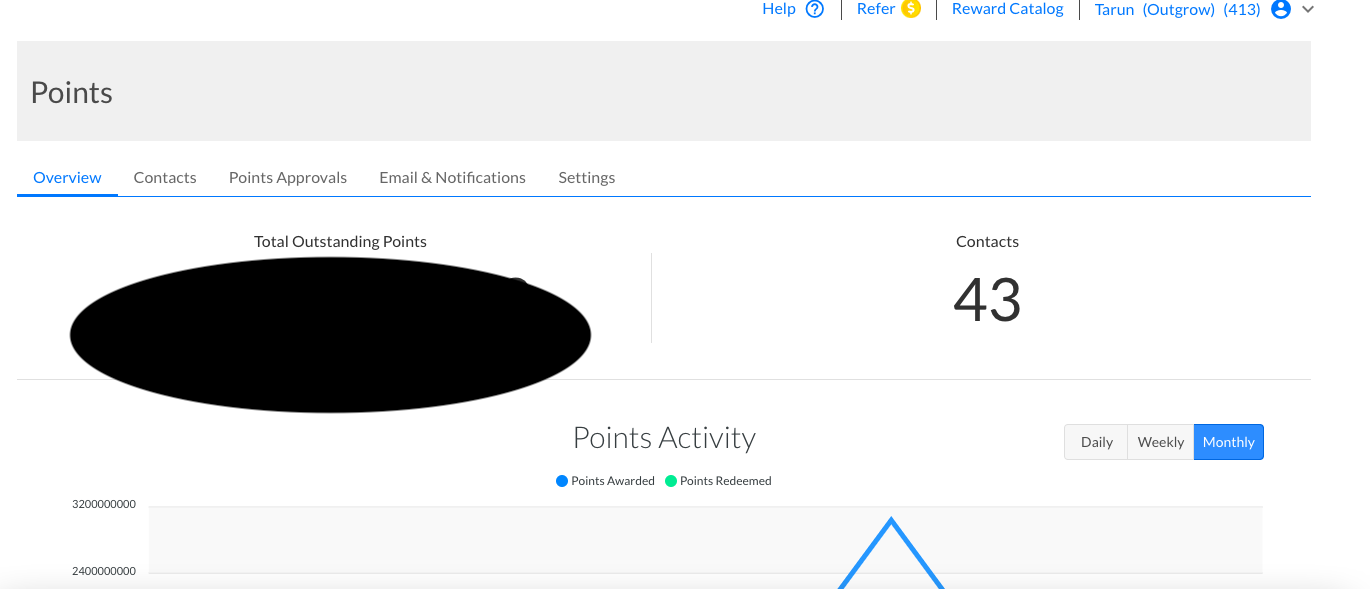
1. In the Points section, click on the Settings sub-tab.
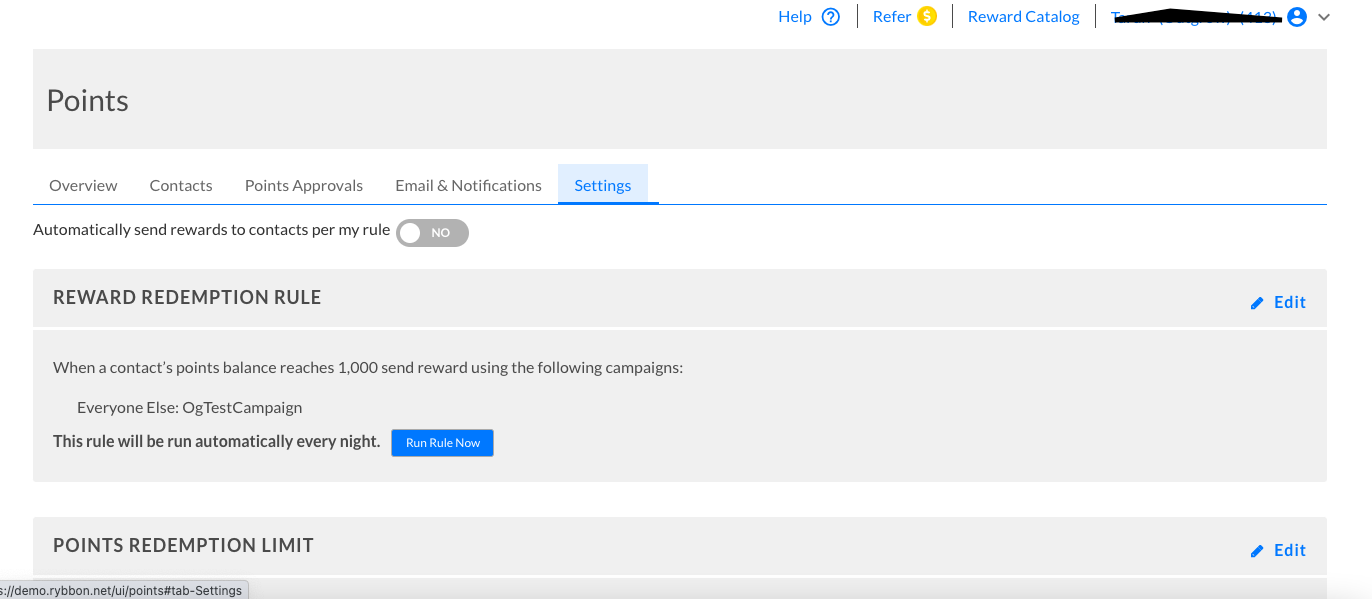
2. Click on Add Rule to add a new Reward Redemption Rule. In the screenshot below, as we have already added a new rule, we will click on Edit to guide you through the setup.
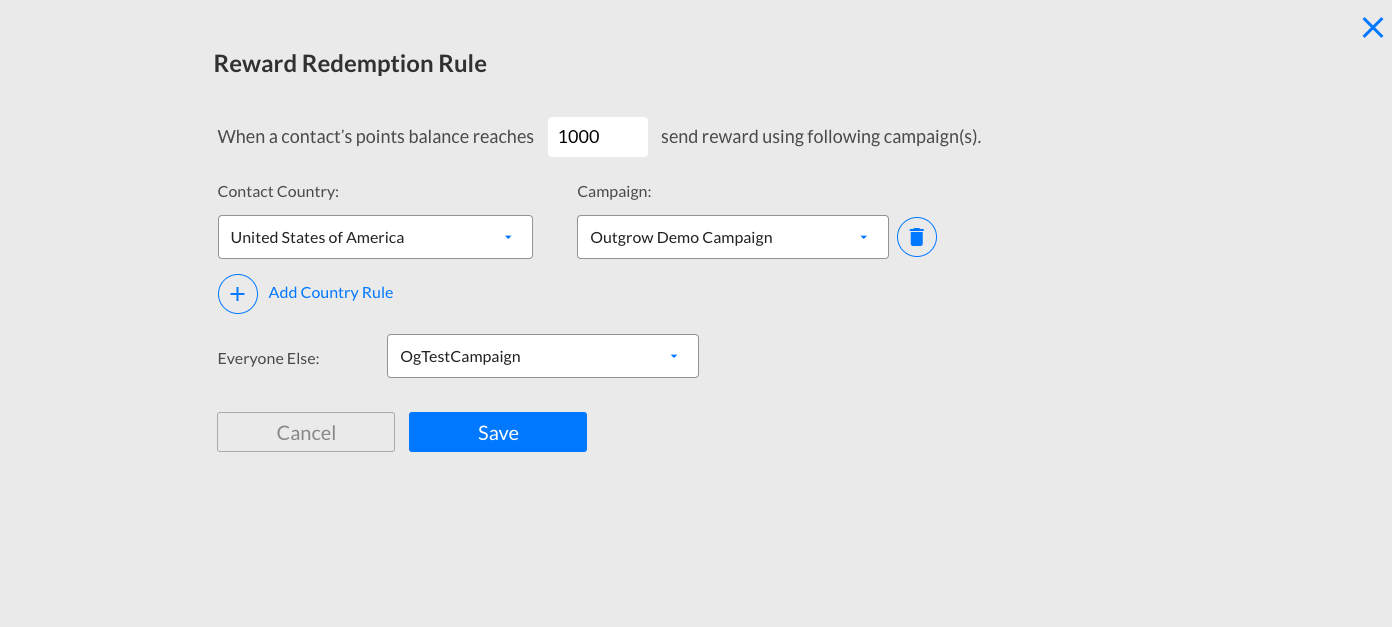
3. In the Reward Redemption Rule pop-up window, click on Add Country Rule to create a new rule.
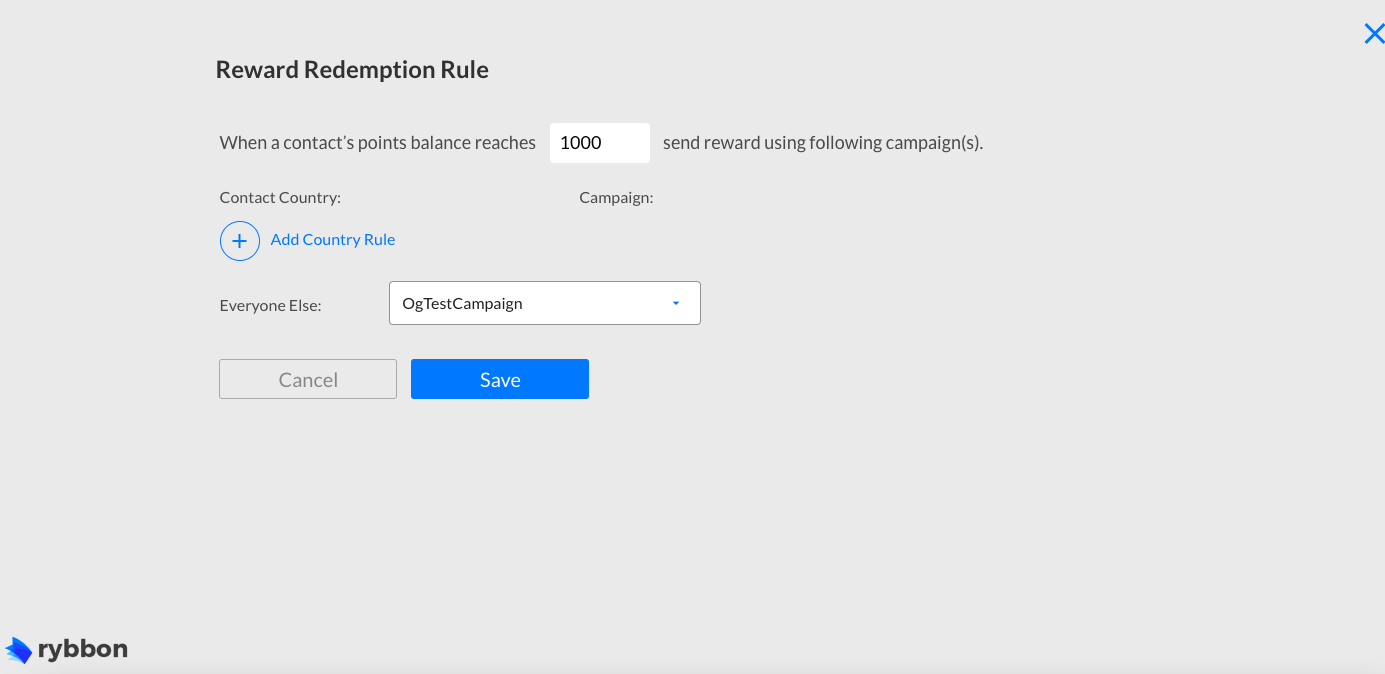
4. You can specify the points that when achieved by a contact, will activate the redemption rule. Specify the Country that the contact needs to belong to, to be associated with the rule, and select the Campaign in which the contacts will be added. For the contacts that do not belong to the specific country select the campaign that the users will be added to. Then click on Save.
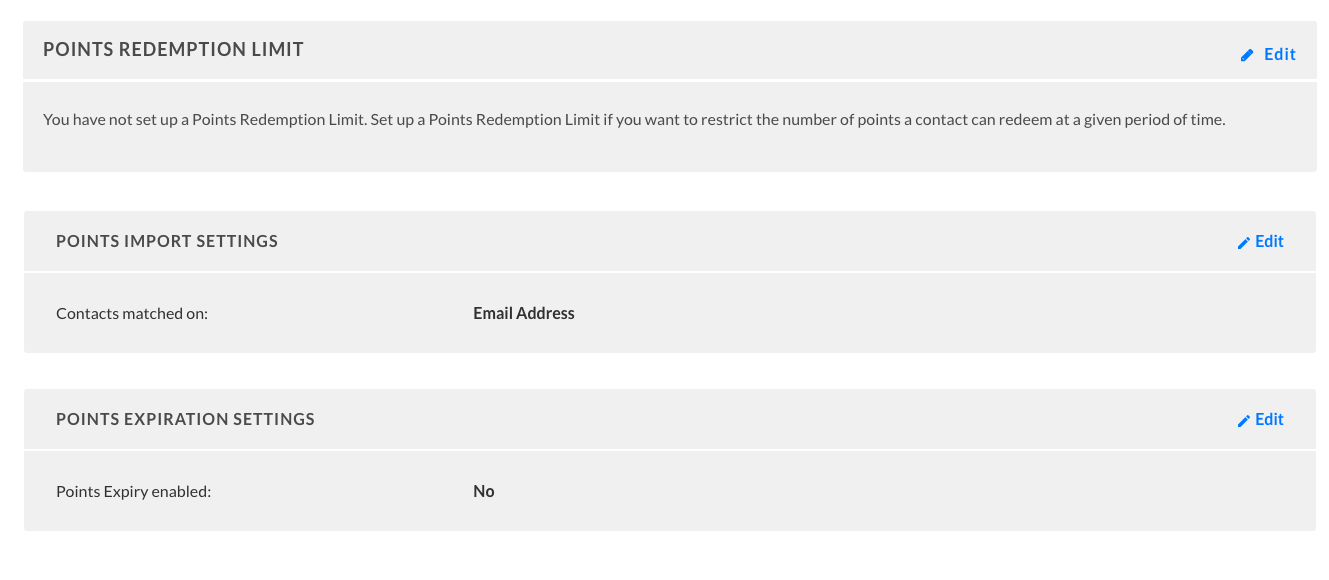
5. You can also specify the Points Redemption Limit and Points Expiration Settings. You can also specify the Point Import Settings which will specify the criteria (Email Address or Reference ID) using which the duplication will be controlled while assigning points.
Additional integrations related actions
Once the integration is configured and active, you can navigate to the Qualtrics block to see more actions that can be performed on Rybbon integration after it has been set up:
A. Re-configure: In case your Rybbon credentials have changed or you want to connect Outgrow with a different Rybbon account, then you will have to Reconfigure your Rybbon integration to continue getting Outgrow leads in your Rybbon account.
B. View Mapping: If you need to go over which fields you have mapped to configure your Outgrow & Rybbon integration, you can click on View Mapping. you can then toggle between tabs to view the mapping across all fields.
C. Task History: This contains the list of all the leads sent to Rybbon. The leads which are in queue to be synced will have the status Waiting and those which have failed to sync due to some reason will be shown as Failed. If due to some error in connection your leads from a content piece have not been sent to Rybbon then you can Sync the leads to your Rybbon account after re-configuring. All the leads which were not sent to your account will be sent to Rybbon when you sync. If for some reason, even after syncing you do not see your lead on your Rybbon account then reconfigure once and then Sync.
D. Filter: In case you would like to set up a quick filter using First Name, Last Name, and Email Address, to see if the lead was sent to Rybbon or not, you can use this feature.
Important
1. For every Outgrow content piece you create, you will have to activate or deactivate the integration from the Configuration section in the builder, in order to start or stop sending leads collected in Outgrow to Rybbon.
2. Email field is a required field and needs to be mapped in order for the integration to be configured.
In case you have any questions or concerns, please feel free to reach out to us at [email protected], and we will be happy to assist you further.
Updated over 1 year ago