Setting Up Lead Routing in Outgrow
All the leads that you collect using Outgrow, can now be routed to the appropriate team members. This can be done by creating segments in Outgrow and then map these segments to respective lists in your CRM tool. You can also map the name of the segment with the relevant field in your CRM or Marketing Automation tool so that you are able to set rules for routing leads within your sales team.
First Step: Set up your Outgrow Content as per your requirements
1. Log in to your Outgrow account, and from the main dashboard choose the content piece that you want to build. For example, In this case, we will build a calculator.
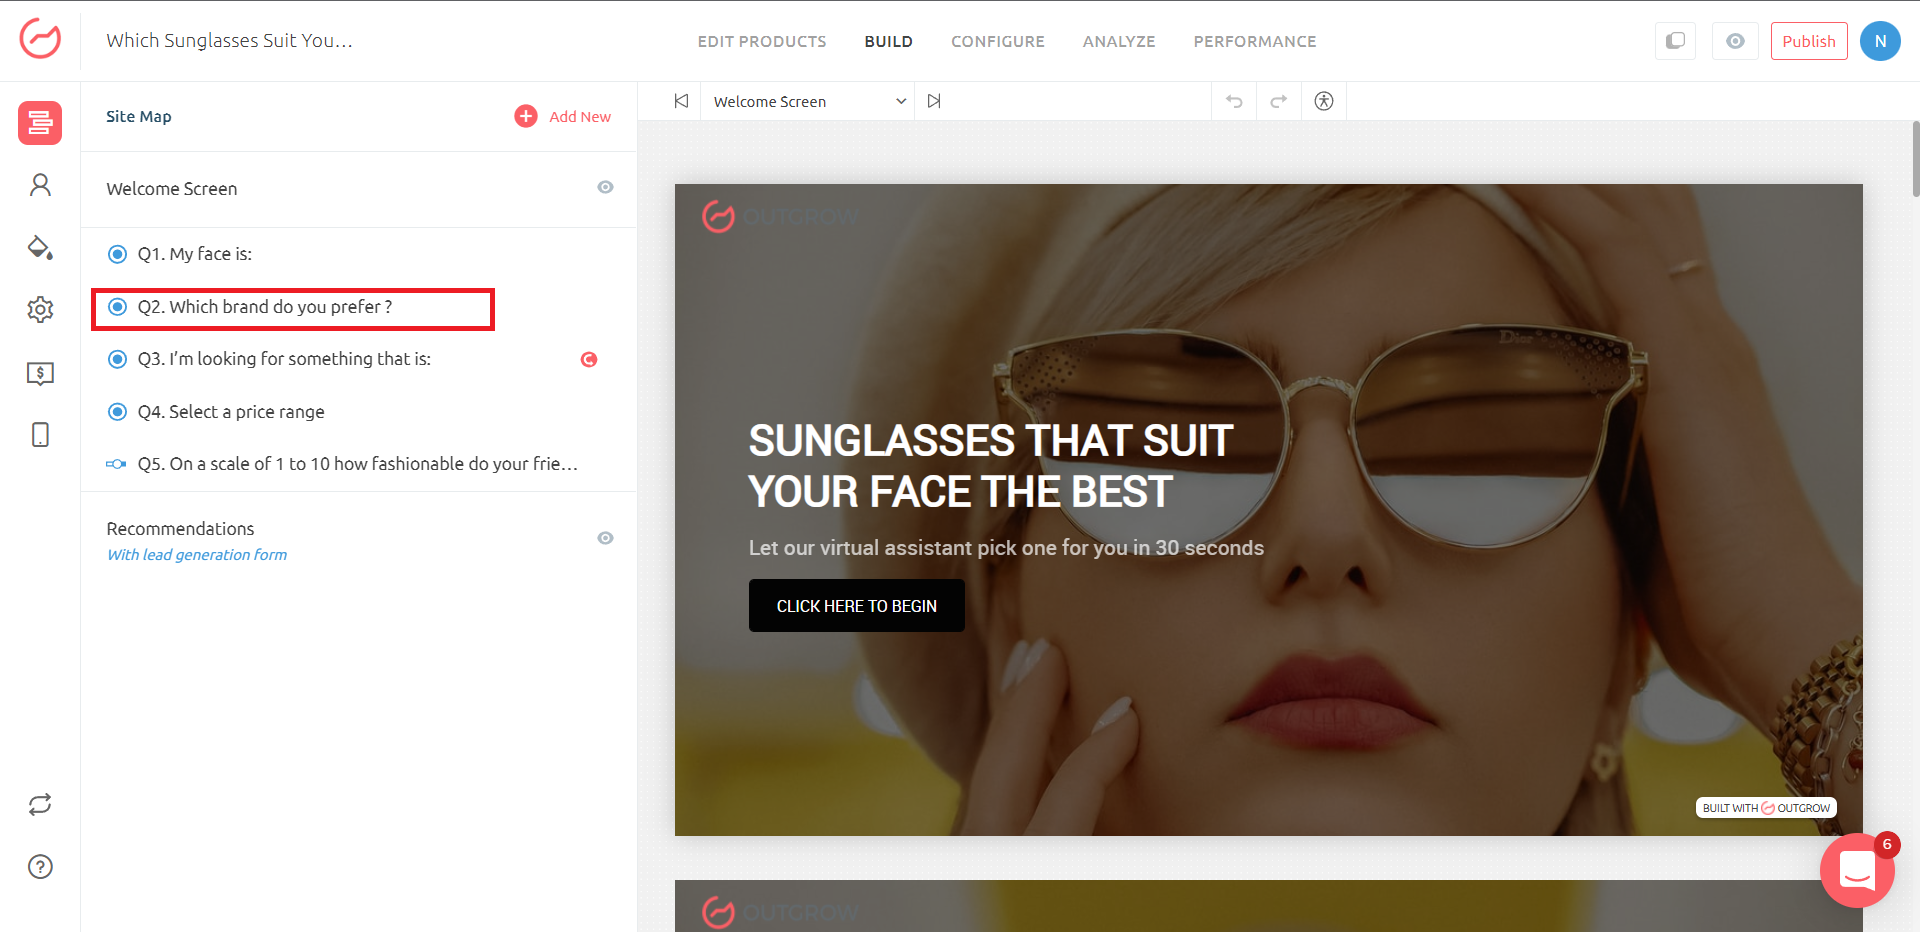
2. Setup the questions as per your requirements. In this case, we have set up a question that asks for the brand preference, and we will be setting up the segment using this information.
Second Step: Create Segments in Analytics
1. Navigate to the Analyze tab in Outgrow and then go to the User Details sub-tab. In this section, you will have to create a filter first. This can be done by clicking on the Add Filter option.
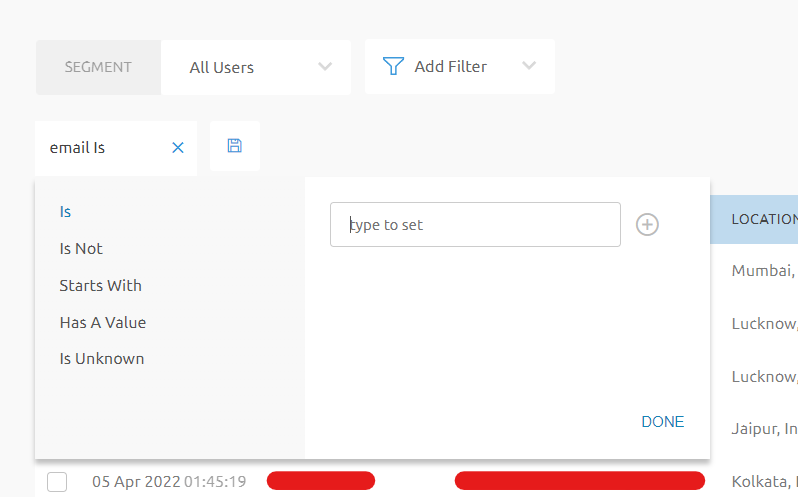
2. Once you click on Add Filter, choose the unique parameter that you want to use to filter the leads. In this case, we want that the leads should be transferred to Person A, Person B, Person C. So we will be setting up a filter matching the criteria as:
A. If Q1 does not equal black then the lead should go to the enterprise account manager, ie; Person A.
B. If Q1 = Black, then the lead should go to the mid-market account manager, ie; Person B.
C. If Q1 = Yellow then the lead should go to the account manager handling small businesses, ie; Person C.
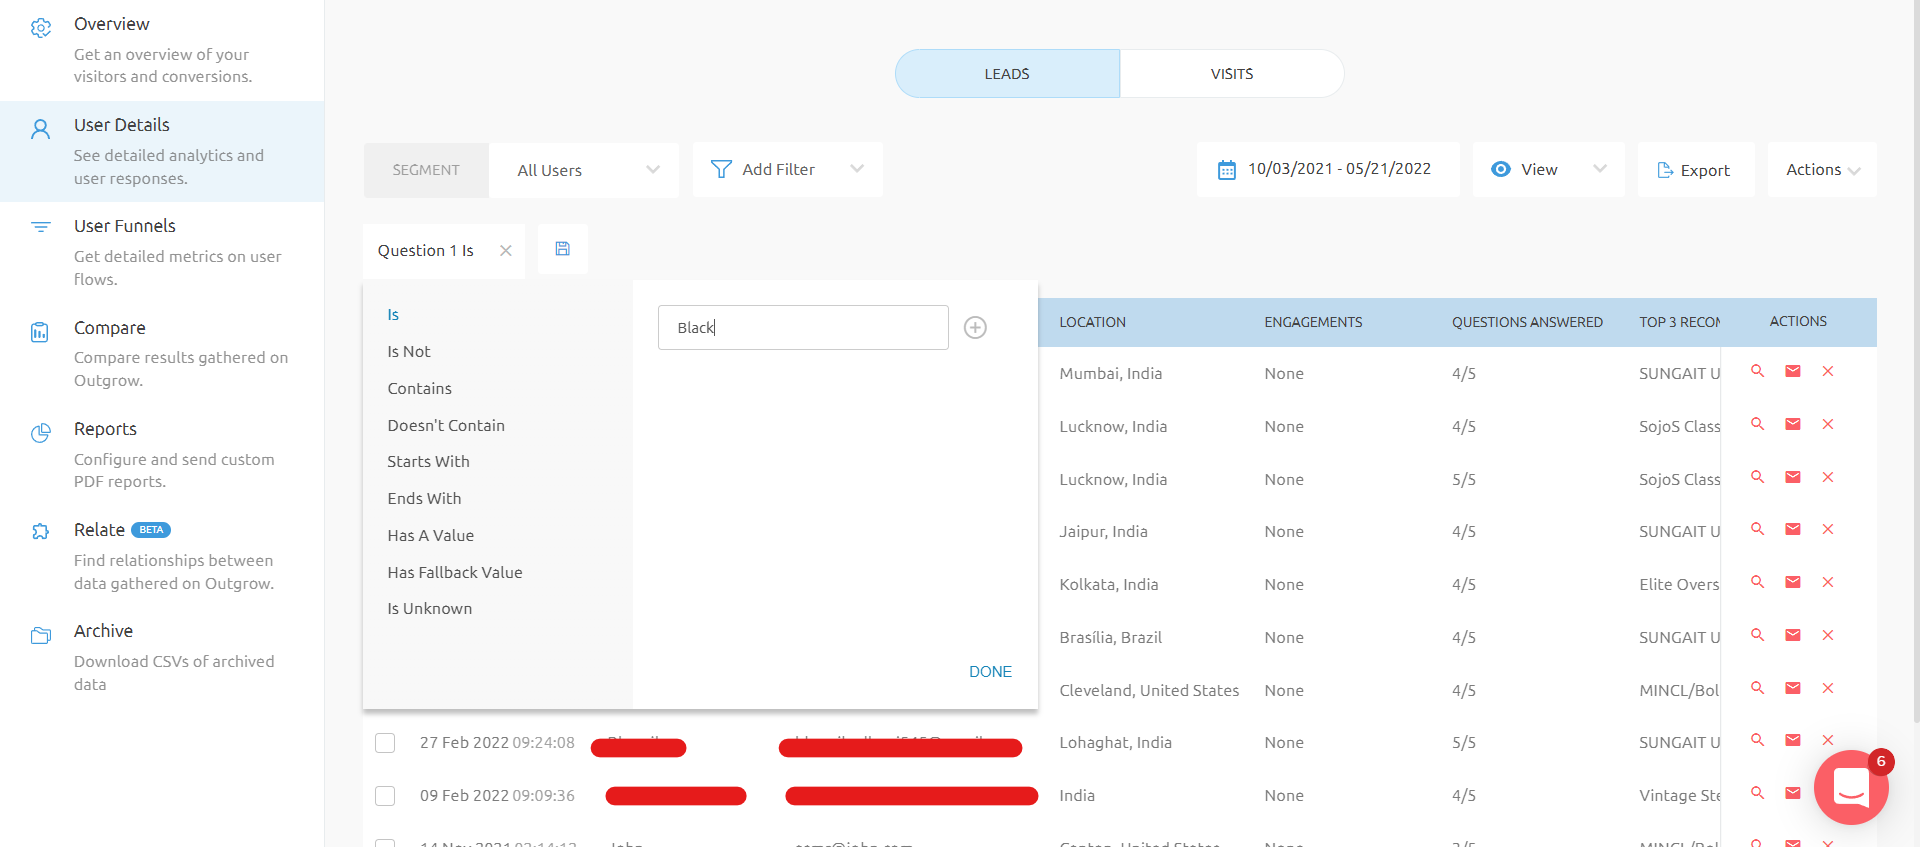
3. Once the leads are filtered, go ahead and save the filter by clicking on Save Segment. Assign a unique name to the filter so that it is easily identifiable.
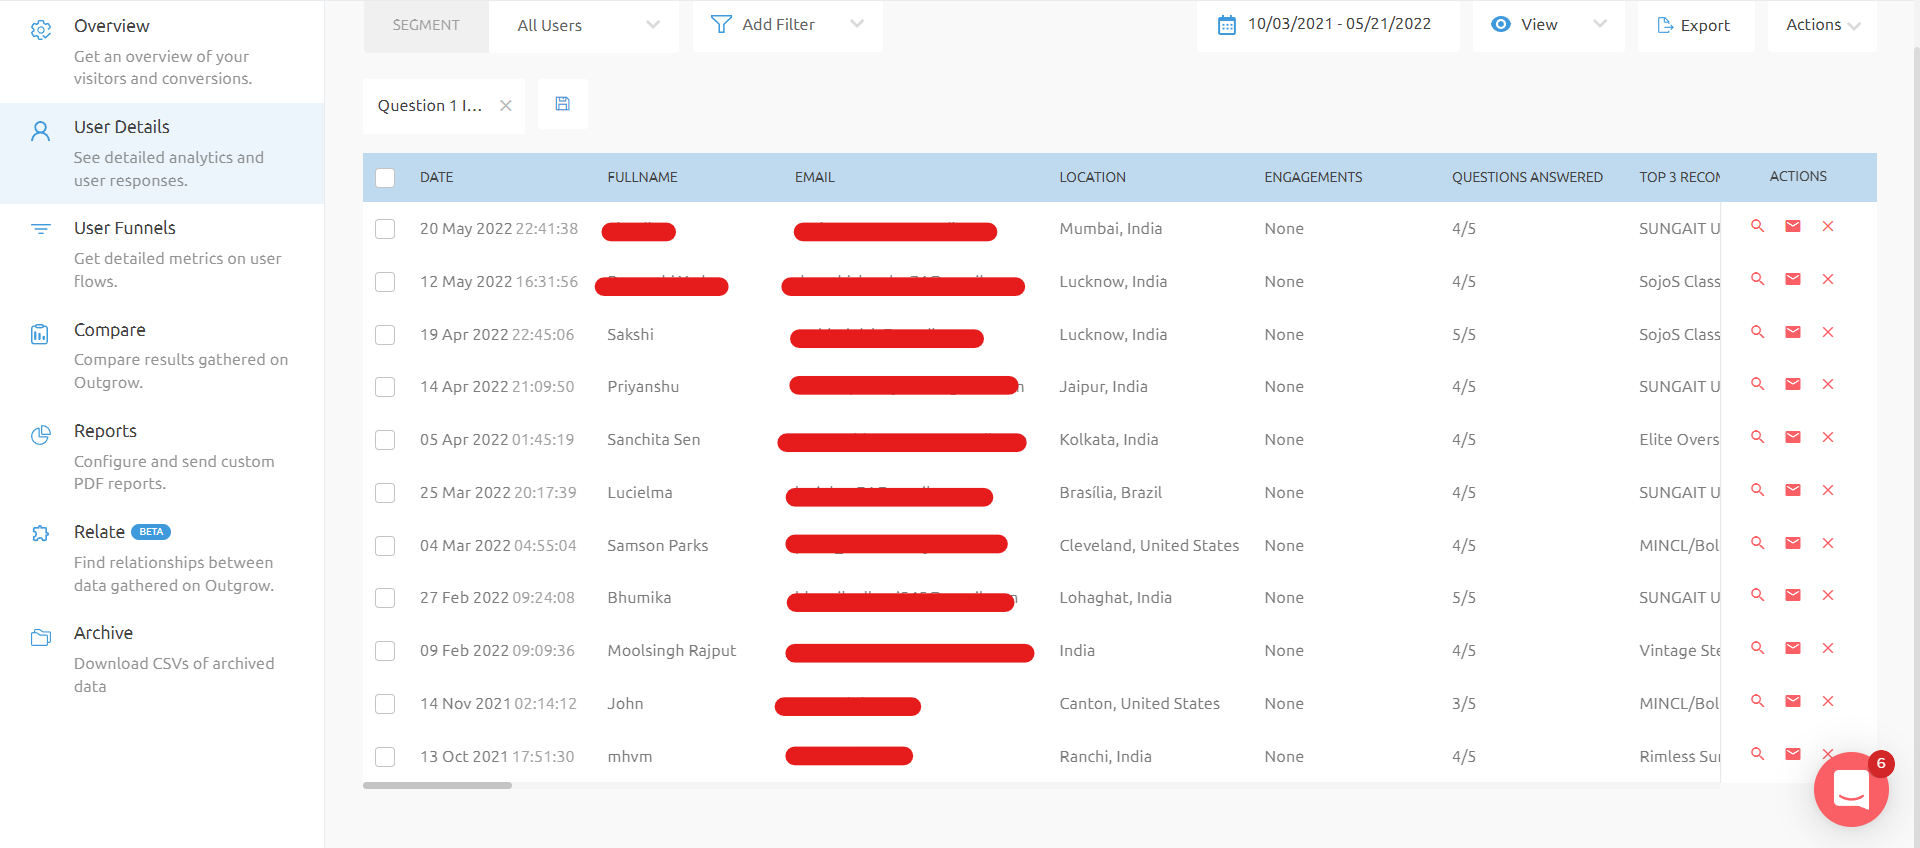
NOTE: Once your segment is created, you can select it from the segment drop-down to see the specific leads at any point in time.
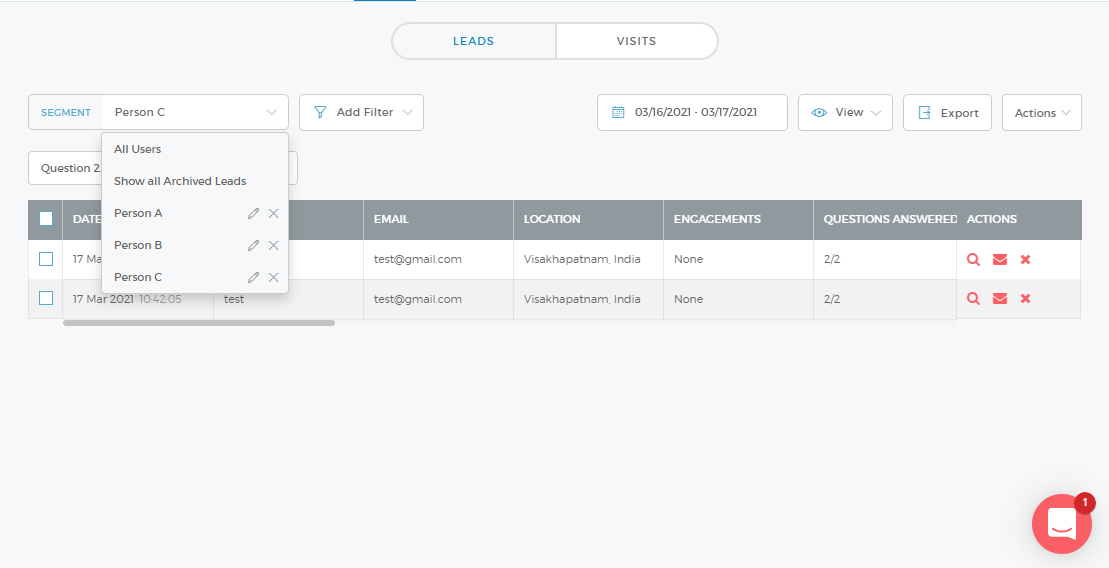
You can create multiple segments like this and save it in the User Details section.
Third Step: Creating A Custom Variable
1. Now to map the name of the segment you first need to create a Custom Variable. To do this you can navigate to the Configure tab and then go to the Integrations sub-tab. Here navigate to Custom Variable.
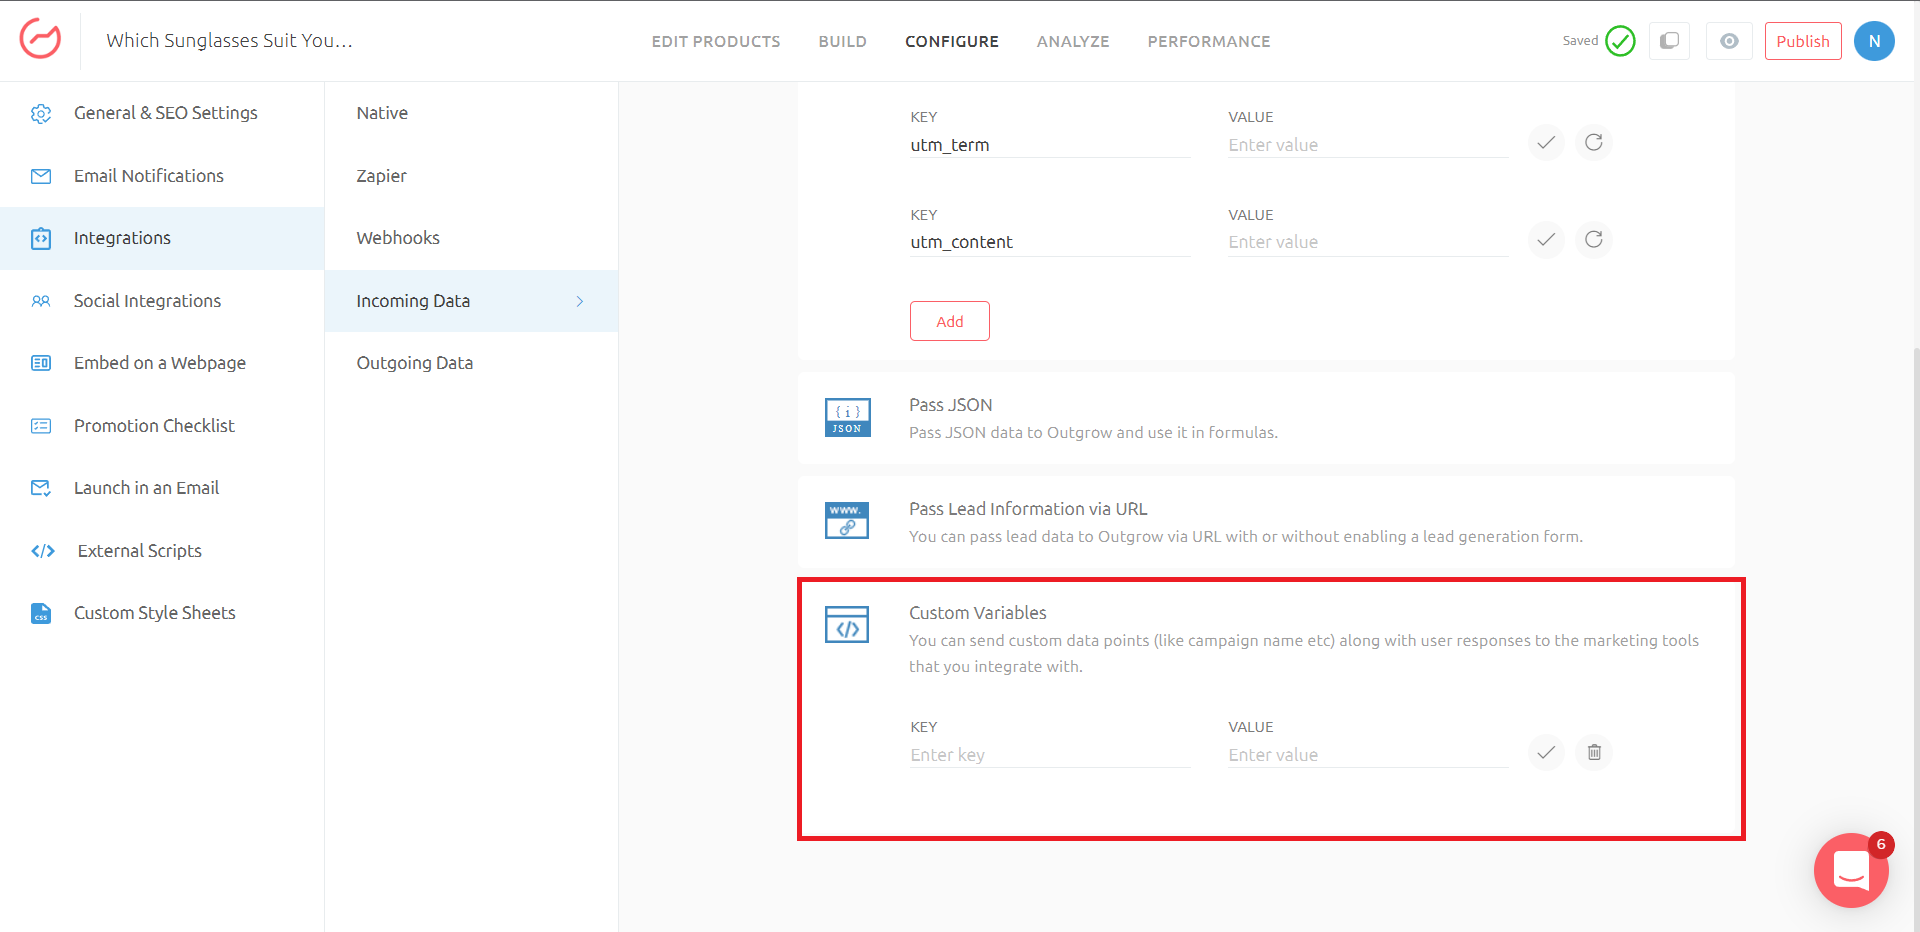
2. Scroll down to the Custom Variables option. Now, specify the Key and the Unique value for the key. In this case, we have specified Key as the respective lead type name and Value as the sales rep name.
NOTE: For each Segment Name, you will have to create a Custom Variable Key with a unique Value.
Fourth Step: Mapping Segment and Segment Name in your CRM
1. Now you want to map leads from the segment that you created in Outgrow, with the leads in your CRM list. To do this you need to go to the Configure tab and then navigate to Integrations followed by navigating to the Native Integrations sub-tab. In this case, we are using SalesForce, as the CRM tool.
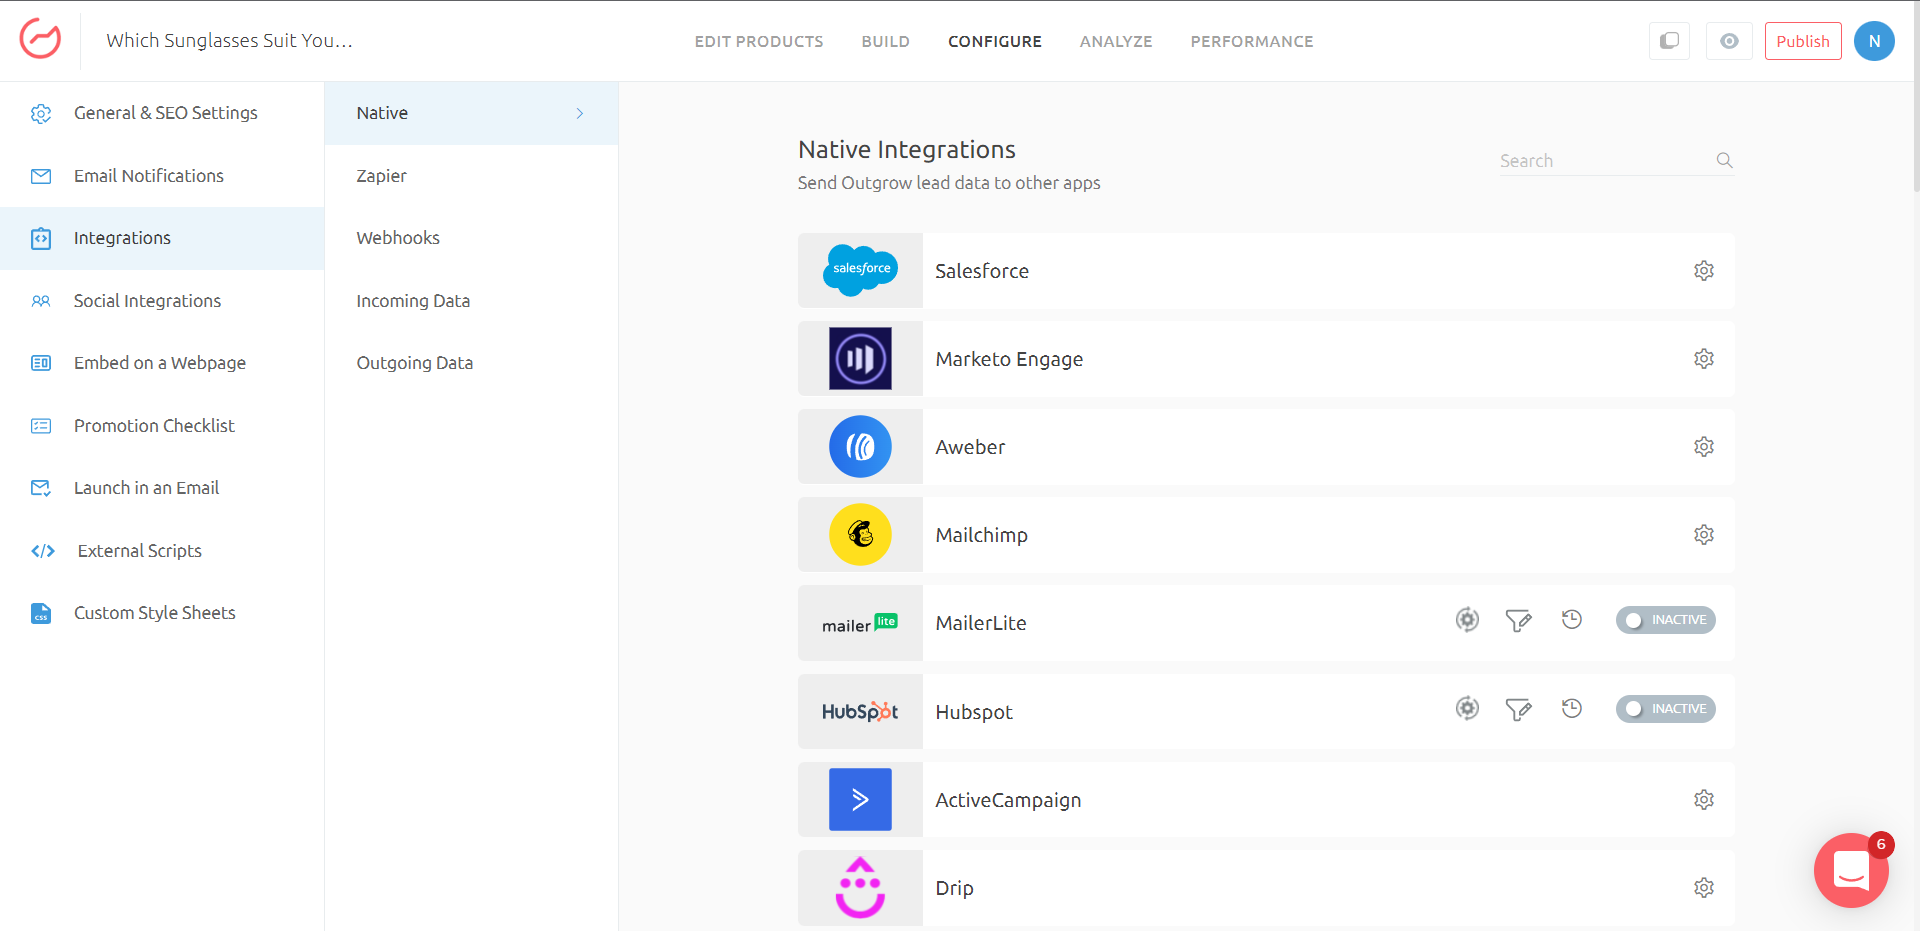
NOTE: In case you have already configured the integration you can click on Reconfigure button, otherwise you can click on the Configure button.
2. Setup your SalesForce account, this will be where you send your Outgrow leads. Once the account is configured, choose one of the two options Proceed With Object or Proceed With Segments.
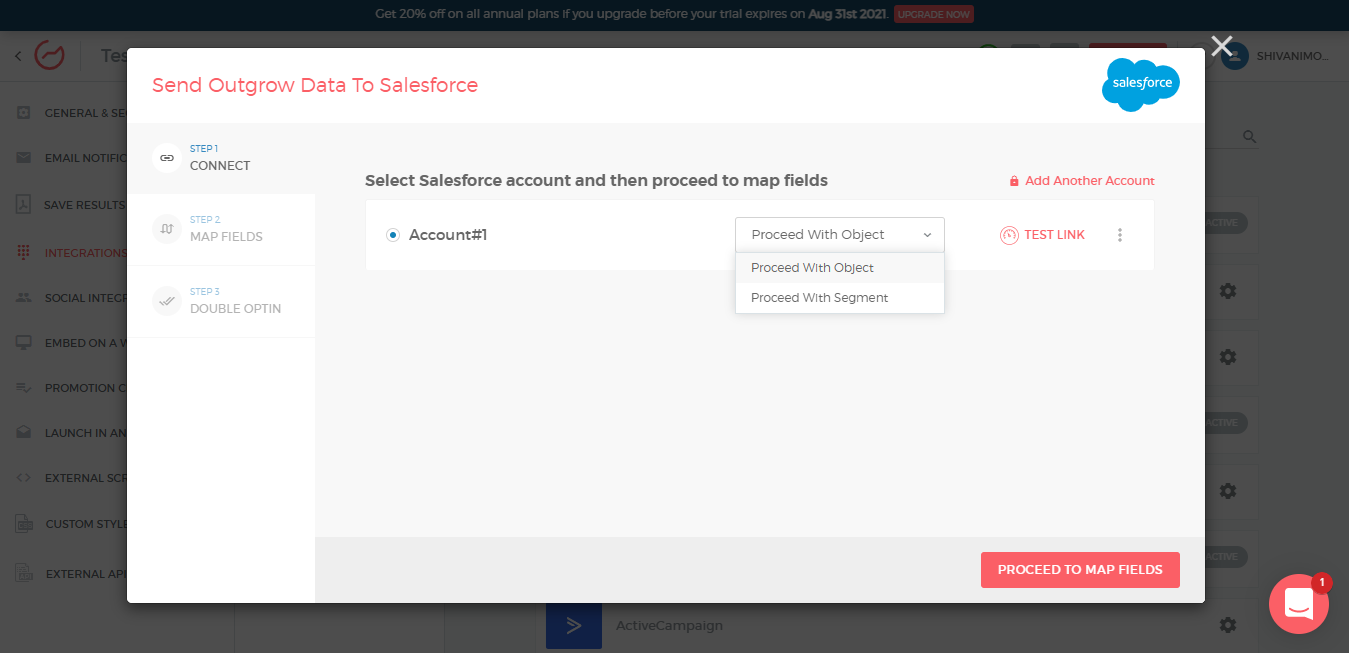
3. In this case, we will Proceed With the Segment. You can select the name of the segment in Outgrow from which the leads will be passed on, and also choose the list in SalesForce where you want the leads to be added.
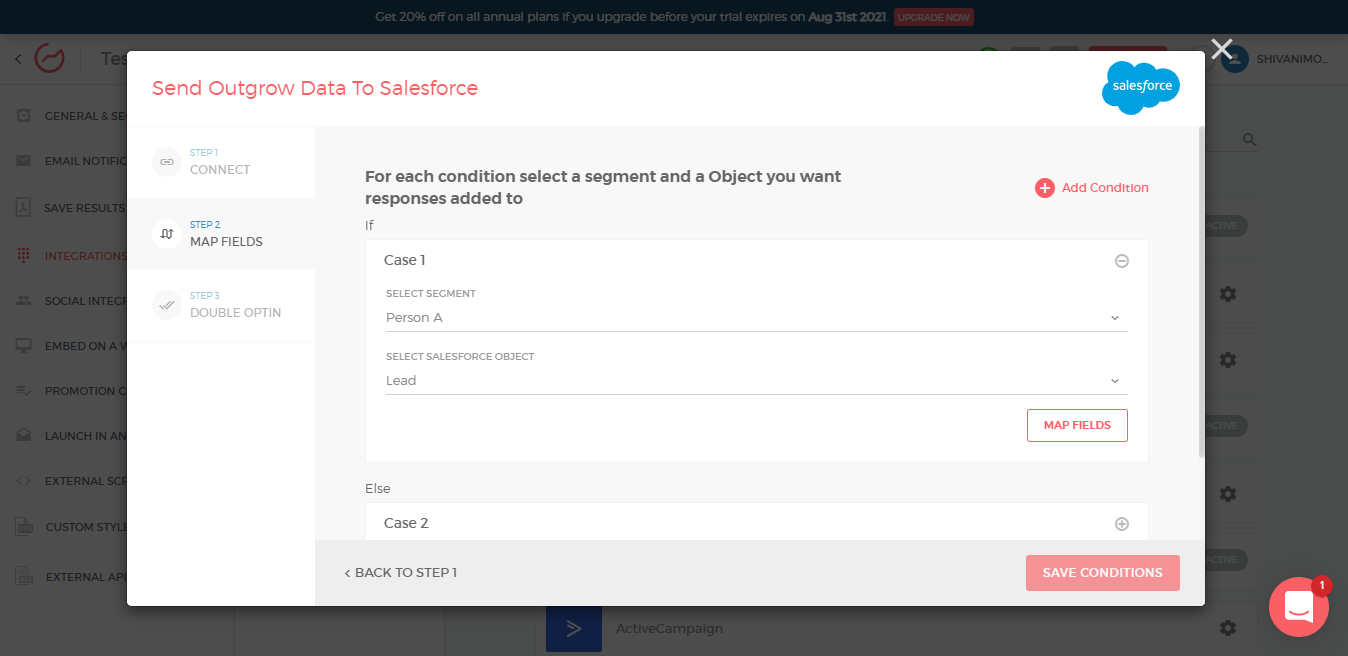
4. Your Custom Variable name will be listed in the Field Mapping section, and you can map the respective Custom Variable for the particular segment with the respective field in SalesForce.
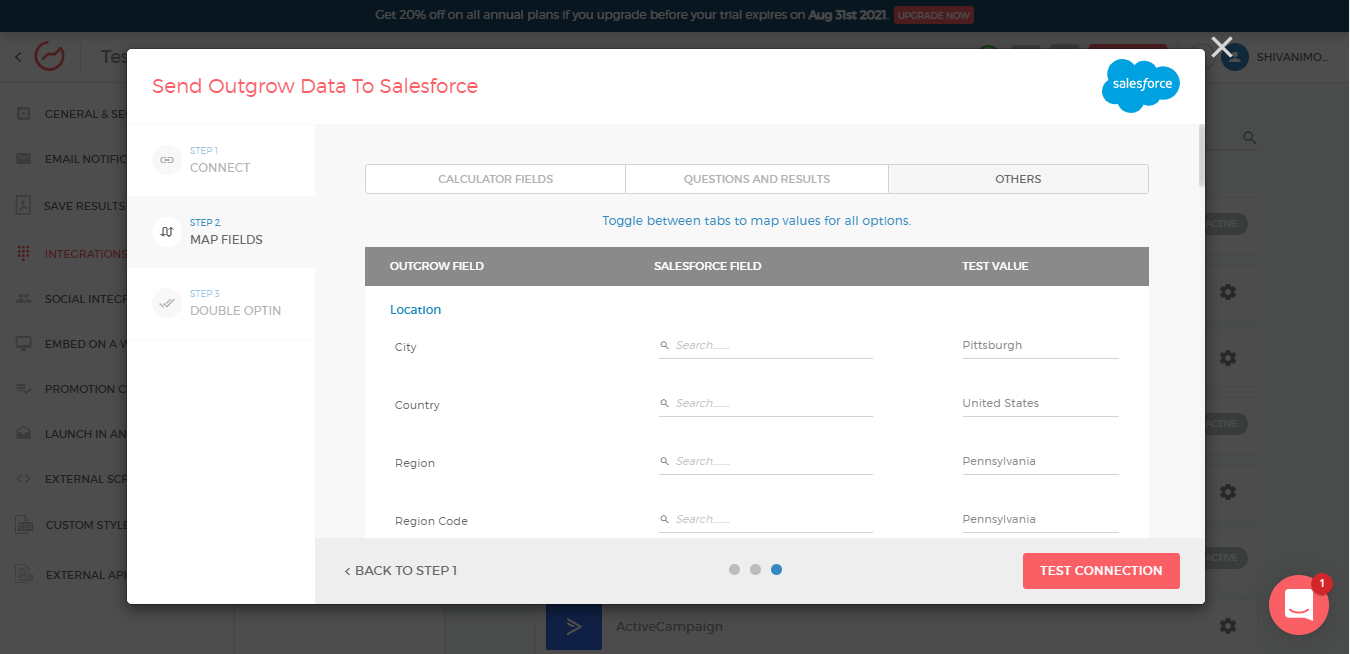
Once the setup in Outgrow is complete, you can go to the respective CRM tool and set up routing rules using the segment name that we just mapped.
For any questions, feel free to reach out to us at [email protected], and our support team will be happy to help!
Updated over 1 year ago