How to Create a Graded Assessment | Complete Guide
In Outgrow, you can now set up assessment-style quizzes. These are known as Graded Quizzes, and in this document, you can learn more about how to set it up.
Taking the first step towards creating your Graded Assessment by choosing a Design Layout or Premade Template
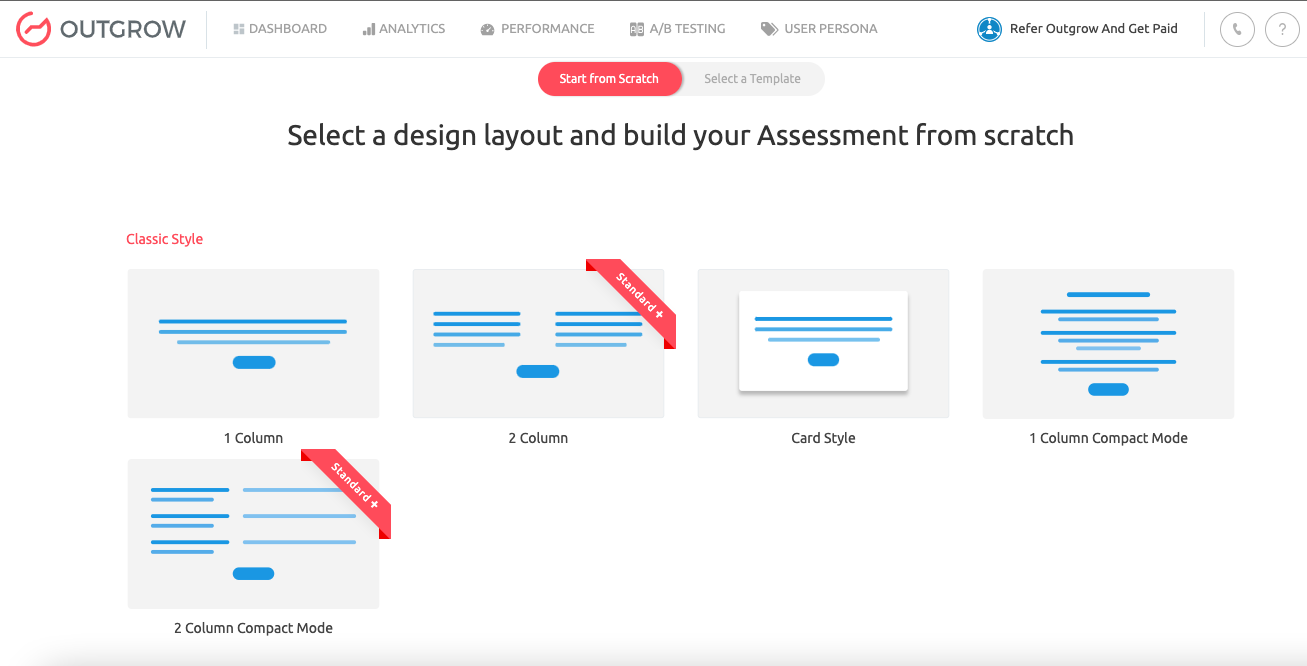
Once you decide to create a Graded Assessment, you first need to choose whether you want to choose a Design Layout and build everything from Scratch, or you want to use a Premade Template from the design library.
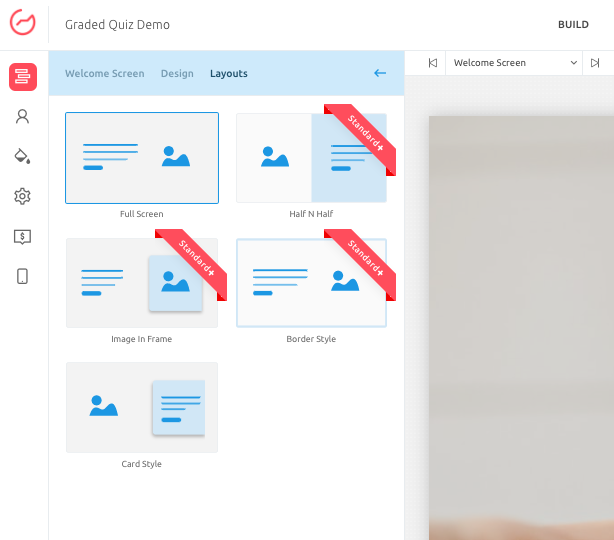
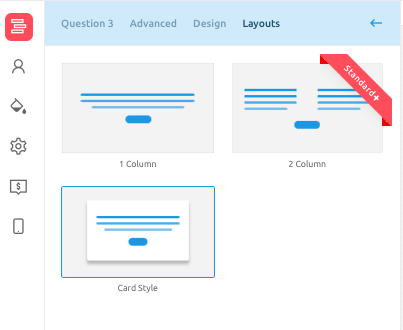
A. Selecting a Design Layout: In this section, you can choose the type of design layout that you want to use for your Graded Assessment. You can choose between 1 Column, 2 Columns, and Card Style layout.
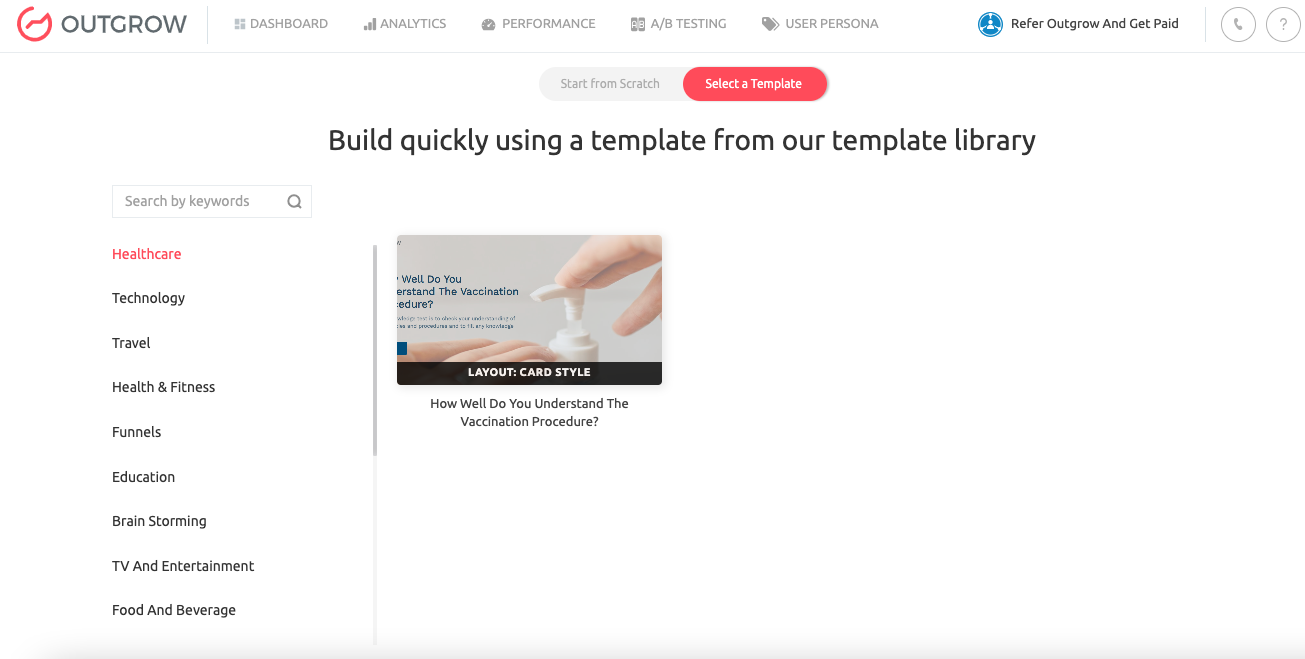
B. Selecting A Premade Template: You can browse through our library of premade design templates, categorized according to industry and use cases, to find the perfect design for your needs.
Designing the Welcome Screen & finalising the Lead Form placement
After selecting the design layout, the next thing that you need to do is to configure the text and fields that will be displayed on the Lead Form and Welcome Screen, and also finalize the design for the Welcome Screen and the overall design.
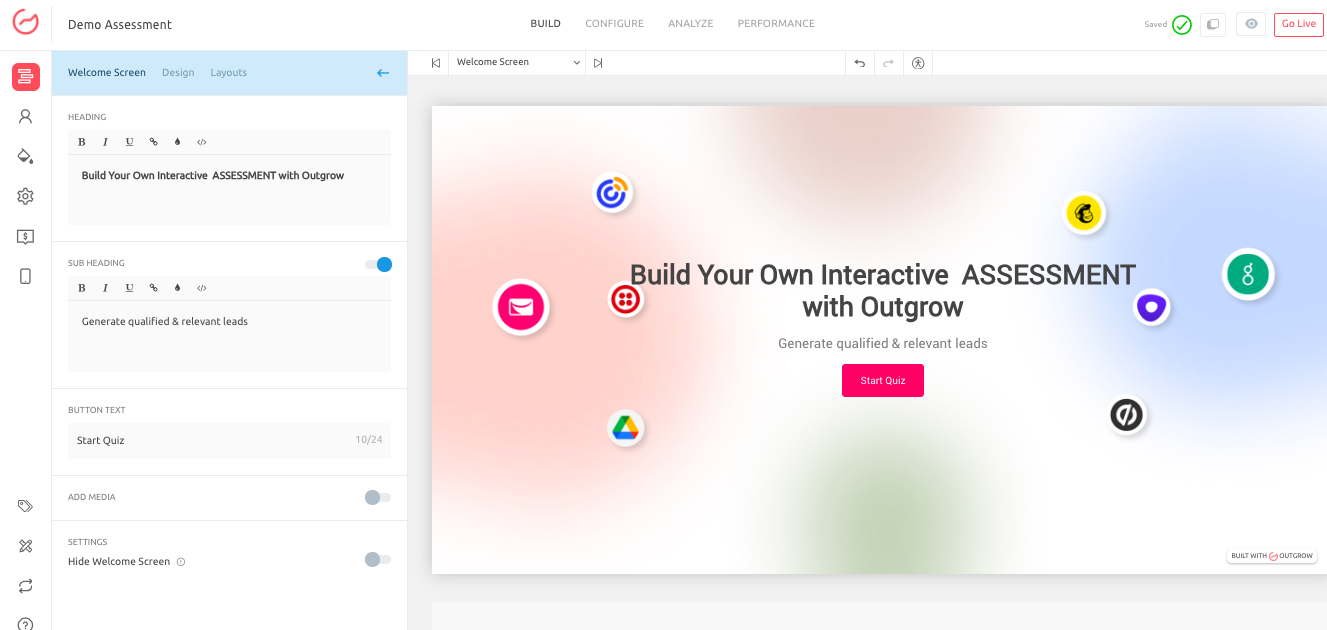
A. Setting up your Welcome screen: In this step, you will choose the heading and sub-heading that you would like to display on the Welcome page.
NOTE: You can hide the Welcome screen if you want to show the questions directly to the user.
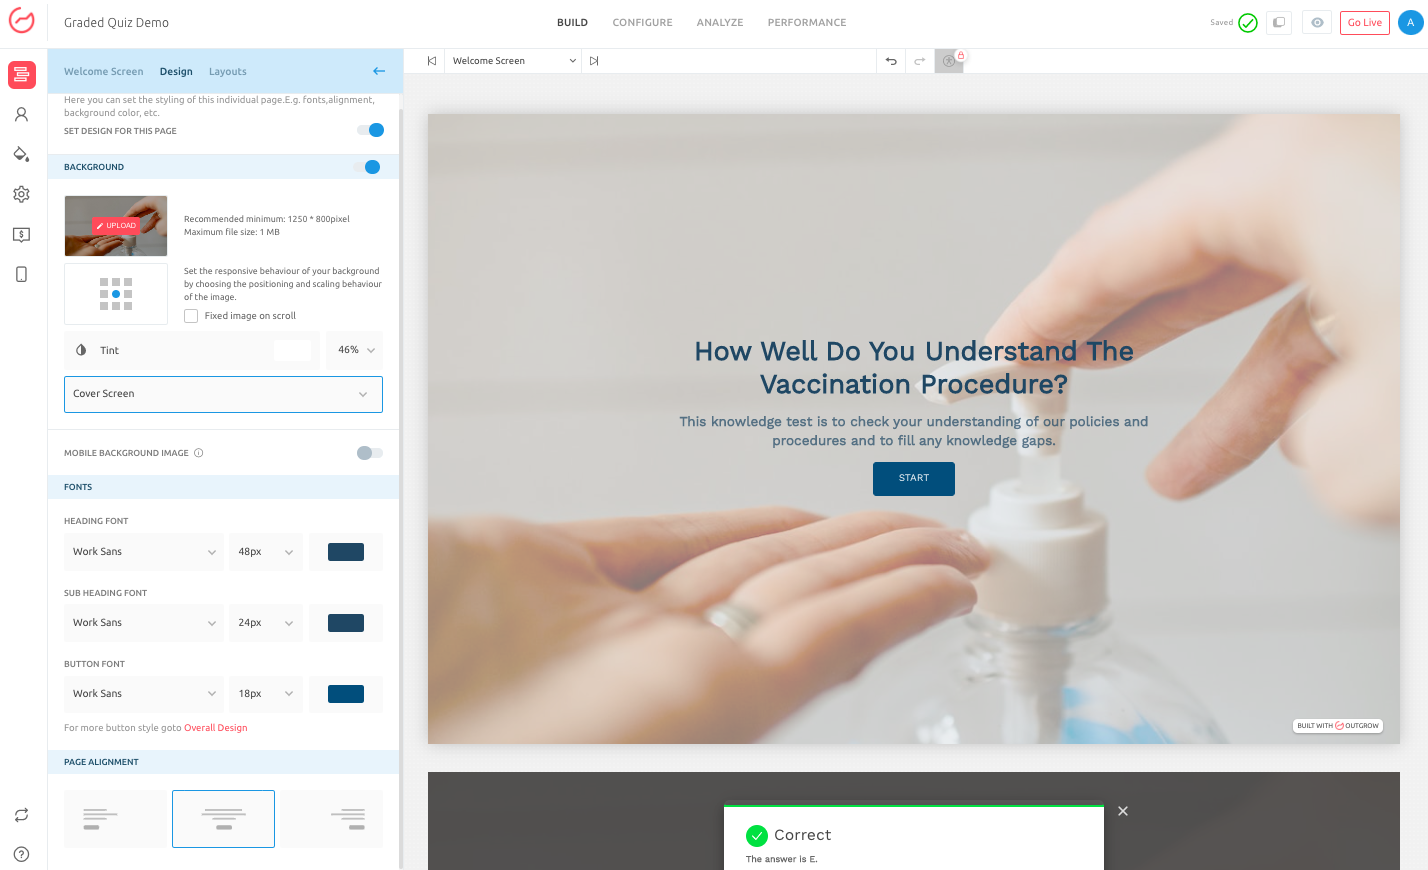
A.1.1. In the Design tab on the Welcome page, you can set the design of the Welcome page. You can choose the Background Image that will be shown to the users, set the Font Type, Size and Color of the text, and Text Alignment.
A.1.2. In the Layout tab, you can select the layouts in which you want the information to be displayed on the Welcome screen.
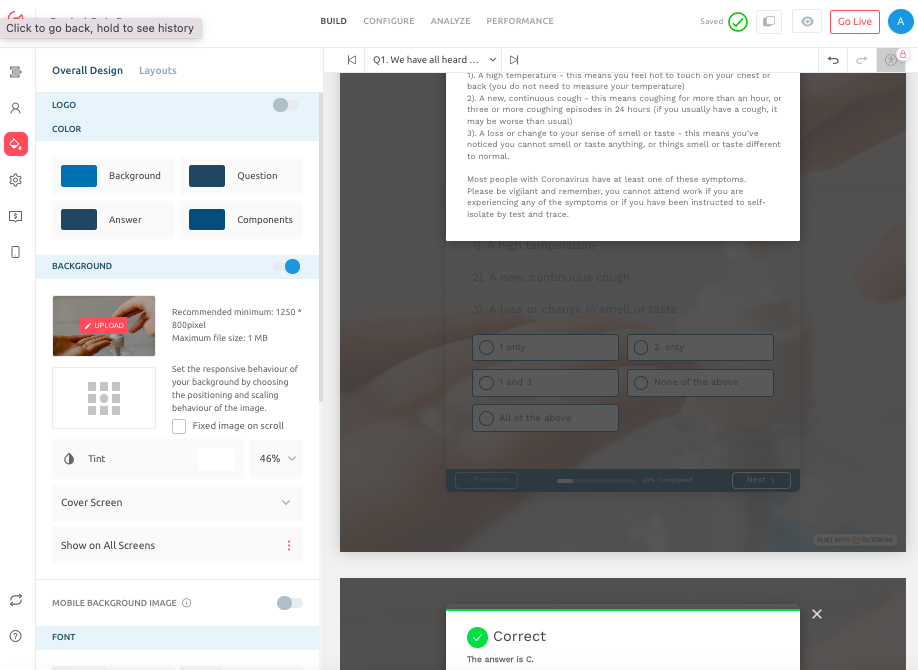
B. Setting up the design of the Assessment from the Overall Design section: Here, you can customize the overall design aspect of the Assessment as per your branding guidelines.
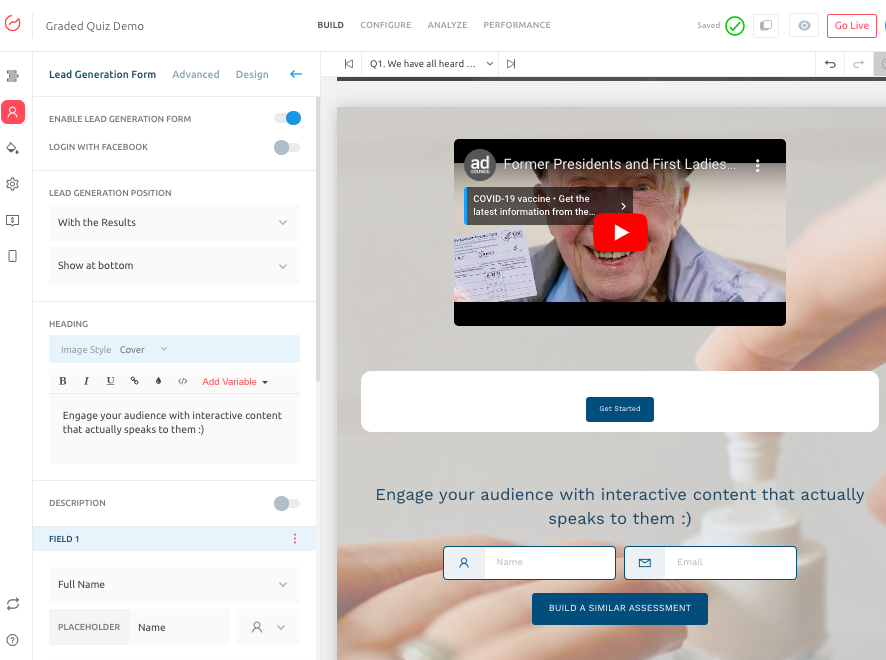
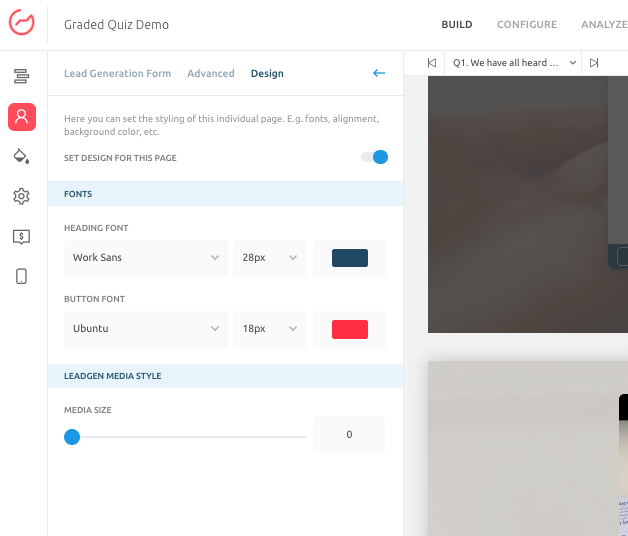
C. Setting up your Lead Form: Once the design aspect is finalized, you now customize how your Lead Form will be displayed in the Assessment. From the Lead Generation Form tab, you can customize:
C.1. The position where the Lead Form will be placed.
C.2. If you want to allow users to use their Facebook details for the Lead Form, you can toggle on the Login With Facebook button.
C.3. You can choose the fields displayed on the Lead Form. If you want to Validate the email addresses, that can also be enabled from this tab.
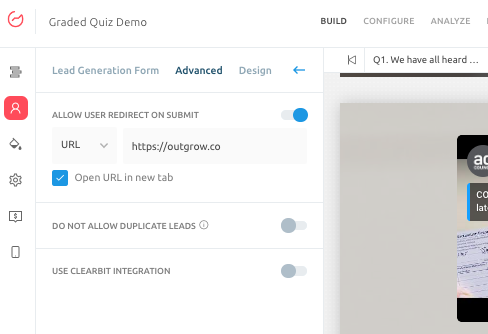
C.4. From the Advanced tab, you can configure if you want the user to be redirected when lead details are submitted. You can also configure the criteria for controlling the de-duplication of leads.
C.5. From the Design tab, you can configure the design aspects of the Lead Form.
Setting up Questions in Your Assessment
A. After setting up the overall design and the welcome page, you now need to focus on adding the actual content that will be shown to the users. Here, you will be focusing on the following:
A.1. Setting up the Questions that will be displayed in your Assessment:
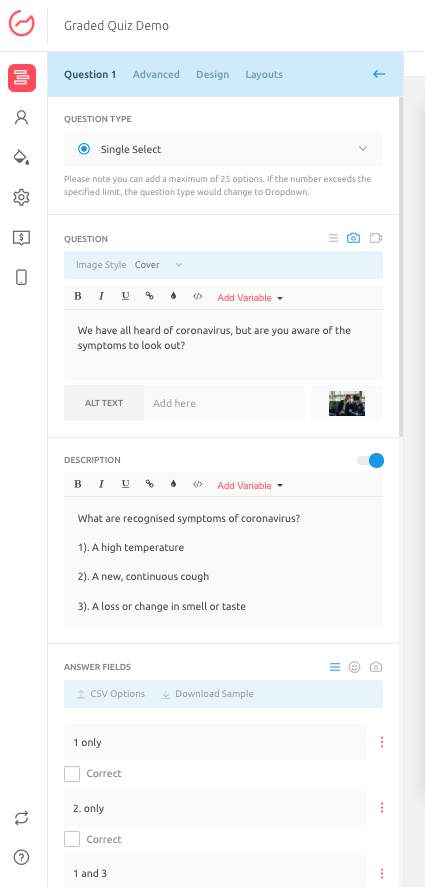
A.1.1. The first thing that you need to do is select the appropriate Question Type that you would like to use for the particular question. You can choose Single Select, Multi Select, Drop Down, Text Input, Text Area, Numeric Slider, Opinion Scale, Ranking Grid, Rating, Date/Time Picker, and File Upload.
A.1.2. Once you add the Question text, the next thing that you need to do is to add the values that will be available for a user to choose from. You can choose if you want to display a Text value, Icon, or image for each option.
NOTE: You can also choose the Layout in which the options will be displayed, the Shape in which the option will be displayed, and the Style in which the option will be displayed.
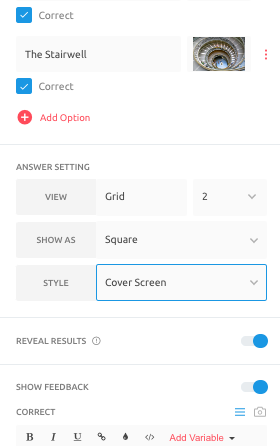
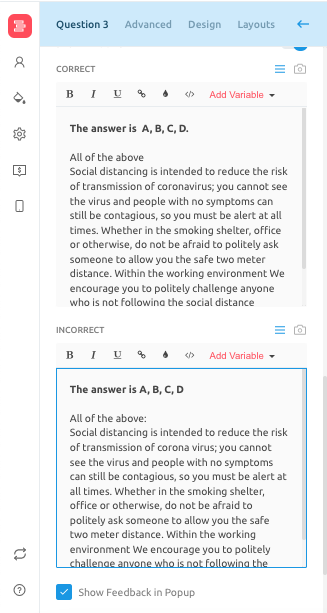
A.1.3. For the Correct and Incorrect options, you can set the Feedback you want to display to the users.
A.1.4. In the next step, click on the Advanced sub-tab. Here, you can configure the following settings:
- Allow User Redirect on Submit: By toggling on this setting, you can specify whether you want the user to be redirected to a URL, allow the user to make a call, or allow the user to send an email when the user submits the response.
- Add Fallback Value: When this setting is enabled, it lets you configure the default value that Outgrow will fall back on if the question remains unanswered by the user.
- Add Countdown Timer: Using this, you can configure a countdown timer that will be displayed on the particular question.
- Enable Continue Button: In case you want the users to click on a CTA button before they are transitioned to the next slide, you can enable this setting. You can also configure the CTA button name in this section.
A.1.5. In the Layouts tab, users can choose the layout where the information will be displayed.
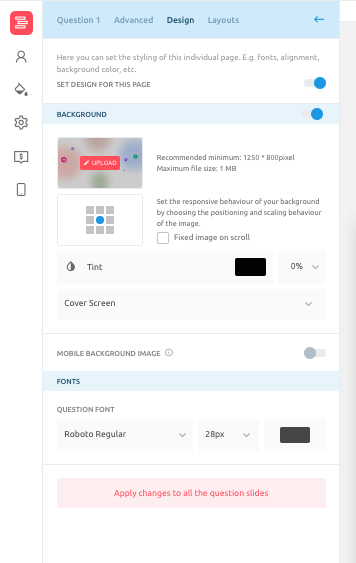
A.1.6. Lastly, in the Design tab, you can configure the design for the Questions page. This includes the settings for Font Style, Background Image, etc.
IMPORTANT NOTE
You can not use the Logic Jump and Randomization feature in the same Assessment, as it will break the jump setup.
Setting up the Result page in your Assessment
A. Once you have added questions and options to your Assessment, you can work on setting up the Results page in your assessment. For this, you can go to the Results page.
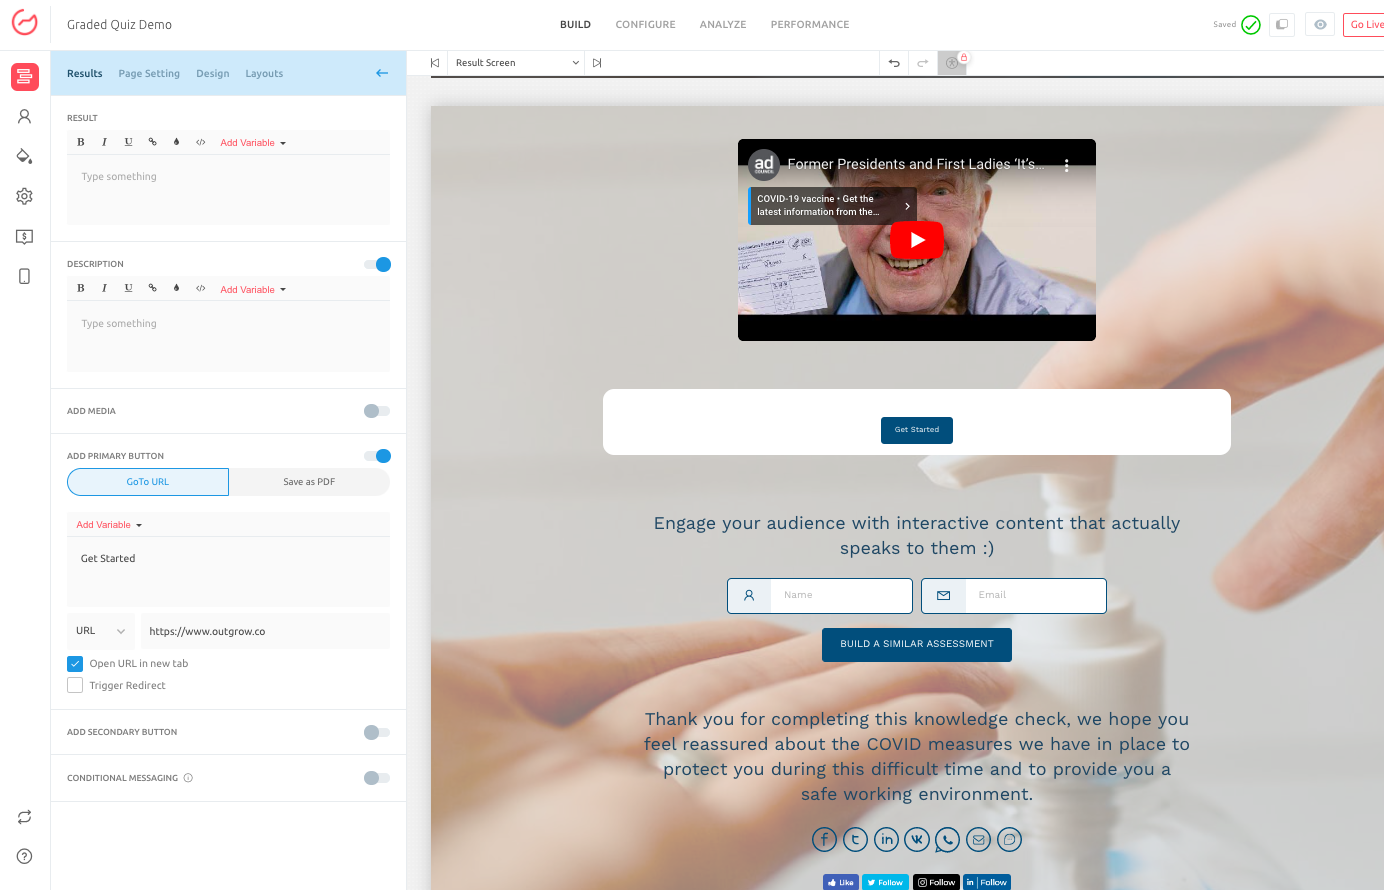
B. For the results page, you can add the Heading and Description. You can also add the media type that you would like to show on the page, such as an image, video etc, and can then add a CTA button as well.
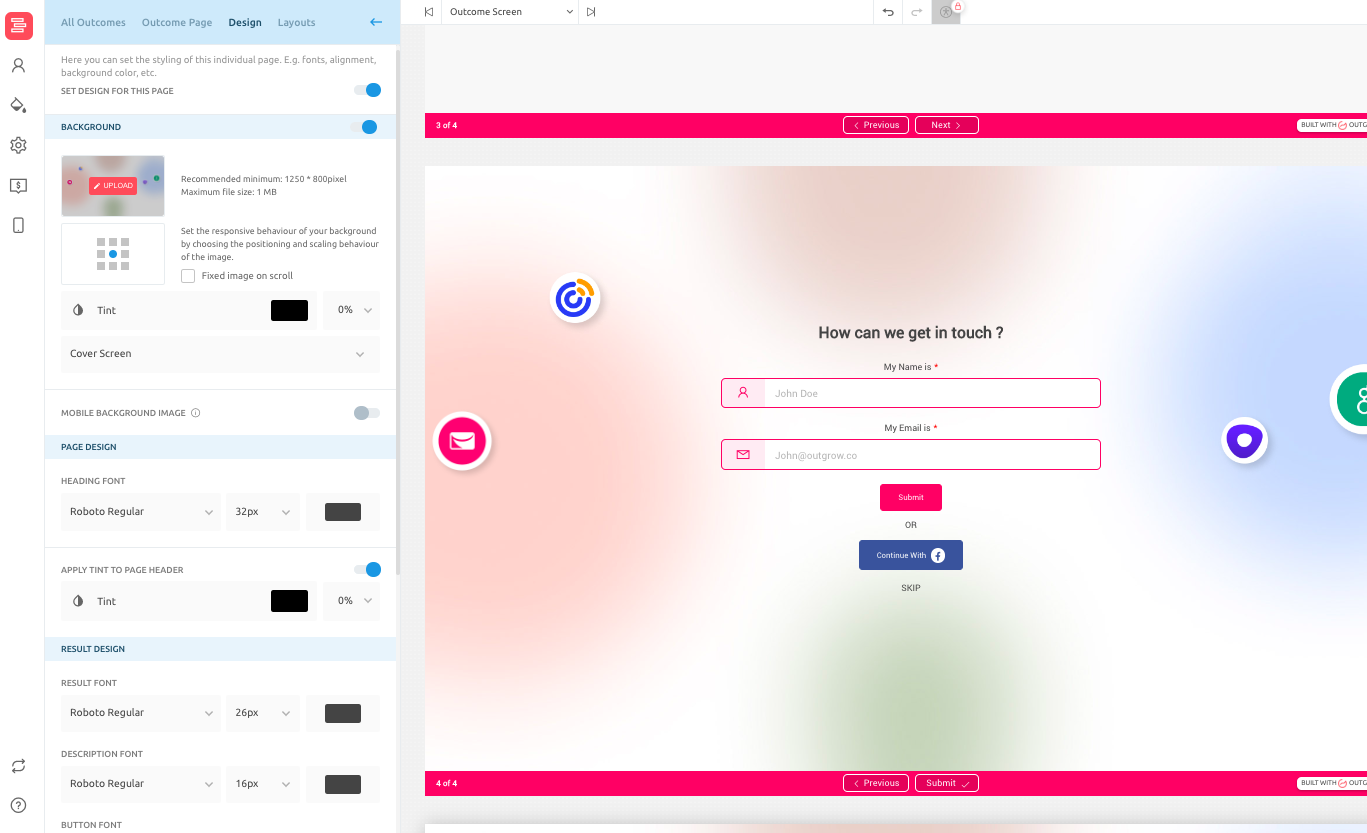
C. In the Design tab, you can configure the design element of the result page.
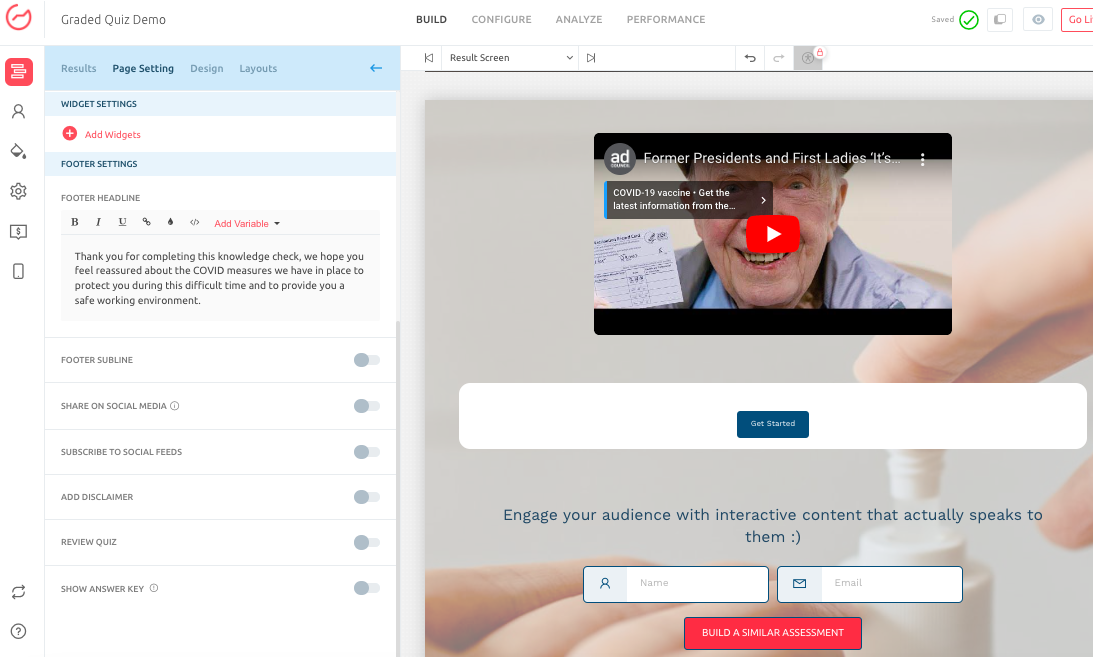
D. Under Page Setting, you can configure settings to allow the user to Review the Quiz, See the Answer Key, etc.
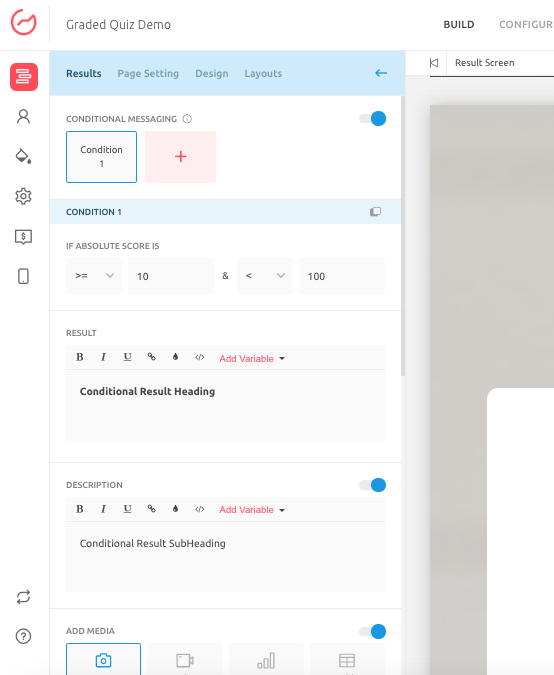
E. IMPORTANT NOTE: You can also configure Conditional Messaging in case you want to show the users different Result Information and CTA buttons based on the score they received in the assessment.
NOTE: Once everything is finalized, click Publish to save the changes.
IMPORTANT NOTE
Once the information in the Assessment is saved, you can go to the Configure tab and configure the SEO and basic settings of your Assessment.
Also, before setting the quiz live add a suitable URL, SEO title, Meta Description and Favicon to your Assessment. Add the Google Analytics tracking code to view the Analytics for your Assessment.
Feel free to reach out to us at [email protected], and we will be happy to address any questions or concerns that you have.
Updated over 1 year ago