Verifying Your Outgrow Domain in Facebook Business Manager
Domain Verification provides a way for users to claim ownership of their domain in Facebook Business Manager. This ownership allows the user to control editing privileges of their links and other content to prevent misuse of their domain. Apple now requires apps in the App Store to obtain permission to track users across apps and websites owned by third parties for advertising and measurement purposes through its AppTrackingTransparency (ATT) framework. As a result of these changes, If you are promoting your business using your Outgrow content and Facebook Ads, and are optimizing, targeting, or reporting on web events from the Facebook pixel, you are required to verify your Outgrow domain in your Facebook Business Manager.
Using this document you can learn more about how to successfully verify your Outgrow Domain in your Facebook Business Manager.
Adding your Outgrow Domain in Facebook Business Manager & verifying the TXT Entry in DNS Records
A. Login to your Outgrow Business Manager and click on the Business Settings button in the upper right corner.
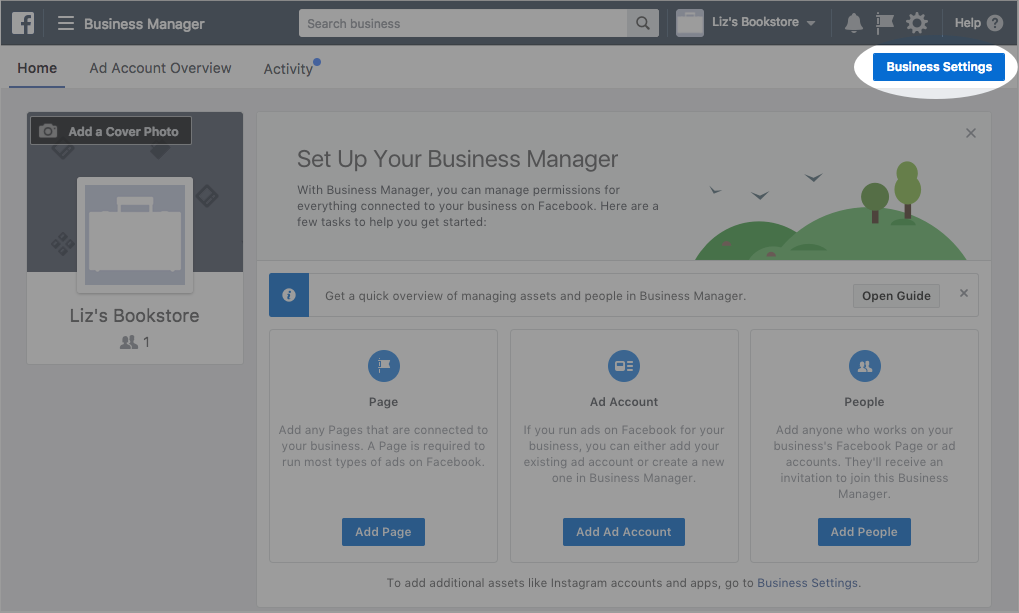
B. In the Business Settings, select the Brand Safety tab, and select Domains from the left side navigation list.
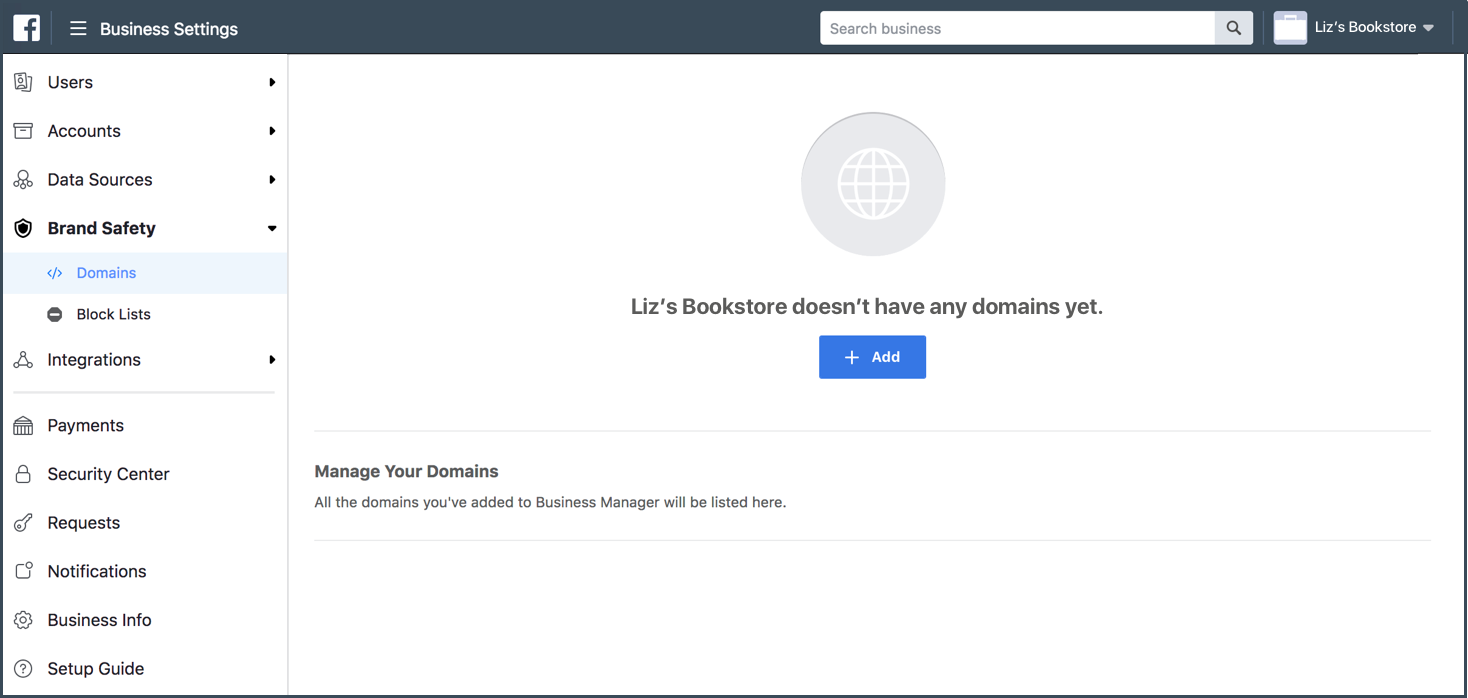
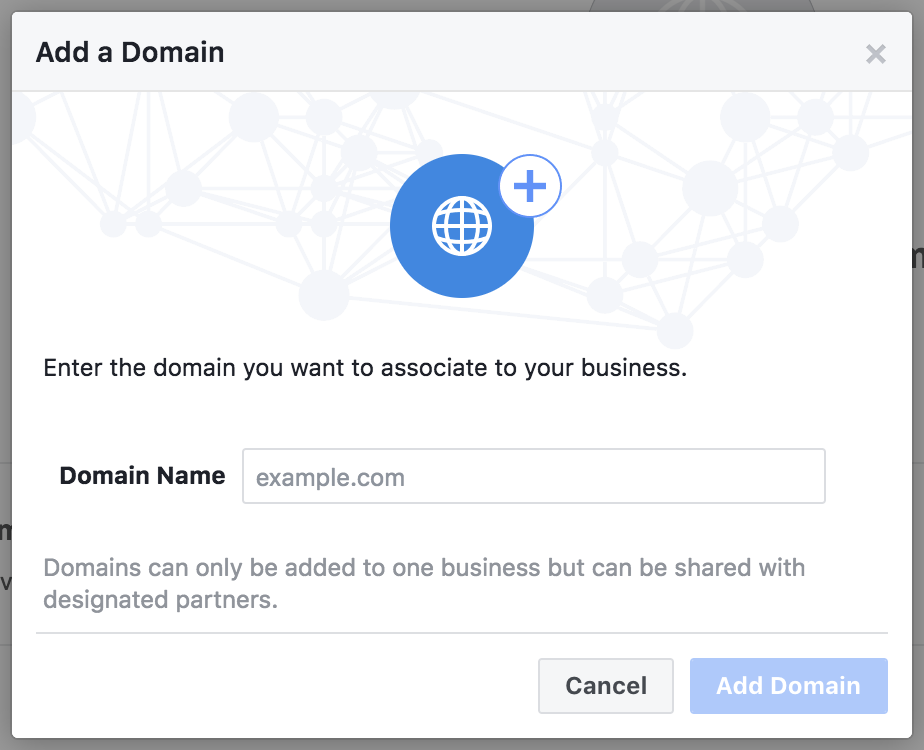
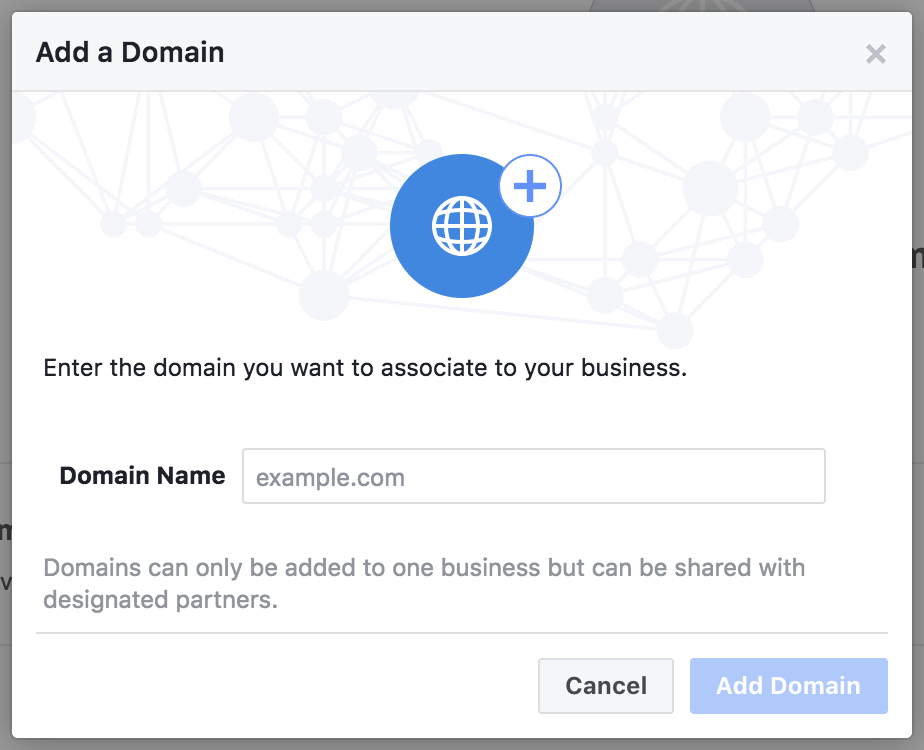
C. Click on the Add button, and enter your domain in the Add a Domain pop-up dialog.
IMPORTANT NOTE
1. Make sure you specify the complete Outgrow domain and not just Outgrow.Us. For example, if your Outgrow Sub-Domain is VerificationTest.Outgrow.Us, then you specify the complete sub-domain as the Domain Name in Business Manager and not just Outgrow.Us.
2. Make sure you specify Outgrow.Us and not Outgrow.Co in your Domain Name.
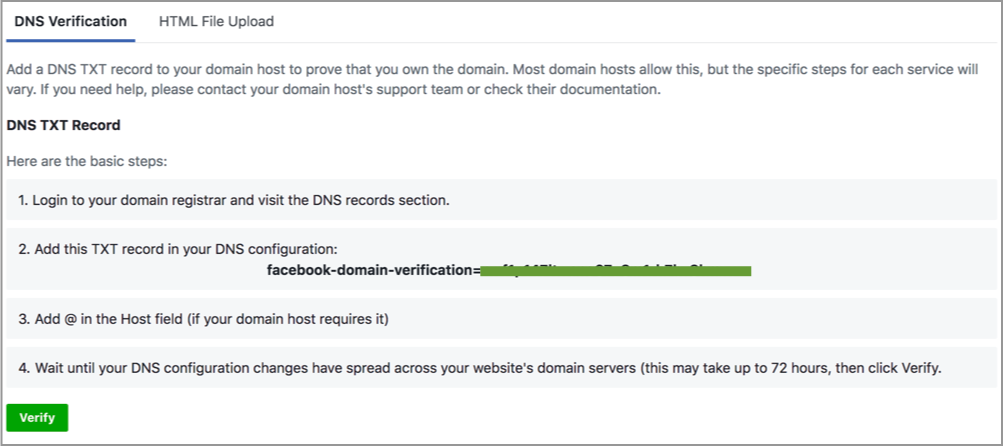
D. In the next step, choose Update the DNS TXT record with your Domain Registrar as the option for verifying Outgrow Domain.
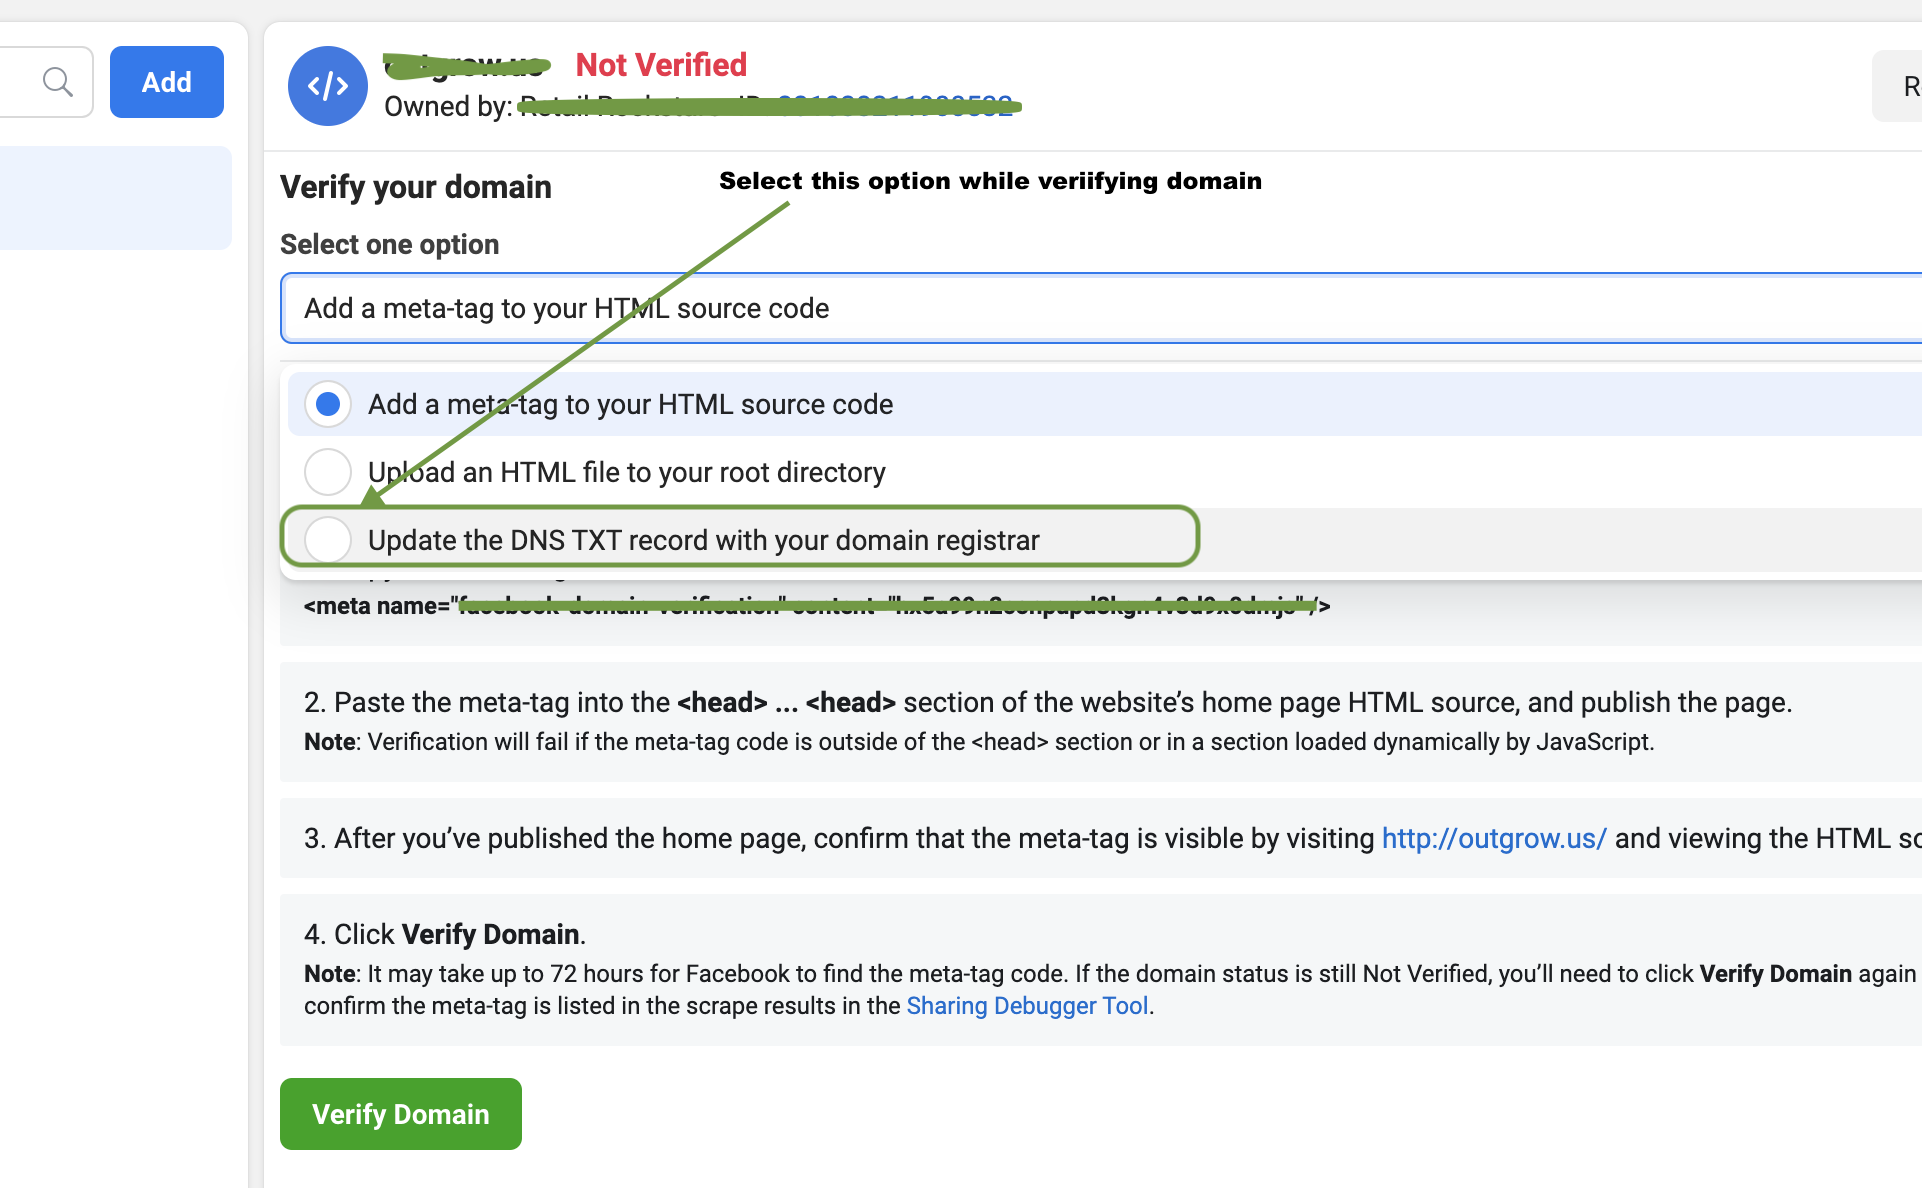
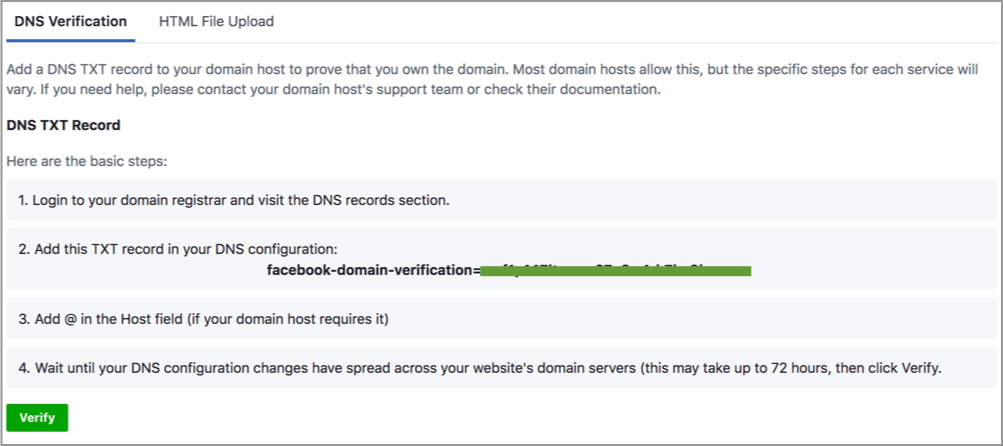
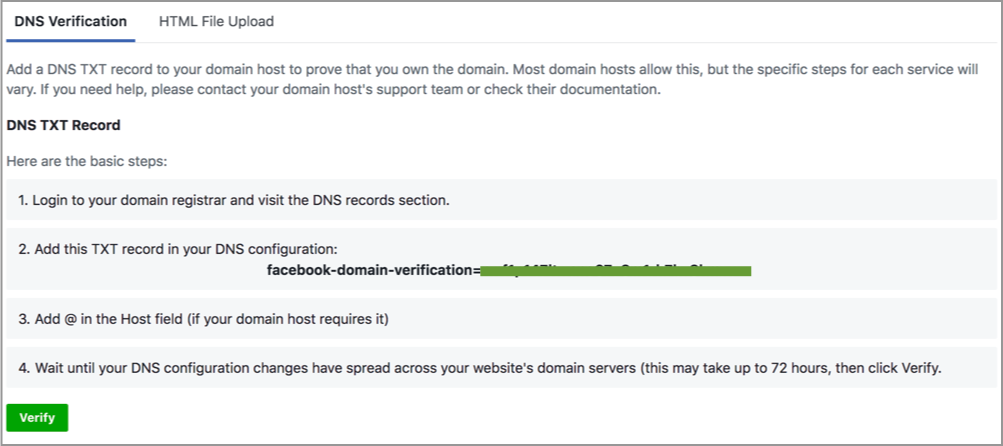
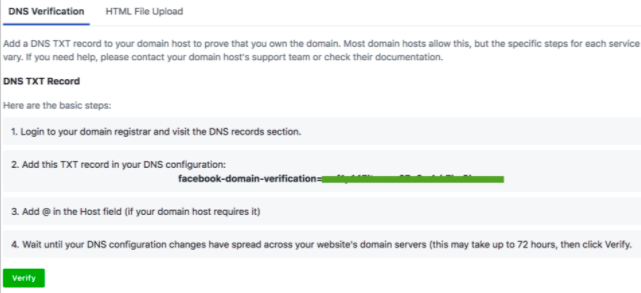
In the DNS Verification window, copy the TXT record as we will be adding this record in Outgrow.
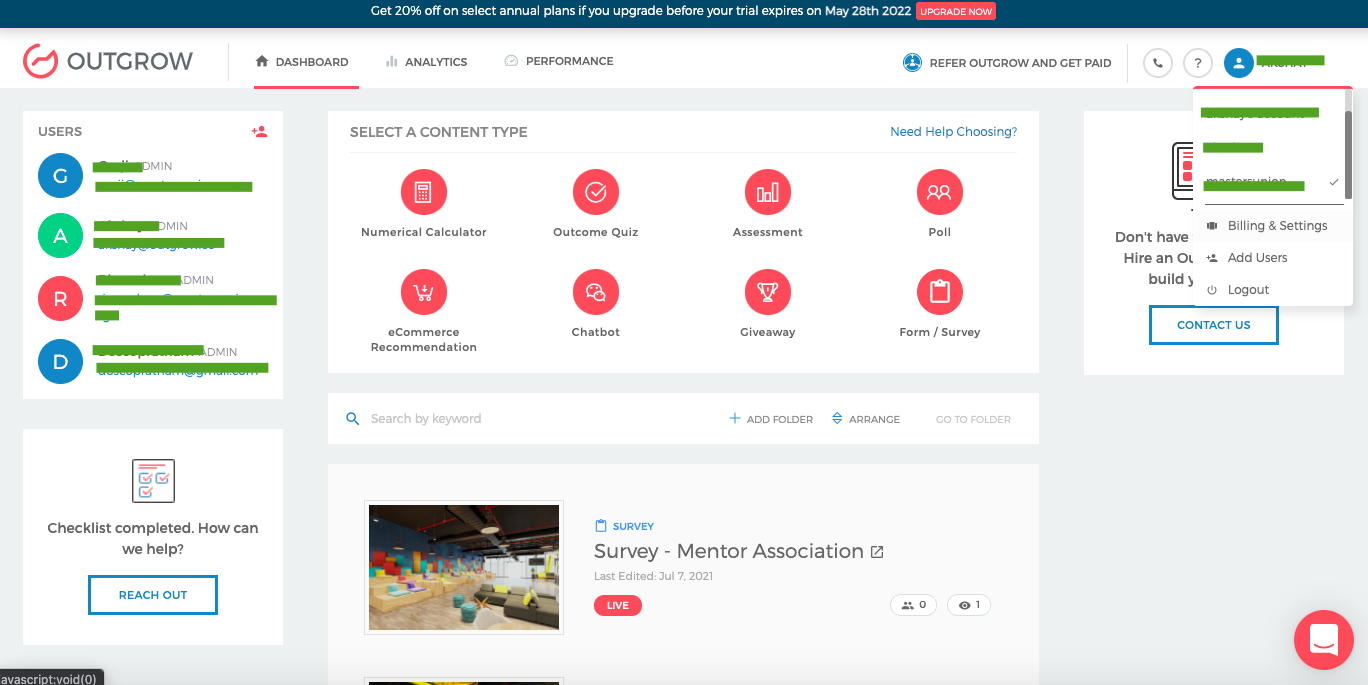
E. Log in to your Outgrow account and click on your name at the top. Then click on Billings & Settings.
F. Under Billings & Settings, navigate to Brand and then click on DNS Verification sub-tab.
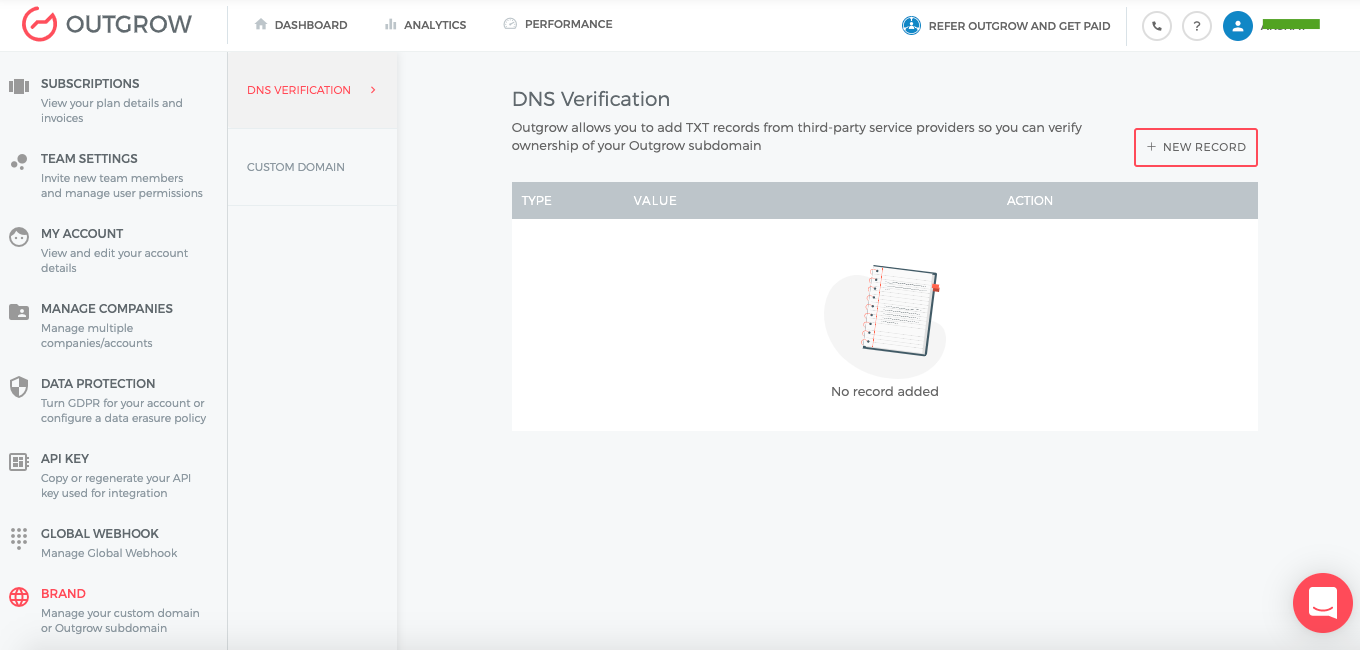
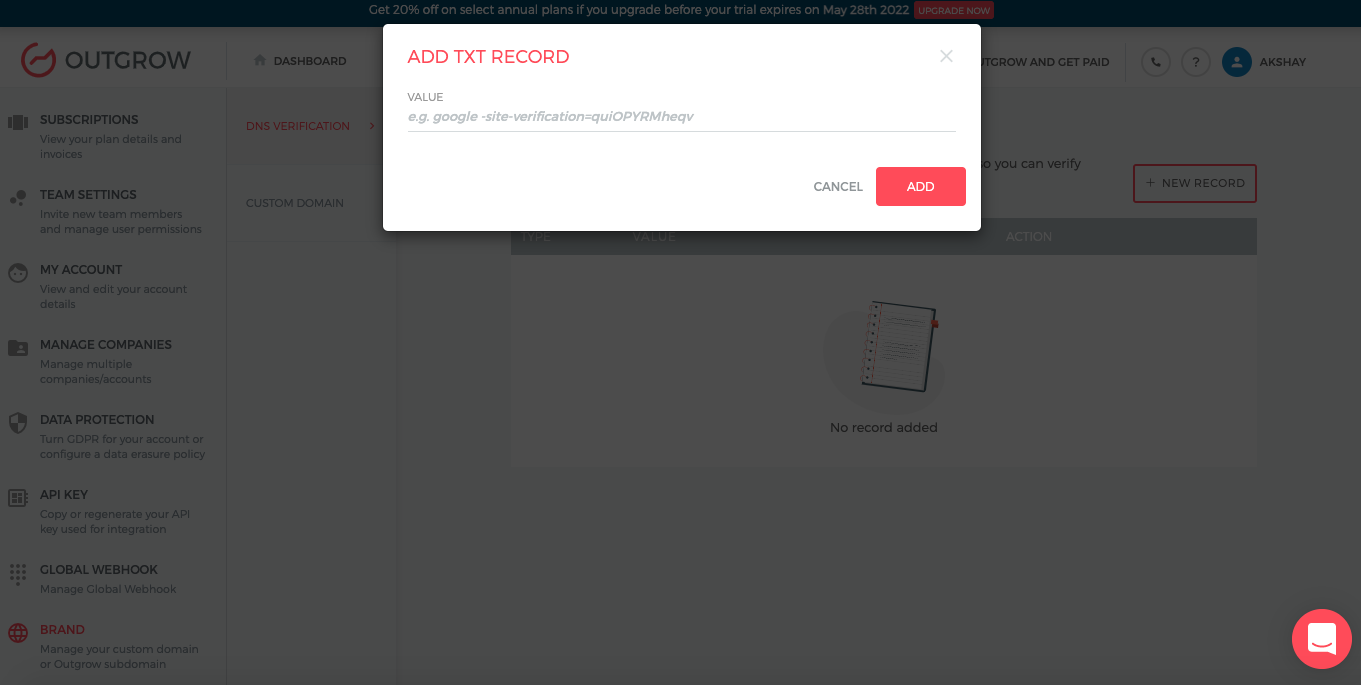
G. Click on New Record, and then Add the TXT Record that you copied from your Business Manager account. Once the TXT Record is added click on Add.
IMPORTANT NOTE
While adding the TXT Record, make sure you enter the entire TXT entry and not just the verification code. For example, if your TXT Entry is facebook-domain-verification=nshae33djshayas234jdhsa113sd, you should enter the entire record string in Outgrow.
H. Once you have added the TXT Record in Outgrow, and the changes have propagated across your domain's web servers, click the Verify button at the bottom of the DNS Verification tab for the selected domain in your Facebook Business Manager account.
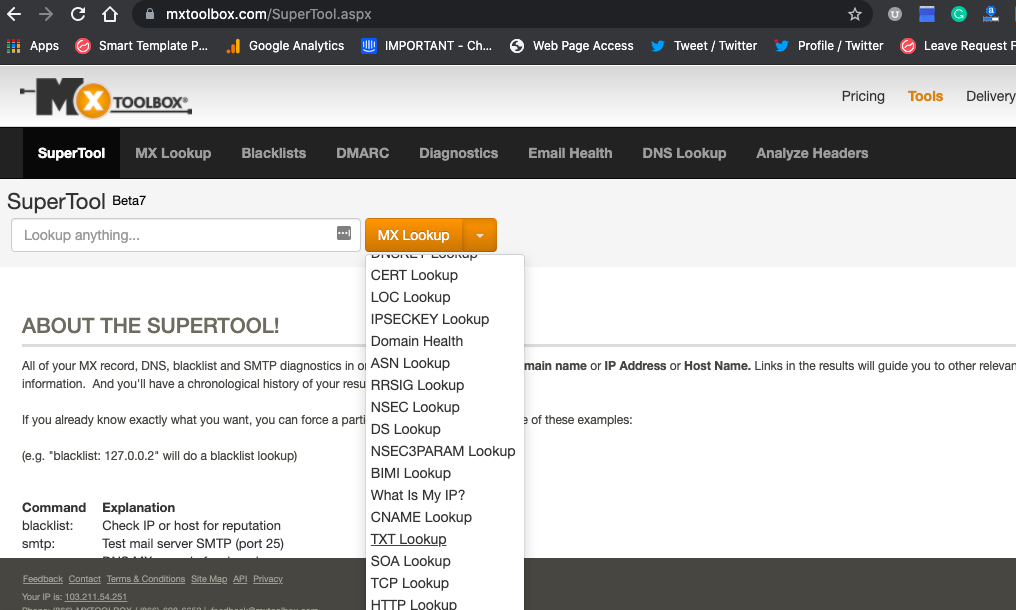
NOTE: Typically, verifying your domain only takes a few minutes, however, there are cases where it may take up to 72 hours to complete. You can use tools like Mx Tools SuperTool to see if the TXT Record has been updated or not with the DNS provider. Make sure you select TXT Lookup as the option from the drop-down.
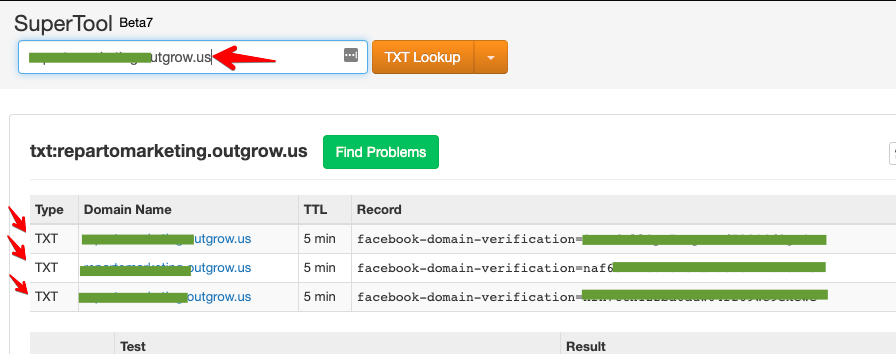
I. Once the TXT entry will be updated in the DNS records, you will be able to confirm the verification using SuperTool
NOTE: Leave the TXT entry in your DNS record as it may be checked periodically for verification purposes.
Common Issues faced while Verifying Domain on Facebook
1. Under the Brand tab in Outgrow Settings, while adding the TXT Record make sure you enter the entire TXT entry and not just the verification code. For example, if your TXT Entry is facebook-domain-verification=nshae33djshayas234jdhsa113sd, you should enter the entire record string in Outgrow.
2. We have noticed that while adding the domain in Facebook Manager, a lot of times our customers specify Outgrow.Co instead of Outgrow.Us as their subdomain name. You need to ensure that you specify your Outgrow domain as SampleSubDomain.Outgrow.Us instead of SampleSubDomain.Outgrow.Co.
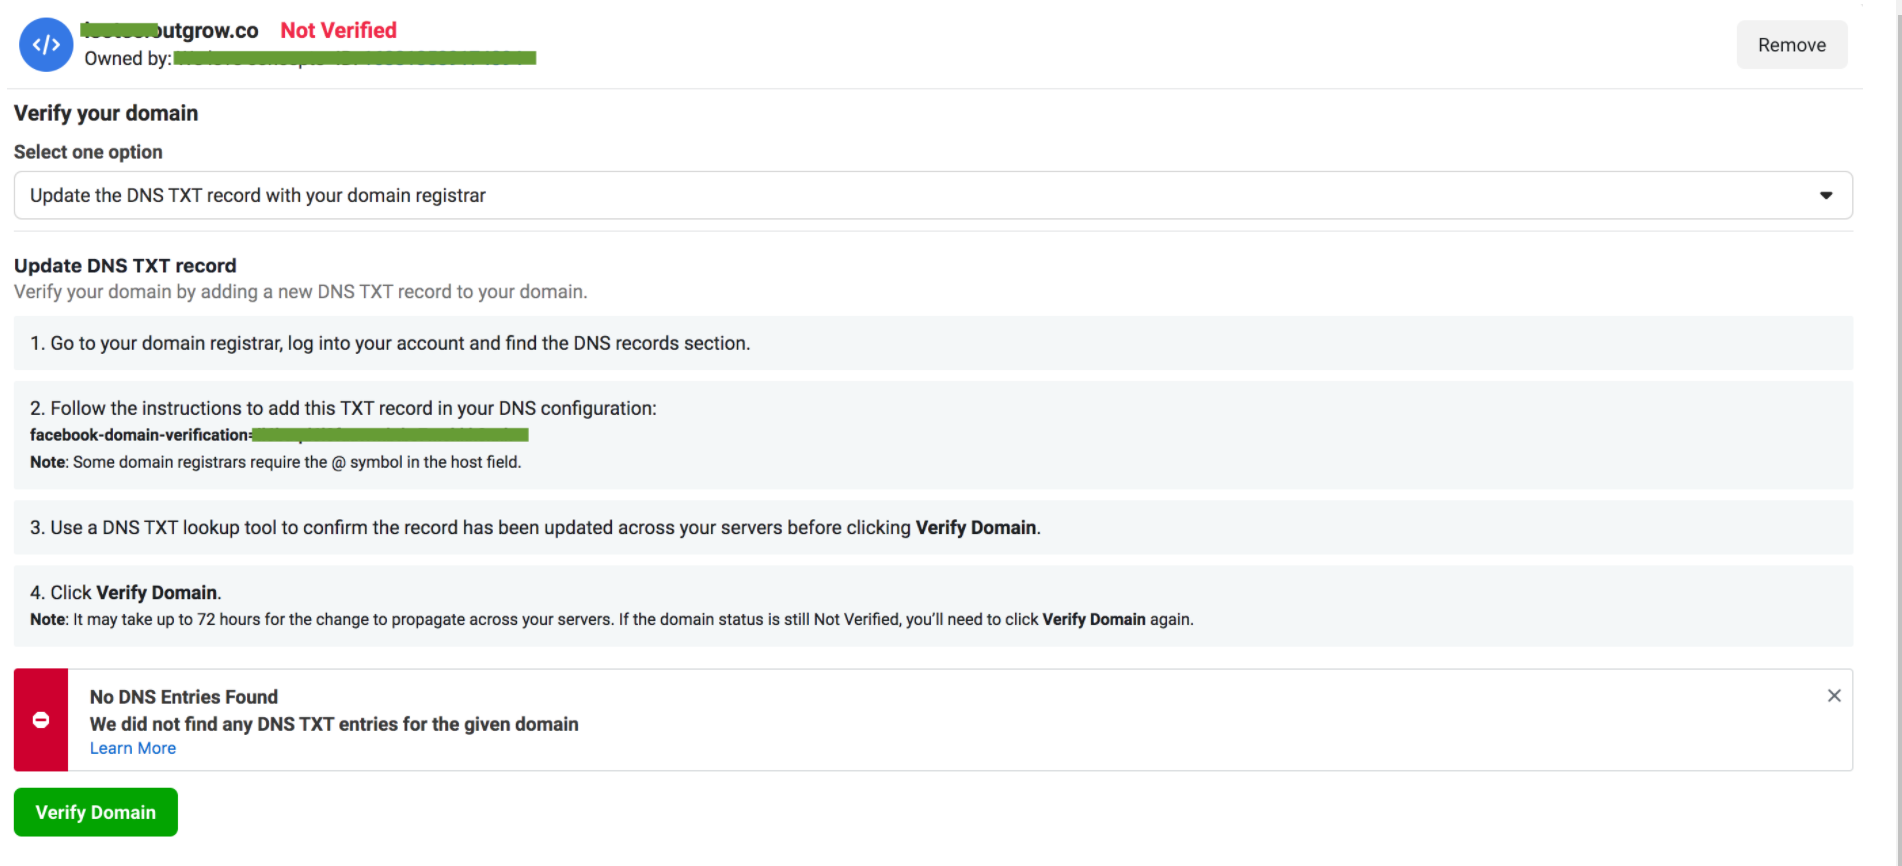
3. While adding your Domain Name in Facebook Business Manager, make sure you specify the complete Outgrow sub-domain and not just Outgrow.Us as the Domain Name. For example, if your Outgrow Sub-Domain is VerificationTest.Outgrow.Us, then you specify the complete sub-domain as the Domain Name in Business Manager and not just Outgrow.Us.
4. In case you are using your Custom Domain such as Test.YourDomain.Com/, then in this case you should add the Facebook Domain Verification value for your Custom Domain and not Outgrow or any other subdomain.
IMPORTANT NOTE
A. In case you are using your Custom Domain such as Test.YourDomain.Com/, then in this case you should add the Facebook Domain Verification value for your Custom Domain and not Outgrow or any other subdomain. By this what we mean is that you should specify Test.YourDomain.Com as the value in Business Manager and not YourSubDomain.Outgrow.Us. NOTE: As you are using CNAME here, as the URL of your content would be on your own domain, you can easily manage things in Facebook Business Manager.
B. You can embed your Outgrow content on your website, and by doing so, the Facebook Pixel of your parent domain will be fired instead of the pixel of the Outgrow content that is embedded in the iFrame. For this, you can follow the below-mentioned steps:
1. Embed the Outgrow content on your website.
2. Add the Facebook Pixel ID to both your Outgrow content and your website, in order for the Pixel ID to track traffic straight from your parent website.
3. Add the Event inside the website through the Aggregated Event Measurement tool under Events Manager. Here is a screenshot for your reference.
4. It would take up to 72 hours to validate the change but your ads would be live.
In case you have any further questions or concerns, please feel free to reach out to us either using our Chat feature at the bottom of the page or by sending an email at [email protected] and we will be happy to assist you further.
Updated over 1 year ago