How to Add Payment Gateways to Your Outgrow Content
Using a Custom Widget, you can now integrate Paypal and PayU payment gateway on a Custom HTML page in Outgrow. This document will help you understand how this can be done in Outgrow.
How to add a Custom HTML page and then a Widget on the page
1. Login to your Outgrow account and open the respective content in Build mode.

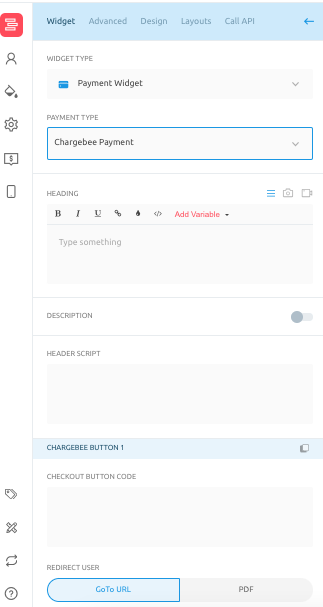
2. Click on Add New and then click on Widgets. Navigate to the Payment Widget option.

3. You can choose between adding PayU Payment Gateway, Paypal Payment Gateway, Chargebee Payment Gateway or Strip Payment Gateway button on your Custom HTML page.

3.1.1. Paypal Payment Gateway: You can add a button for processing payment using Paypal by authenticating the integration using a Client ID and Secret Key. You can configure the currency denomination and amount as well. Also, you can configure if you want to use Live or Test mode.

3.1.1.1. For the Paypal button, you can go to the Advanced tab and configure Smart Button Style as well.

3.1.2. PayU Payment Gateway For adding the PayU Payment Gateway button on the Custom HTML page, you need to authenticate the integration using Merchant POS ID, Secondary Key, oAuth Client ID, oAuth Client Secret. You can choose whether to use the integration in Test or Live mode.

3.1.3. Chargebee Payment Gateway: For adding the Chargebee Payment Gateway button on the Custom HTML page, you need to authenticate the integration using Header Script & Chargebee Button Code.
3.1.4. Stripe Payment Gateway: For adding the Stripe Payment Gateway button on the Custom HTML page, you need to authenticate the integration using Stripe Publishable Key & Secret Key.
3.2.Under the Advanced tab, you can configure whether you want to redirect the user once the user clicks on the button.

4. Make sure you click on the Publish button to save the changes.
IMPORTANT NOTE
For processing payments, the availability of Payment Gateways for selection is a layout-based restriction. Real-time templates do not support Chargebee or PayPal, whereas non-Real-time layouts support integration with all 4 Payment Gateways.
Ensuring that a user makes the payment before continuing to the next page
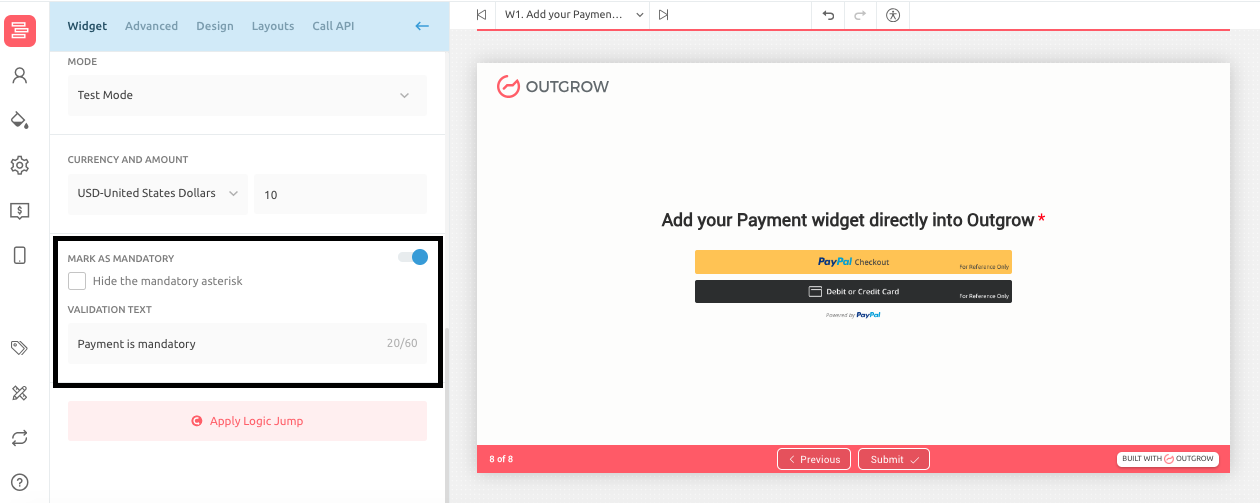
If you have placed a payment widget in your Outgrow content and want to make sure that a user has to make a payment in order to move to the next page, you can do so by marking the payment step as mandatory. You can enable this setting on the widget configuration page. You can opt to hide the mandatory asterisk if required, and you can also configure the text that will be displayed when the user tries to move to the next page without making a payment. Make sure you click on Publish to save the changes.
Some Common Use-cases
1. If you are creating an interactive content piece asking for donations on behalf of your organisation, you can add a Payment Button at the end by using the Custom HTML feature. This will make the payment process convenient, as the user will be able to navigate to the payment page by simply clicking on a button.
2. You can add a Payment Button to your e-commerce recommendation quiz like an Add to Cart button or a Buy Now button. This will help increase your sales as the process will become more accessible and less time-consuming for the users.
3. If you are creating a quiz, assessment, or any other type of content to market the courses your institution offers, you can add some details about your course and attach a payment button at the end so that the users can easily buy it.
Feel free to reach out to us at [email protected] in case you have any questions, and we will be happy to assist you further.
Updated about 2 years ago