Configuring Native Integration Between Outgrow And Make
Make(formerly Integromat) is a powerful visual platform for designing, building, and automating workflows. It's a "no-code" or "low-code" tool, meaning it allows users to create complex automations without extensive programming knowledge. It acts as a "glue of the internet," connecting various apps and services to streamline processes and boost productivity.
Here are some of its key features:
- Visual Scenario Builder: This is Make.com's standout feature. It provides an intuitive drag-and-drop interface where you can visually design your workflows (called "scenarios"). You can see how data flows between different applications and modules in real-time, making it easy to understand and manage even complex automations.
- Extensive Integrations: Make.com boasts a vast library of integrations with popular applications and services, ranging from CRM systems (Salesforce, HubSpot) to email marketing tools (Mailchimp), project management software (Asana, Trello), social media platforms, payment gateways, and many more. This allows you to connect virtually any tool you use.
- Triggers and Actions: The core of any automation in Make.com consists of triggers and actions.
Triggers initiate a workflow when a specific event occurs (e.g., a new email arrives, a form is submitted, or a new row is added to a spreadsheet). Actions refer to the tasks performed after a trigger (e.g., sending a message, updating a database, or creating a task). You can link multiple actions to create multi-step workflows. - Conditional Logic and Filters: Make.com allows you to set up conditional automations, meaning actions are triggered only when specific criteria or conditions are met. This provides granular control over your workflows, allowing for highly customized processes.
- Data Parsing and Manipulation: Make.com offers robust tools for working with various data formats (JSON, XML, CSV). You can extract, transform, and manipulate data within your workflows, ensuring it's in the correct format for different applications. This includes features like text processing, data enrichment, and more.
- HTTP/Webhooks: For applications without direct integrations, Make.com's HTTP module and webhook capabilities enable you to connect to virtually any API, further extending the automation possibilities.
Custom Functions: For more advanced users on enterprise plans, Make.com supports custom functions using JavaScript. This enables users to perform multiple actions within a single step, creating highly tailored data transformations. - AI Integrations and AI Agents: Make.com is increasingly incorporating AI into its platform. It offers integrations with various AI apps and has introduced "Make AI Agents" that can think and adapt in real-time, allowing for more intelligent and adaptive automations.
- Scalability and Enterprise-Ready Features: Make.com is designed to scale with businesses of all sizes, from small enterprises to large organizations. It offers enterprise-level features, including enhanced security (GDPR, SOC2 Type 1 compliance, data encryption, and SSO), role-based access control, and robust support.
- Real-time Monitoring and Observability: You can monitor your workflows in real-time and gain insights into their utilization and performance through dashboards, helping you ensure smooth operation and identify any issues.
This document will help you understand how to configure the native integration between Outgrow and Make.
Getting started with setting up the integration
Here's what you will need to get started:
A. An Outgrow account with an active subscription plan.
B. An active Make account.
C. A live Outgrow content piece.
How to configure the integration
To configure the integration between Outgrow and Make, here are the steps that you ne** to follow:
1. Log in to your Make account and click on Create a new scenario.

2. Click on the Add icon (plus sign) and then select Outgrow as an app from the list.

3. Select the New Lead trigger from the list.

4. To connect Make and Outgrow, you need to add your Outgrow API key in the account.
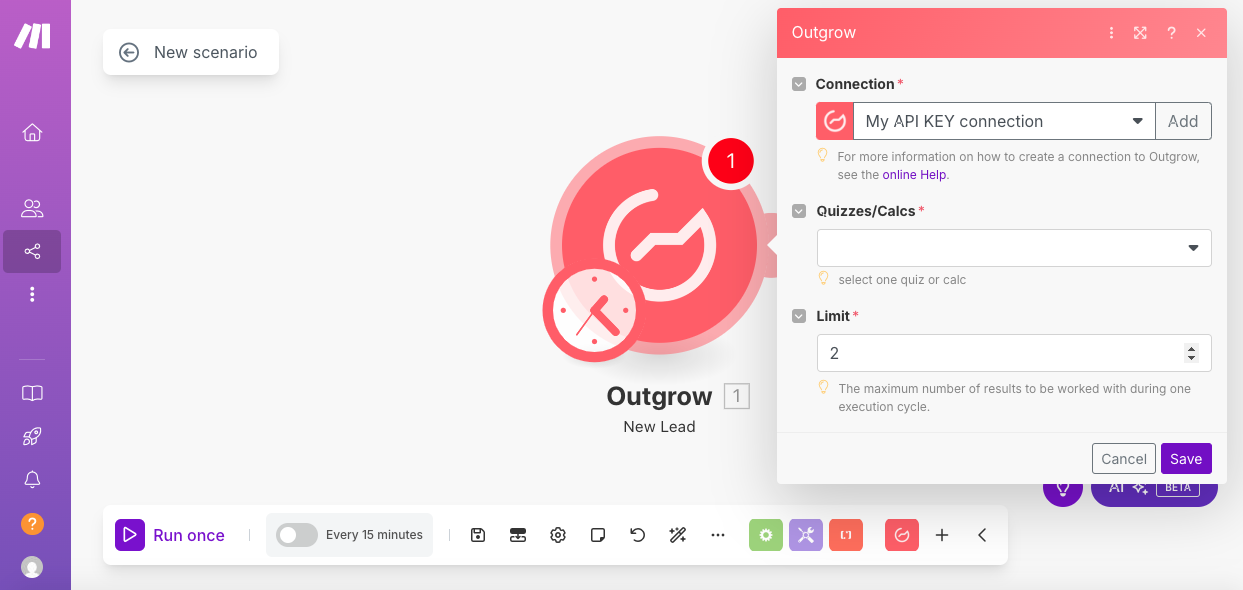
5. To access your Outgrow API key, click on your name at the top of your Outgrow dashboard, and then go to Settings. Under settings, navigate to the API Key section and copy your Outgrow API key.

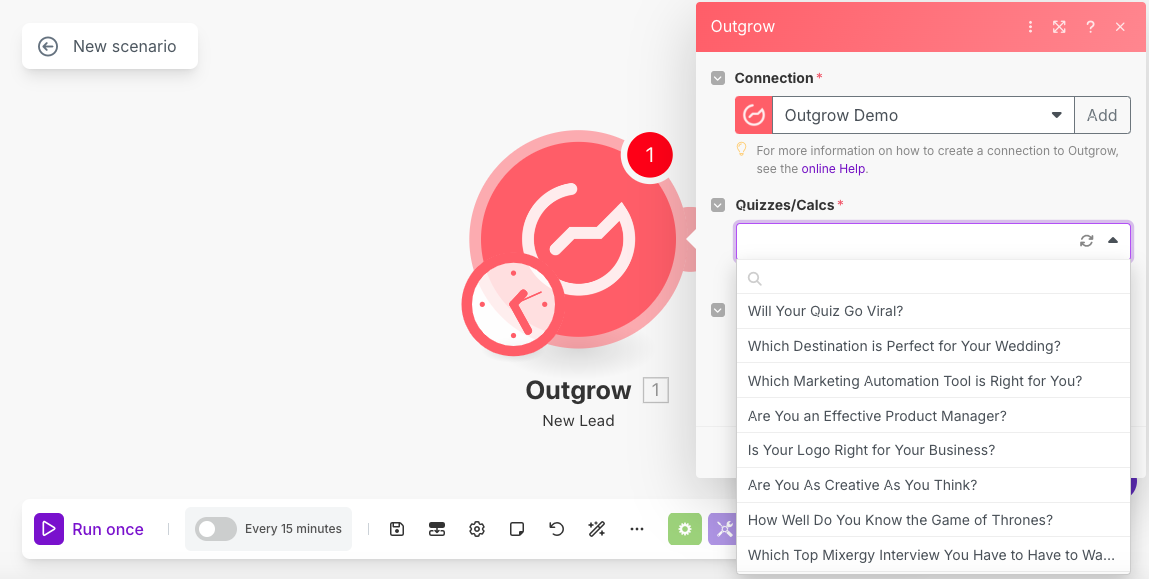
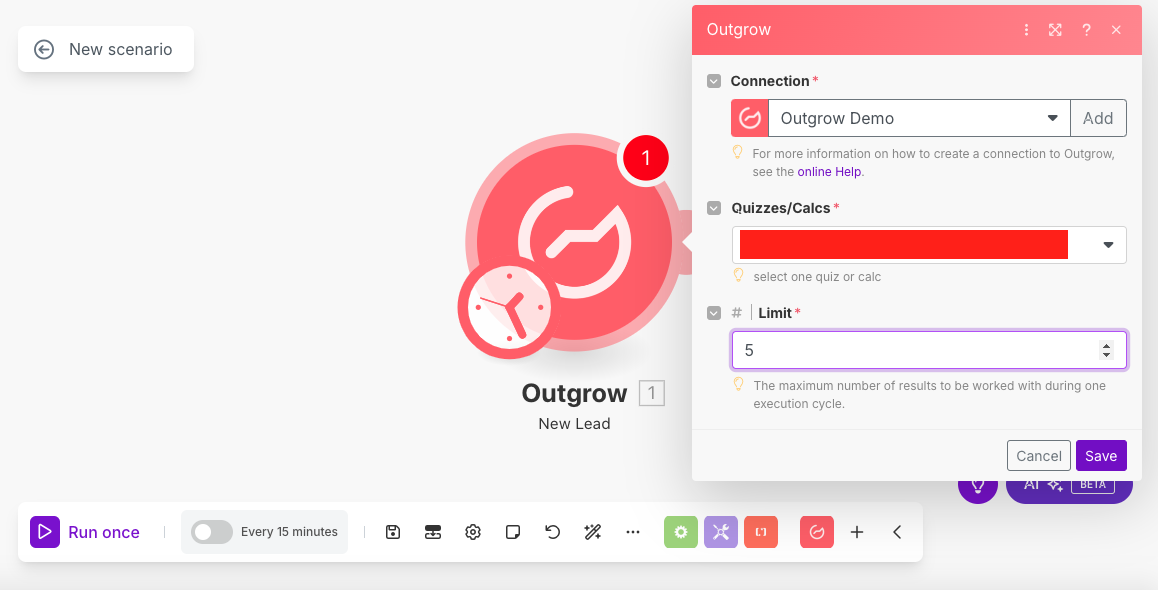
6. Add your Outgrow API key in Make and then authenticate the key. Once the key is authenticated, select the respective Outgrow content from the Quizzes/Calcs dropdown.
7. Select the rate limit for the integration.
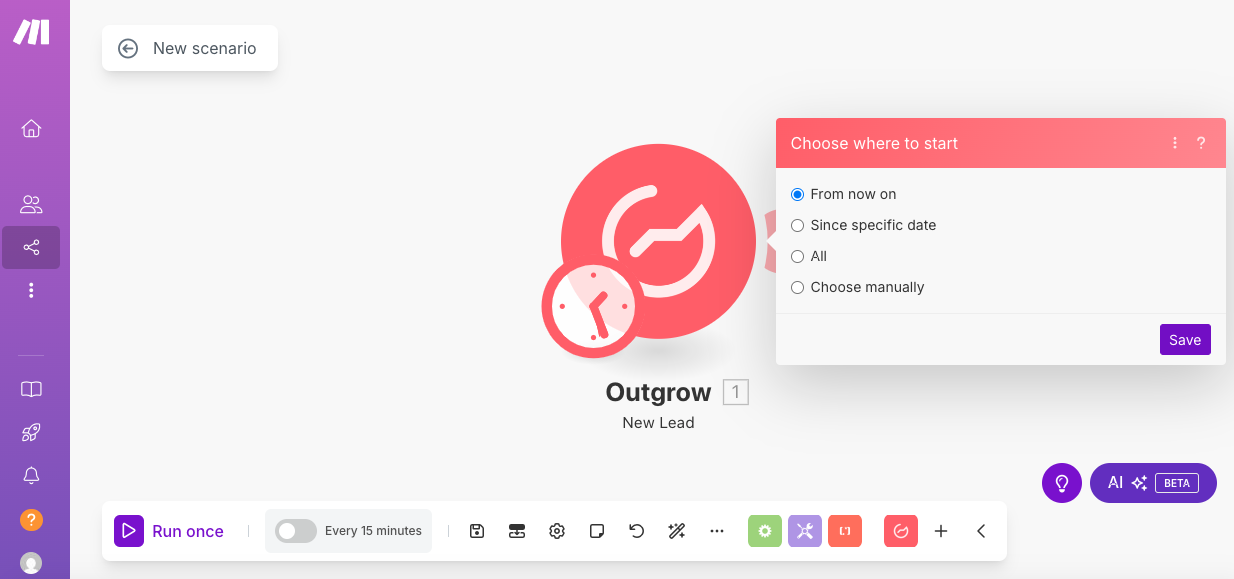
8. Select the initialization configuration to select when the integration will run. Click on Save to save the setting.
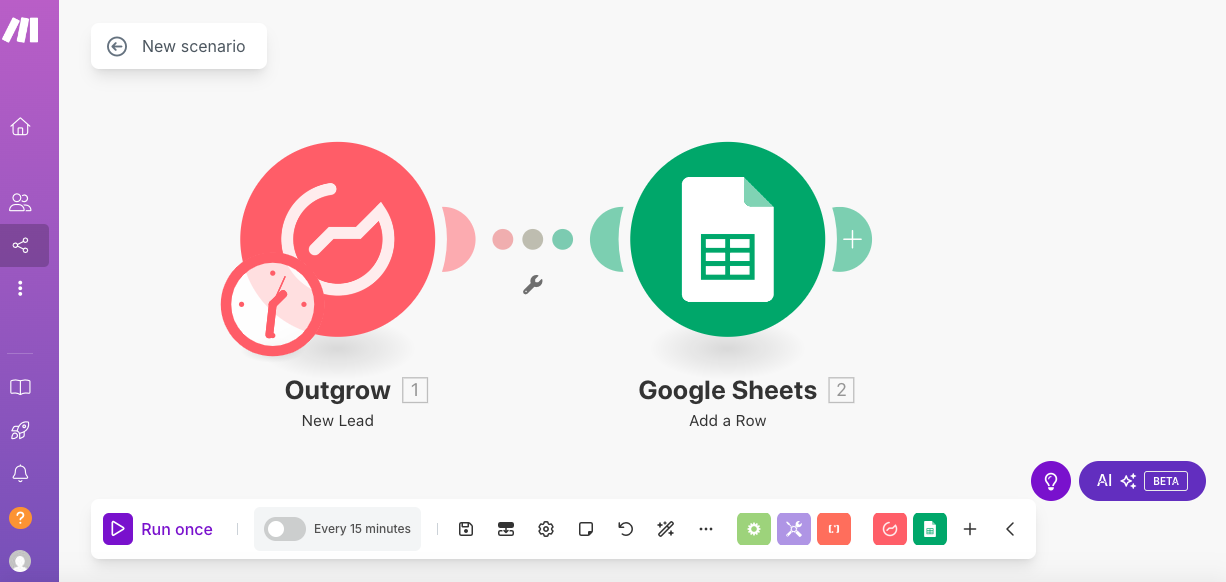
9. Once the Outgrow app has been authenticated, click on Add AnotheModule , to select the application that will be connected with Outgrow using Make.
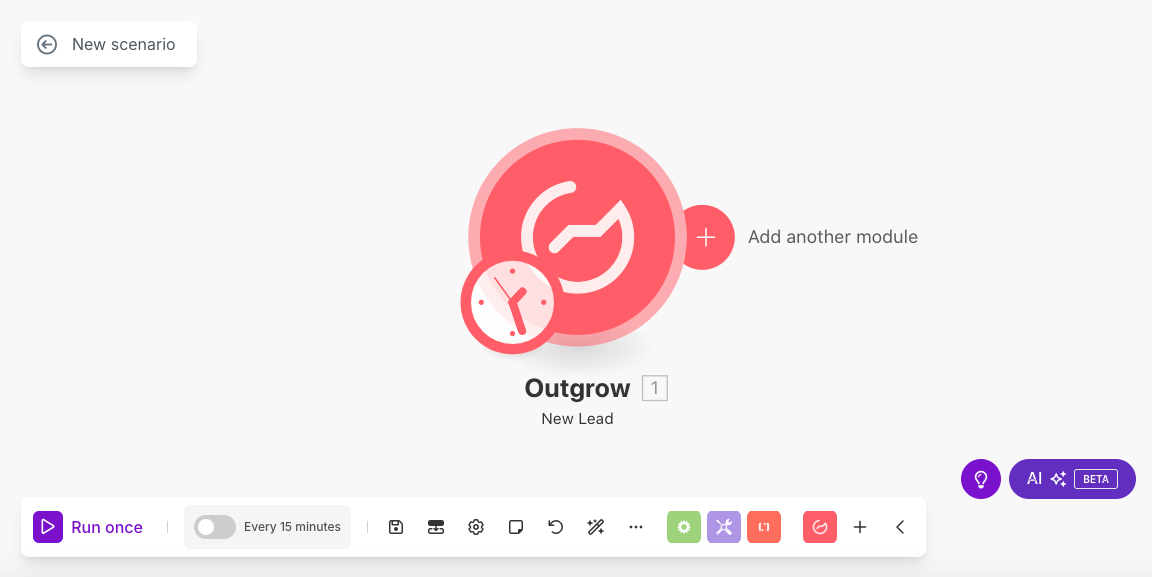
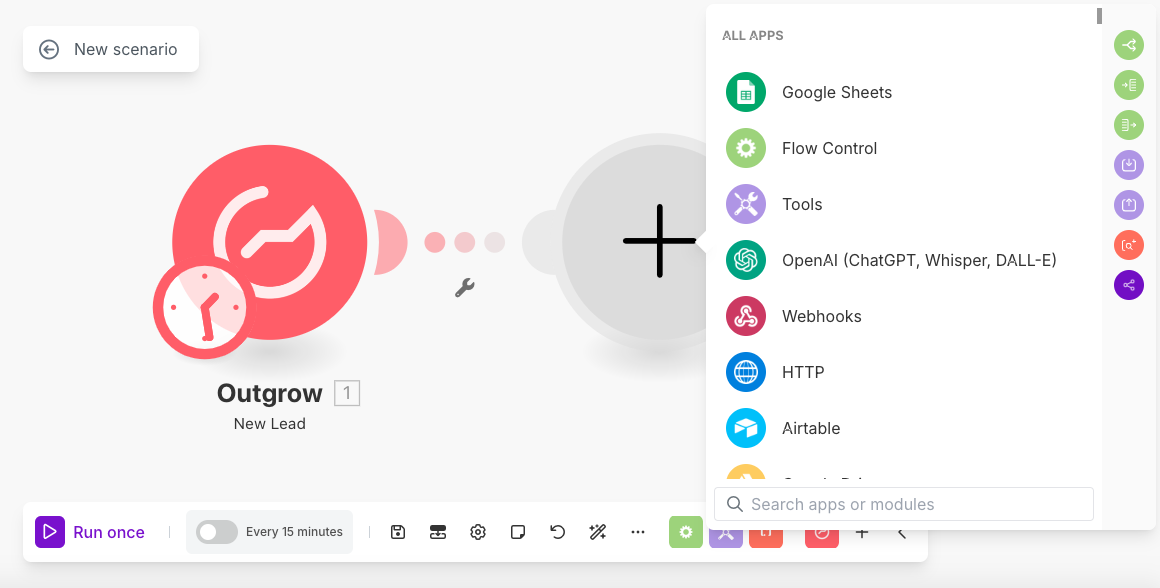
10.Select the required app from the list of available apps. For explanatory purposes, we have selected Google Sheets as the respective application.
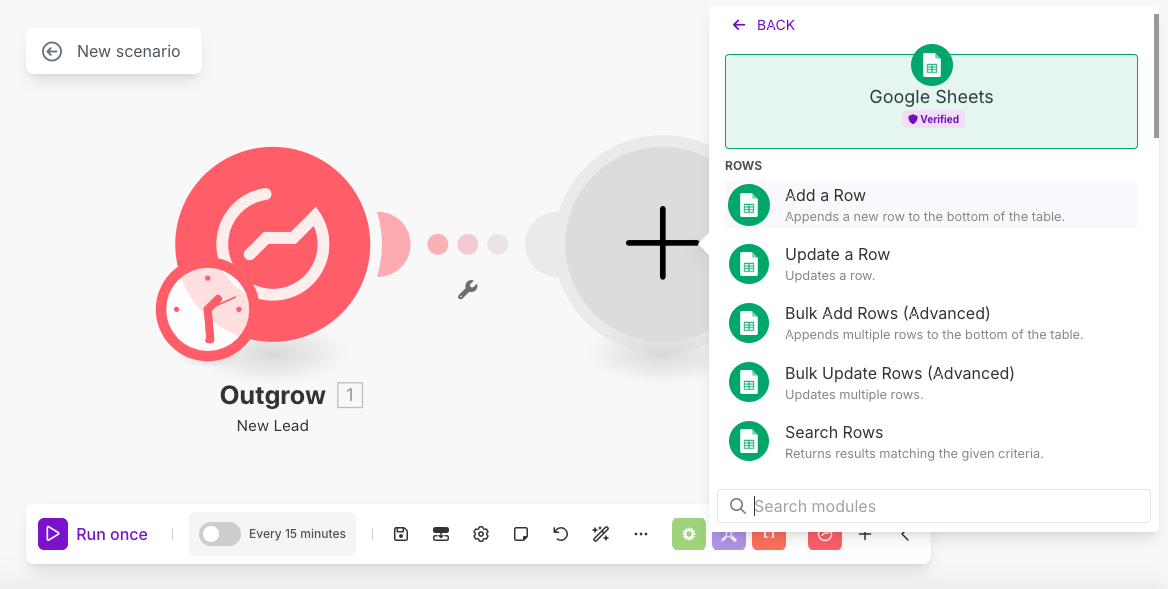
11. Select the desired action that will be executed in Google Sheets when the respective trigger is executed in Outgrow.
12. Authenticate the connected app and also the location in the app where the lead information being sent from Outgrow will be saved.
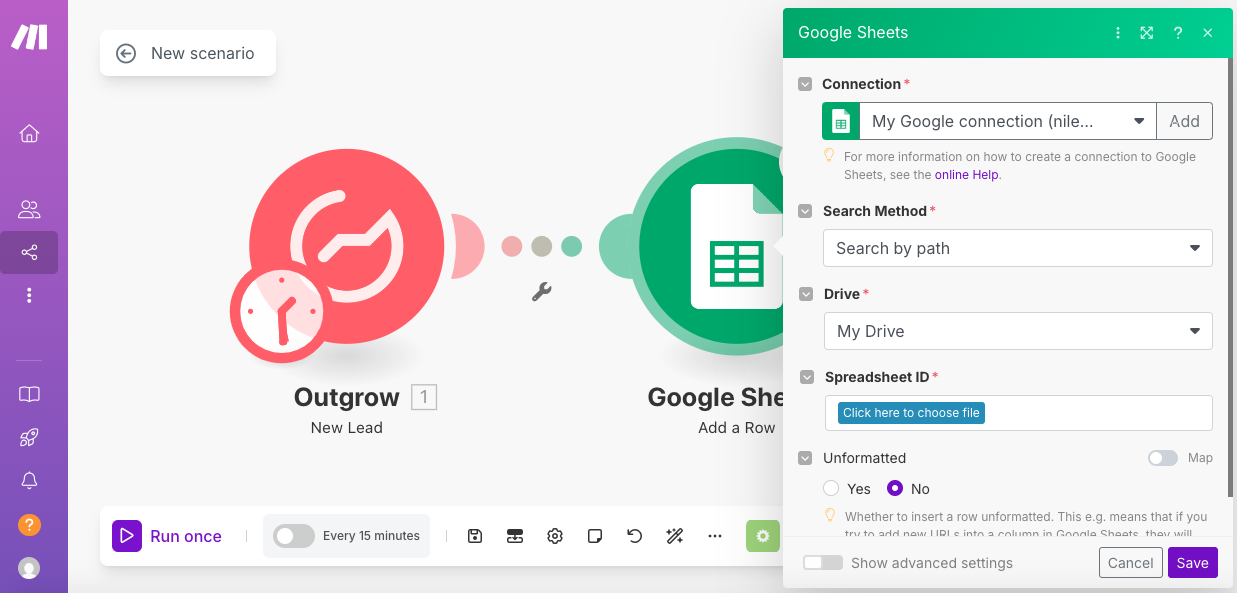
13. Map the respective Outgrow fields with the respective fields in the connected app.
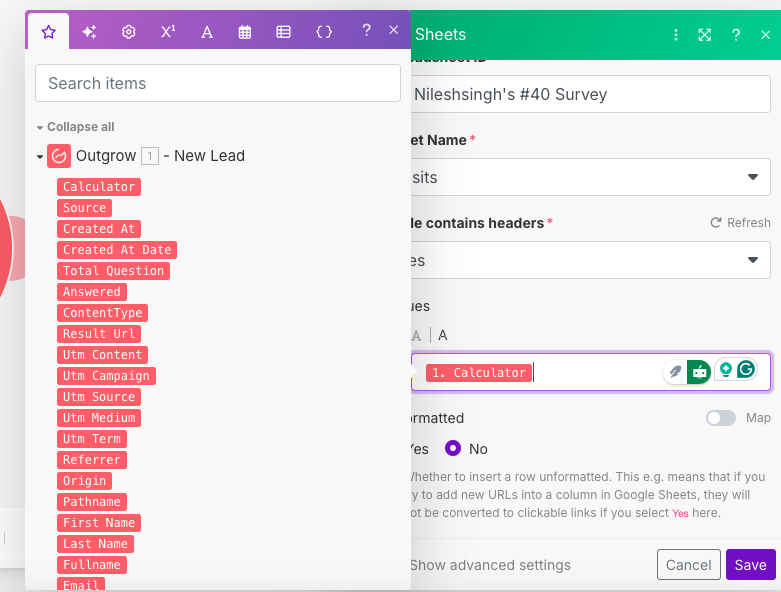
14. Once the configuration is saved, select the frequency at which the data will be fetched using the newly configured scenario.
15. Under All Scenarios, you will be able to see all the scenarios that you have created in your Make account, which are in Active, Inactive or Concept stage.
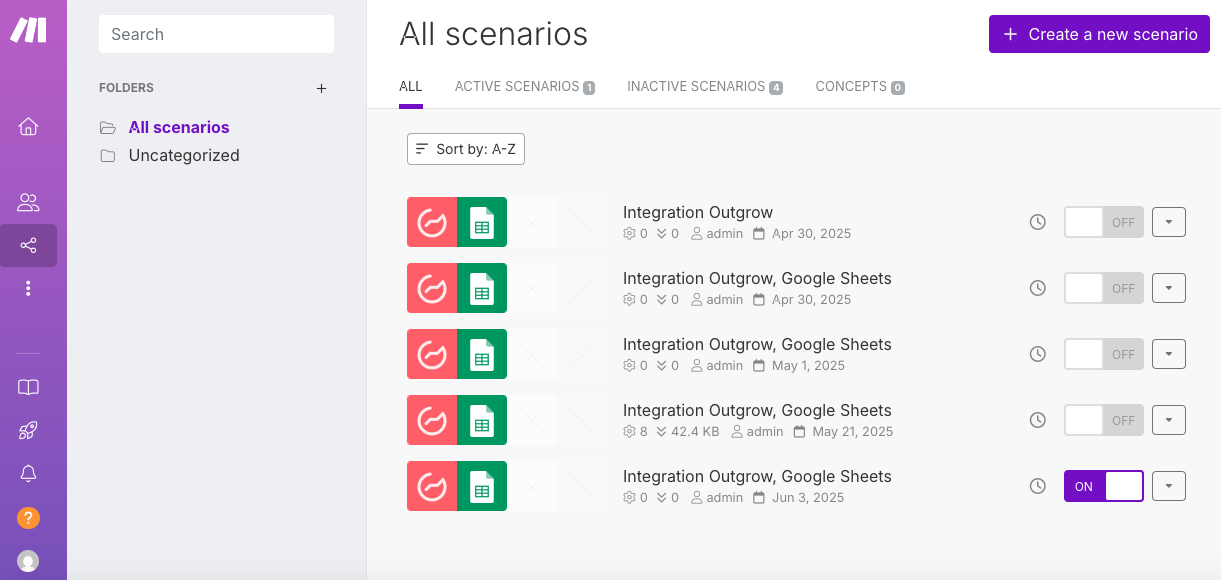
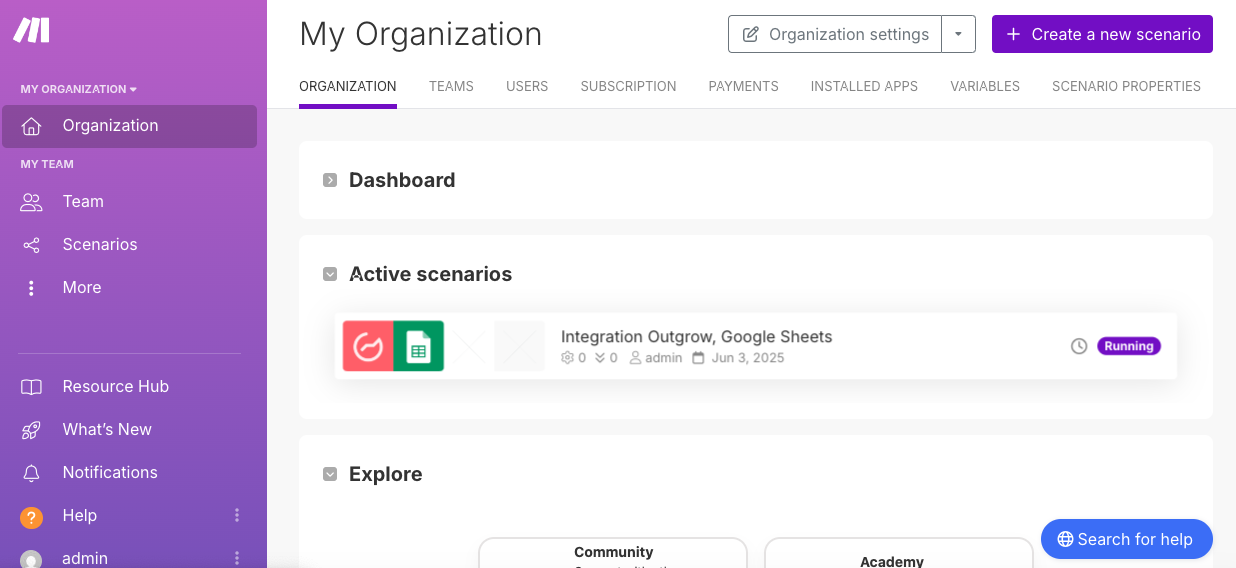
16. Active scenarios will be listed on your main Make dashboard.
If you have any questions or concerns, please don't hesitate to contact us at [email protected], and we will be happy to assist you further.
Updated about 1 year ago