AI Agent Design Customization And Trigger Configuration
Design and trigger configuration play a critical role in how users perceive and interact with your AI Agent. While the AI Agent's underlying intelligence determines the quality of its responses, the visual design and timing of interaction determine whether users engage with it in the first place.
This document explains how to customize the appearance of your AI Agent across different stages of the user journey and configure its trigger behavior so it appears at the right moment. Together, these settings help create a seamless, engaging, and high-converting user experience.
Accessing Design And Trigger Settings
- To configure these features, open your AI Agent and navigate to the Channels tab.
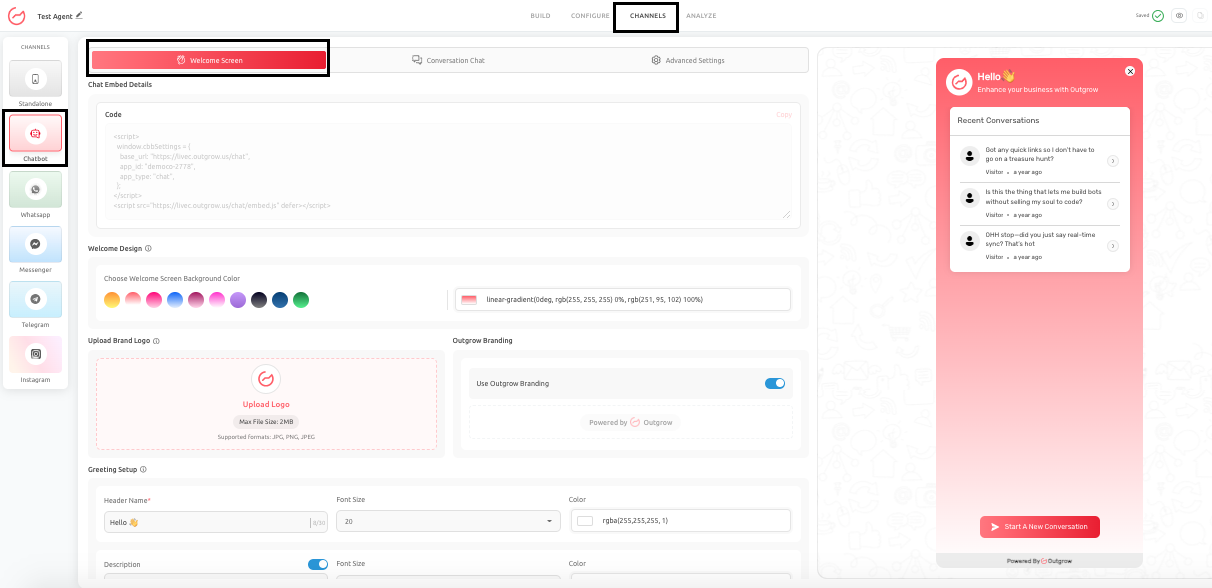
- Within this section, select Chatbot. You will find three key areas:
- Welcome Screen
- Conversation Chat Design
- Advanced Settings (Widget and Launcher)
- Trigger behavior can be configured within the same Chatbot section by accessing the Launcher Trigger Behavior settings.
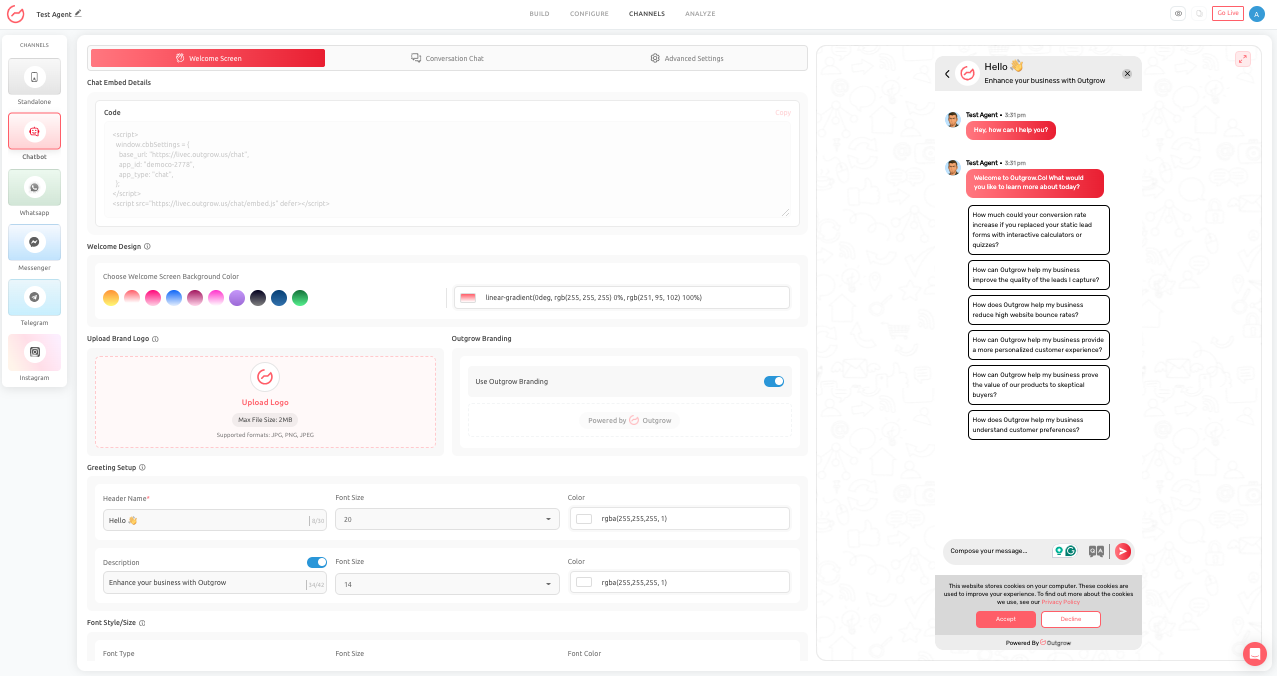
Welcome Screen Design
Overview
The Welcome Screen is the first interaction point users see before starting a conversation. It sets expectations, communicates value, and influences whether a user chooses to engage with the AI Agent.
What You Can Customize
You can configure the following elements:
- Background color or gradient
- Brand logo
- Header text
- Description text
- Font style and size
- Button text and styling
- Custom CSS for advanced control
Why It Matters
A strong Welcome Screen immediately communicates what the AI Agent does and why users should interact with it. A weak or unclear design can reduce engagement, even if the AI Agent itself performs well.
Best Practices To Follow
- Keep the header short and clear
- Use consistent brand colors
- Make the call-to-action direct and actionable
- Keep the description concise and helpful
Common Mistakes To Avoid
- Overcrowding the screen with too much text
- Using low-contrast color combinations
- Writing vague or generic greetings
- Using unclear or weak button labels
Our Recommendation
The Welcome Screen should clearly answer three questions for the user: what this AI Agent does, how it can help, and what will happen when they click to start.
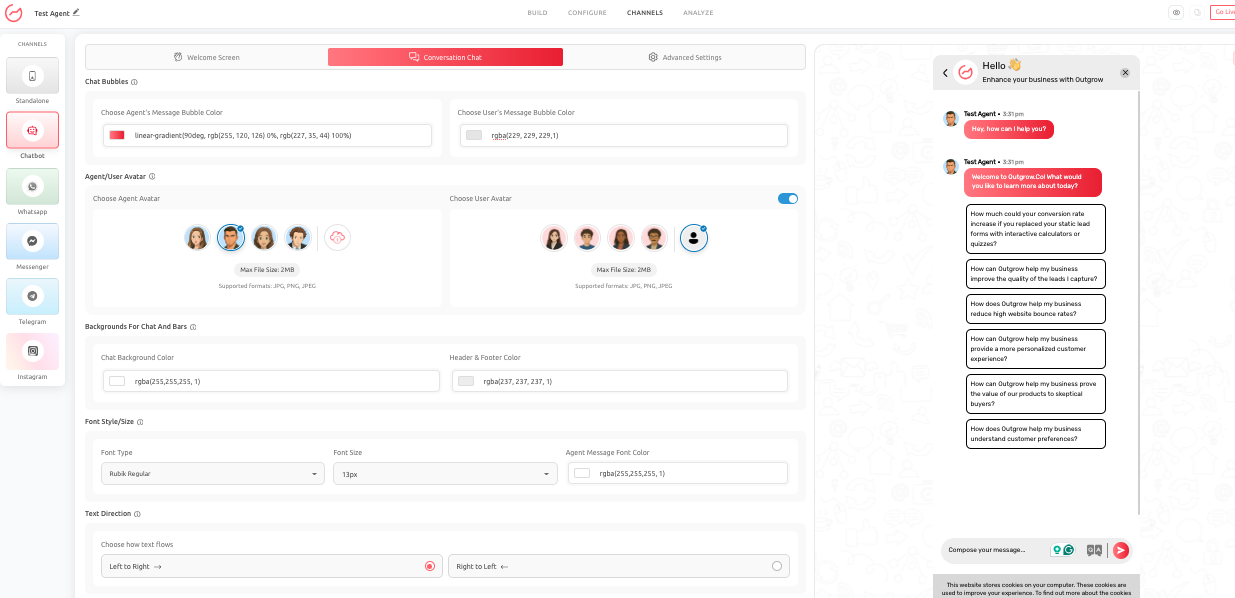
Conversation Chat Design
Overview
Once a user starts interacting, the Conversation Chat Design controls how the interface looks and feels throughout the interaction. This includes message styling, layout, and readability.
What You Can Customize
- AI Agent message bubble color
- User message bubble color
- Avatars for both agent and user
- Chat background color
- Header and footer styling
- Font family and size
- Text direction (left-to-right or right-to-left)
- Light or dark theme
- Custom CSS
Why It Matters
Conversation design directly affects usability. Even if responses are accurate, poor visual design can make the experience feel confusing or difficult to follow.
Best Practices To Follow
- Maintain a strong contrast between text and background
- Clearly differentiate user and AI Agent messages
- Align avatar style with your brand personality
- Use themes thoughtfully based on audience preference
Common Mistakes to Avoid
- Using too many competing colors
- Reducing readability through poor contrast
- Inconsistent typography
- Over-designing elements that distract from the conversation
Final Recommendation
The best conversation design is one that feels natural and effortless. Users should be able to focus on the content without being distracted by the interface.
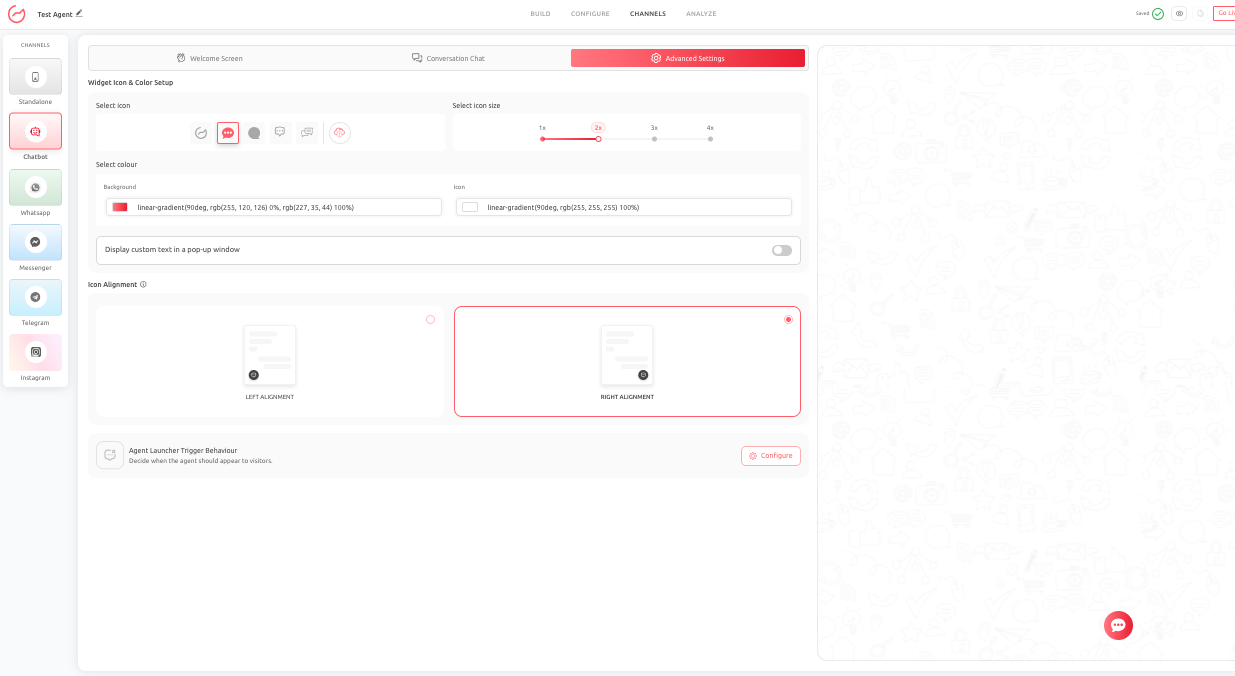
Widget Icon and Launcher Settings
Overview
The Widget Icon and Launcher control how the AI Agent appears on your website before a user opens the AI Agent. This includes the floating icon, its position, size, and optional pop-up messaging.
What You Can Customize
- Launcher icon style
- Icon size
- Background and icon colors
- Alignment (left or right)
- Optional popup message
Why It Matters
The launcher determines whether users notice and engage with your AI Agent. It must be visible without being intrusive.
Best Practices
- Use right-side alignment unless there is a specific reason otherwise
- Keep the pop-up text short and helpful
- Ensure the design aligns with your website’s existing UI
- Maintain a subtle and non-intrusive appearance
Common Mistakes to Avoid
- Using oversized or distracting icons
- Applying harsh or clashing colors
- Writing overly aggressive or spam-like pop-up messages
- Interrupting users unnecessarily
Final Recommendation
The launcher should feel like a natural extension of your website, making it easy for users to engage without disrupting their browsing experience.
Custom CSS
Overview
Custom CSS allows advanced customization beyond the default design settings. It is intended for teams that require precise control over styling and layout.
When To Use It
- When default design settings are not sufficient
- When exact brand alignment is required
- When a specific layout or visual behavior needs adjustment
Best Practices To Follow
- Test changes across devices and screen sizes
- Keep styles minimal and purposeful
- Avoid overriding core structural elements unnecessarily
Common Mistakes to Avoid
- Breaking responsiveness on mobile devices
- Adding conflicting or redundant styles
- Overcomplicating simple design adjustments
Our Recommendation
Use Custom CSS carefully and only when needed. It should enhance the experience without introducing instability.
Trigger System Configuration
Overview
The Trigger System controls when and how your AI Agent appears automatically on your website. This is one of the most important factors influencing engagement and conversion.
Why It Matters
Users are not always ready to interact immediately. Triggering the AI Agent at the right moment can increase engagement, while poor timing can feel intrusive and reduce trust.
Types of Trigger Conditions
- Platform Targeting: This allows you to adapt behavior based on device-specific user expectations. You can choose whether triggers apply to:
- Desktop users
- Mobile users
- Both
- Exit Intent: Triggers when a user is about to leave the page. This is useful for re-engaging visitors who have abandoned.
- Page Visit: Allows the AI Agent to appear only on specific pages, ensuring context-specific relevance.
- URL Parameter: Useful for campaign-based targeting, enabling personalized experiences for users arriving from specific sources.
- Delay: Triggers the AI Agent after a defined time. This gives users space before interaction begins and is one of the safest trigger types.
- User Event: Triggers based on specific user actions, such as scrolling, clicking, or interacting with key elements on the page.
Trigger Actions
Once a trigger condition is met, you can define what happens:
- Display a pop-up message
- Automatically open the chat
Popup messages are generally less intrusive, while auto-opening should be used more selectively.
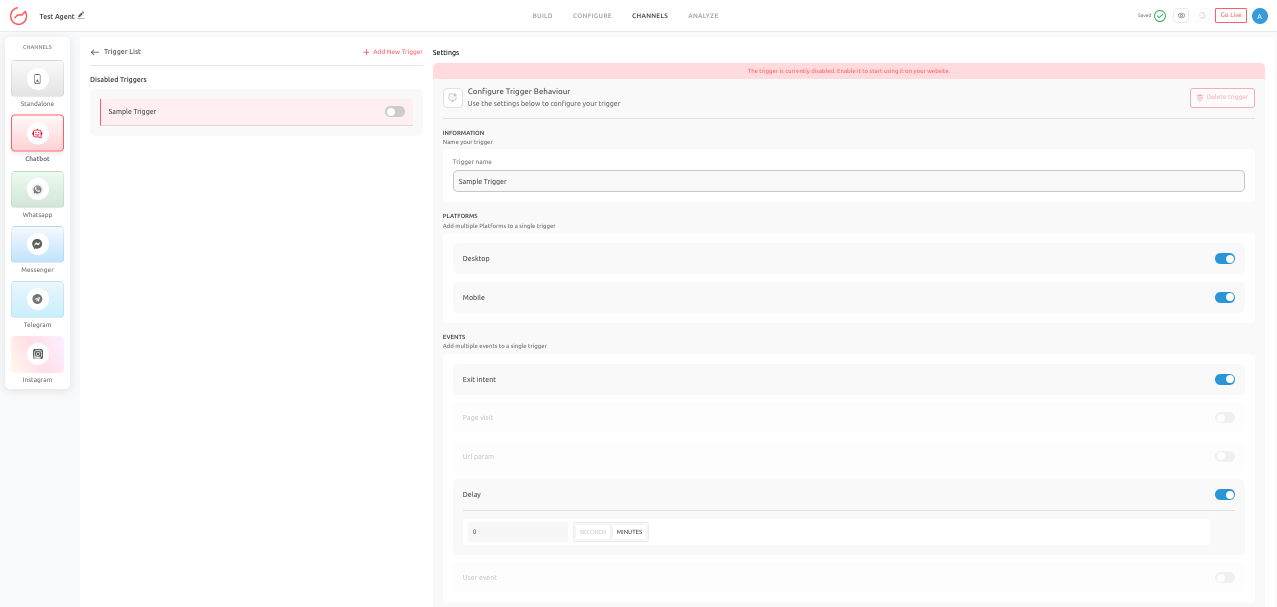
How To Configure Triggers
To set up a trigger:
- Go to Channels and then to Chatbot tab
- Go to the Advanced Settings tab and open Agent Launcher Trigger Behavior
- Click Configure to add a new trigger.
- Name the trigger and then configure whether you want the agent to be triggered on the basis of Platforms, Events, or Actions.
- Once you publish the changes, the trigger will go live.
Real Business Use Cases
- Exit-Intent Recovery: An e-commerce site shows a helpful message when users attempt to leave the cart page, encouraging them to complete their purchase.
- Pricing Page Assistance: A SaaS platform uses a delayed trigger on the pricing page to assist users who may need help choosing a plan.
- Campaign-Based Engagement: A marketing campaign uses URL-based triggers to display personalized messages to targeted visitors.
- Mobile-Friendly Engagement: A business uses delayed popup messages instead of auto-opening chat on mobile devices to avoid interrupting users.
Best Practices To Follow
- Limit the number of triggers to avoid overwhelming users
- Prioritize relevance over frequency
- Use pop-up messages before enabling auto-open
- Align trigger timing with user intent
- Test and optimize trigger behavior regularly
Common Mistakes to Avoid
- Triggering the AI Agent too frequently
- Using auto-open too aggressively
- Writing vague or generic popup messages
- Ignoring page-specific context
Conclusion
- Design customization and trigger configuration together define how your AI Agent looks, feels, and behaves in real-world usage.
- A well-designed interface combined with intelligent timing can significantly improve engagement, usability, and conversion outcomes.
- By carefully configuring these elements, you can ensure that your AI Agent not only performs well but also delivers a seamless and intuitive user experience.
Feel free to use our chat tool on the bottom right or reach out to us at [email protected] if you have any questions, and our team can help you with a quick solution.
Updated 3 months ago